


Hello and welcome! Today, I’m sharing my March Artisan Design Team projects using the Hey Chick and Hey Birthday Chick Bundles! These bundles are SO FUN and include a huge variety of coordinating elements that are sure to spark your creativity. I had a blast playing with them.

To see the entire March Artisan Design Team Showcase, see yesterday’s post on the Stampin’ Up! FaceBook page!
Have a Happy Day!
My first card features the Hey Chick and coordinating Hey Chick Dies. You may recognize these stamps. They were a very popular Sale-A-Bration set from the past that Stampin’ Up! has brought back to coordinate with the new Hey Birthday Chick Bundle used on my next card. But what’s even better is that now there are coordinating Hey Chick Dies to go with the stamps!!!
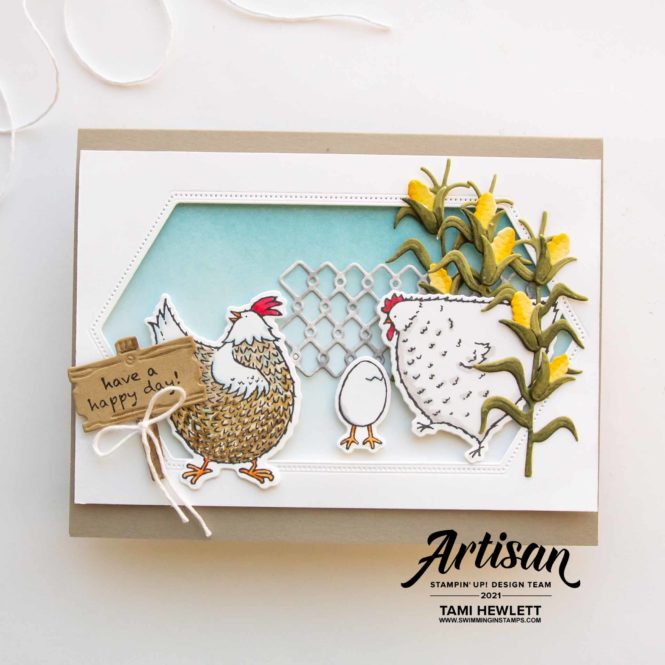
The dies not only cut out the stamps, but include super fun elements like the chicken wire, sign, and corn I used above! I LOVE the corn!!!!
This card layout includes a fun negative cut-out using the Stitched Nested Labels Dies. (In fact, I used the die-cut label on my second card.)
For the stamped images and decorative die-cuts on this card, I colored everything with Stampin’ Blends Markers, including the corn, chicken wire, and sign post. You can see all the colors below in the Supply List, so I’ll just go over a few highlights. I used both light and dark Smoky Slate and a Color Lifter on the chicken wire; Soft Suede, Crumb Cake, and Balmy Blue on the body of the rooster; and So Saffron and Daffodil Delight on the corn. In addition, I used a Soft Suede marker to highlight sign post and a Color Lifter to blend shading into white areas.
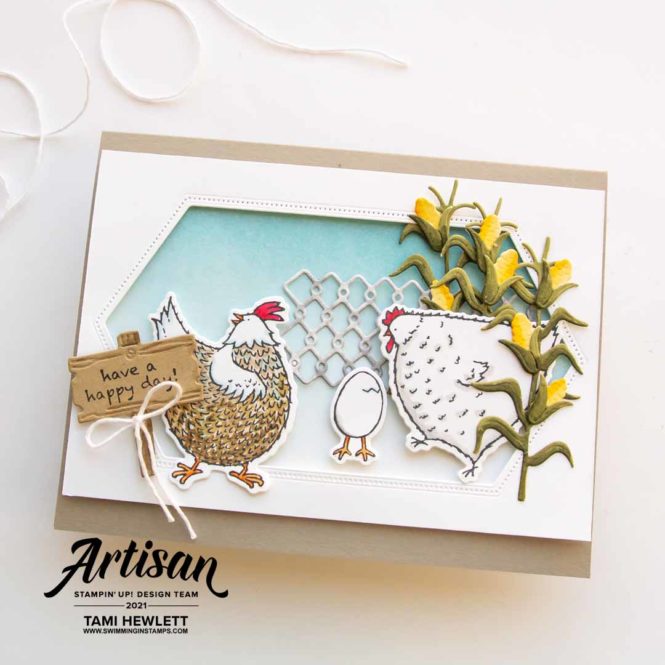
On all of my cards, I used a Blending Brush to add Balmy Blue ink to the sky.
Happy Birthday
My next card features the Hey Birthday Chick and coordinating Birthday Chick Dies. Again, this bundle includes lots of fun decorative elements, such as the “Happy Birthday” sentiment and streamers.
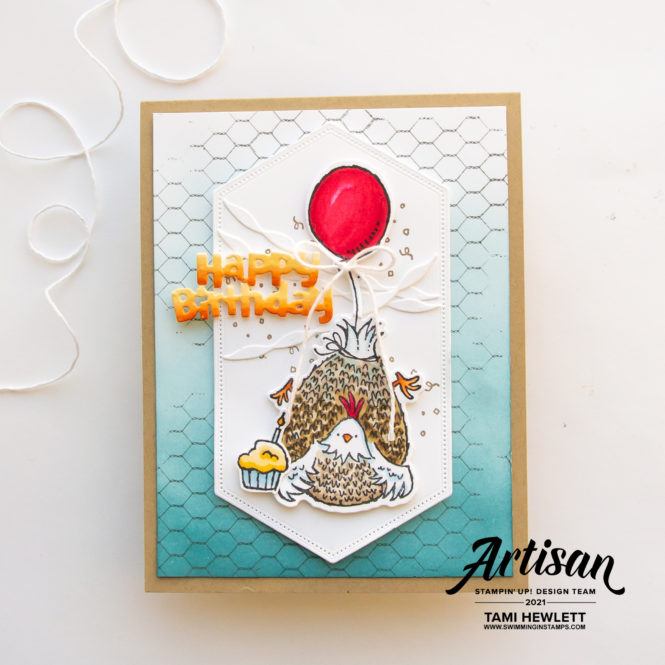
On background of this card, I used the All Wired Up background stamp. Seems like this stamp was made to go with these two bundles! In order to get that vintage look with just a partial stamp, I inked up the stamp with Basic Gray ink and placed it face up on my work surface. Then I gently placed the Basic White Cardstock on top and used my fingers to only press down the paper on portions of the stamp. Afterwards, I added the Balmy Blue ink blending.
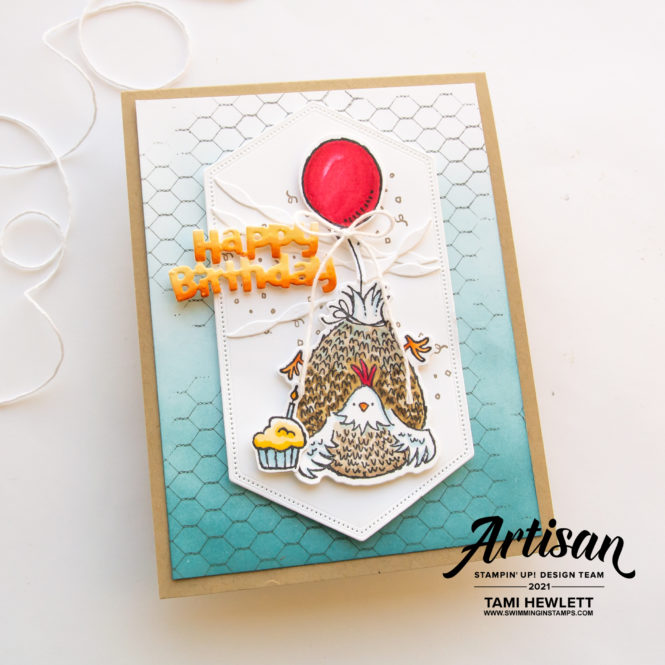
For the “Happy Birthday,” I adhered the Basic White Cardstock to a Foam Adhesive Sheet prior to cutting it out. Then, I colored it with Pumpkin Pie and Daffodil Delight Stampin’ Blends Markers.
Slimline Card
For my last card, I used both bundles and the All Wired Up background stamp. I also used a similar technique to the first card with the negative die-cuts, but this time I used the Stitched Rectangle Dies.
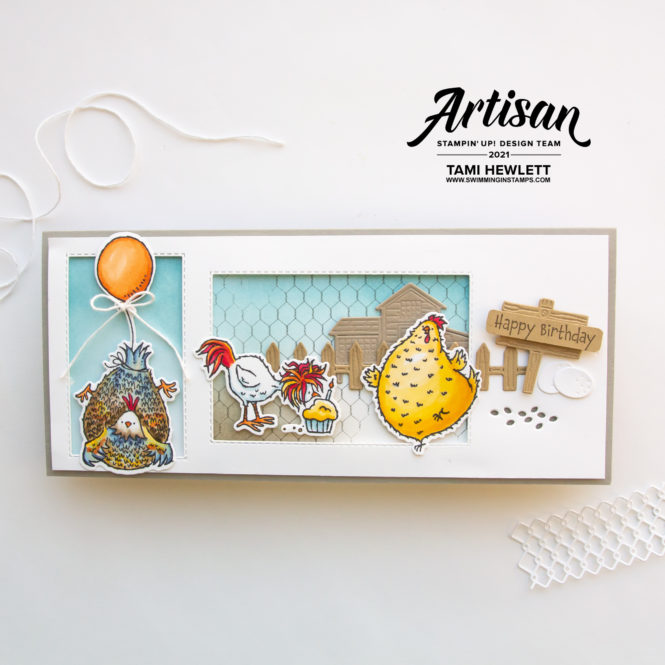
This card shows a few more of the fun die elements, including the fence, hen house, eggs, and footprints. There are even more!!!
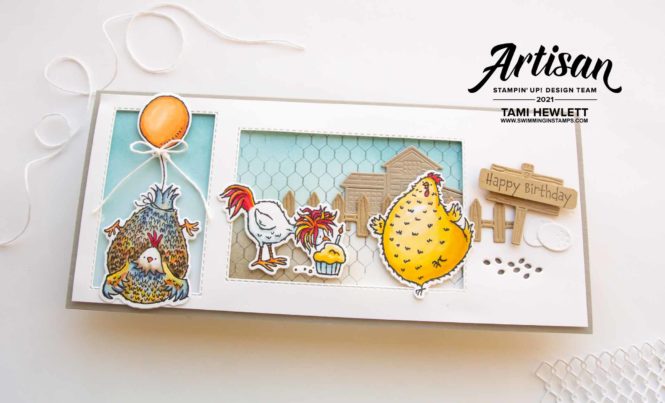
To color the birds, I used a few different color combinations this time. For the rooster, I added some Misty Moonlight to his feathers, and for the “crazy bird,” I colored her hair with a combination of Real Red, Pumpkin Pie, and Daffodil Delight Stampin’ Blends. Finally, for the hen, I used both Daffodil Delight and So Saffron Stampin’ Blends Markers.
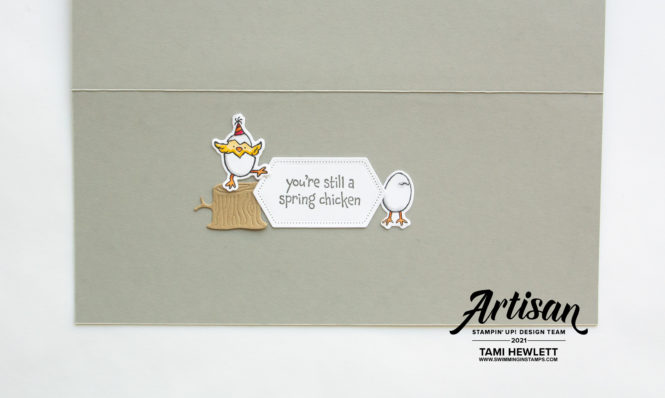
The Hey Birthday Chick stamp set has some really cute sentiments! I love this one in particular!!!
There’s so much you can do with these two bundles. Be sure to check out the entire March Artisan Design Team Showcase for even more inspiration.
Have a wonderful and creative day!

Use Host Code 6JG9ACJS for purchases at my online store to qualify to receive free exclusive project tutorials and a special thank you card from me. This month’s PDF features 13 AMAZING tutorials from a group of super talented demonstrators. You are going to love them!!! (Please note that Host Codes are only valid for 30 days. You can always find the current Host Code on the right side bar of my blog.)
")

")

")
")


