


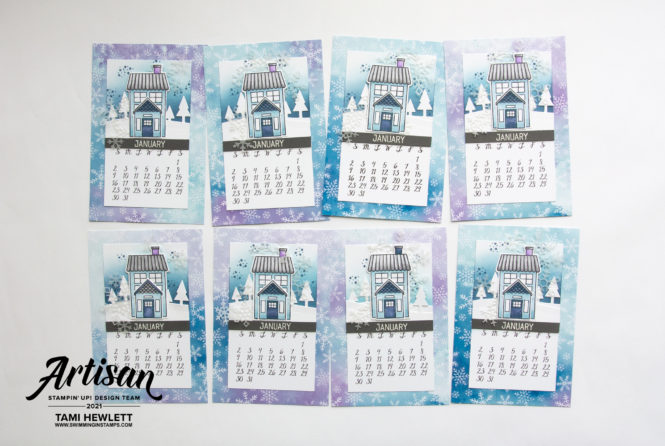
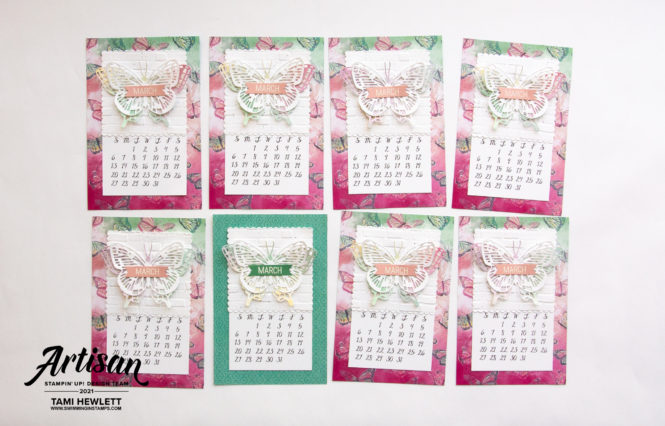
Hi Friends! If you’ve followed my blog for long, you know that each year I work on designing desktop calendars for the following year. I try to work a year ahead, so that by the time Christmas comes along, I have eight complete sets to give to friends and family as gifts. Well, we are now practically three months into 2021, and this is my first post for the 2022 calendars! I was feeling seriously behind, but I’m relieved to say that now I’m caught up, well almost … it’s practically April!
All the calendar pages measure 4″ x 6″ and fit in a standard frame. That makes it easy to cut six backgrounds from one sheet of 12″ x 12″ designer series paper (or one from a sheet in a 6″ x 6″ pack.) The central calendar layer measures 3″ x 5″. Each page is displayed individually, so again easy, peasy, no need to worry about attaching them together.
When I’m designing these calendars, I try to make it easy on myself and base them on favorite projects I’ve made in the past, so I don’t have to spend a lot of time thinking. It’s also a great opportunity for me to use up some of my favorite retired designer series paper. This is the one time I allow myself to post projects on my blog that include retired items. If you’d like to copy and don’t have the particular product, you could always substitute similar supplies!
At the end of this post, I have a link to download the entire 2022 calendar PDF that I used to create these pages!
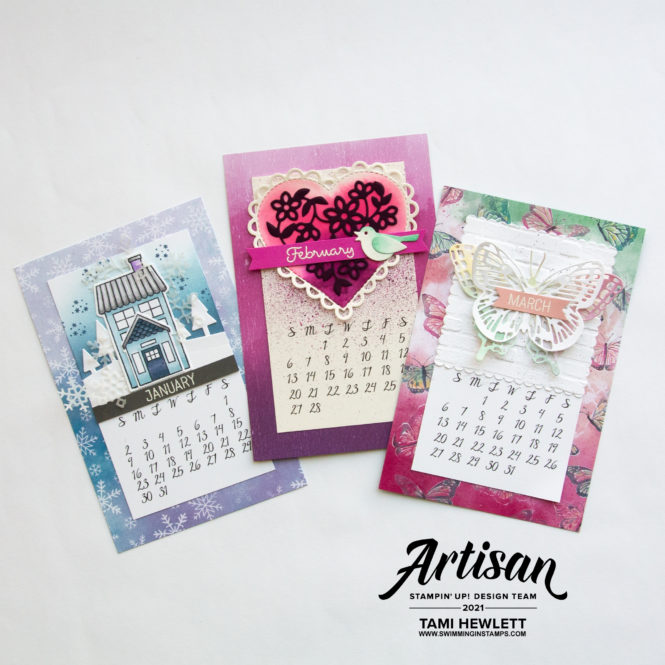
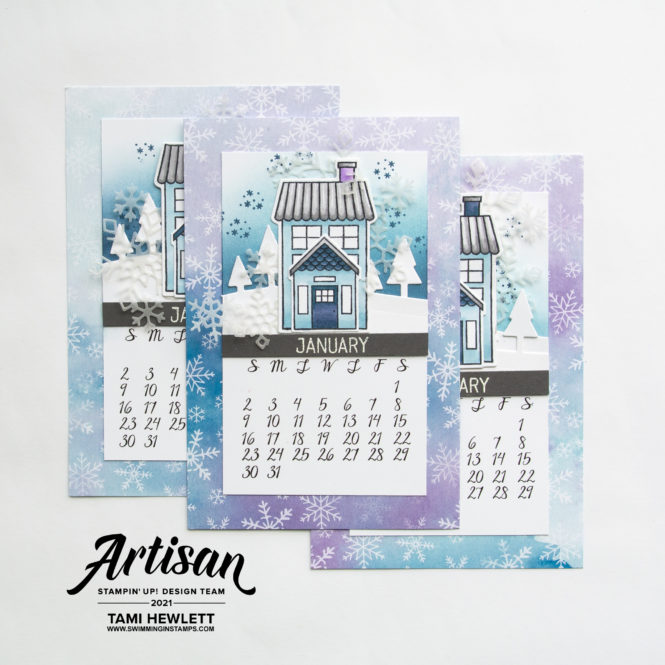
January 2022 Calendar Page:
The January page features the Coming Home Stamp Set, Home Together Dies, and Snowflake Splendor Designer Series Paper. I absolutely love these retired items, so I based this calendar page on a favorite birthday card I created for a friend.
January Tutorial:
- Cut the Snowflake Splendor Designer Series Paper to measure 4″ x 6″.
- Print the calendar page on Basic White Cardstock and trim the calendar layers to measure 3″ x 5″. (See instructions below.)
- Use Blending Brushes to add Misty Moonlight and Balmy Blue ink to the center portion of the calendar layer.
- Stamp snowflakes with Misty Moonlight ink.
- Stamp two house shapes with Memento ink on Basic White Cardstock and then cut them out with the coordinating dies. Color with Stampin’ Blends Markers: Roof – Smoky Slate, House – Balmy Blue and Misty Moonlight, Chimney – Highland Heather. Tip: Outline the roof area with both light and dark Smoky Slate leaving a little white in the center. Use a Color Lifter to blend the white areas.
- Cut two strips of Basic White Cardstock for the snow and trees with the Home Together Dies. (They will overlap each other in order to position trees on both sides of the house.) Cut one strip so the trees are on the left and another strip so the trees are on the right. Highest portion of snow should be no more than 3/4″. Overlap the two strips and trim the edges flush with the sides of the calendar layer. Adhere with Seal.
- Use Christmas Layers Dies to cut snowflakes from Vellum Cardstock. Cut apart and layer under house as shown.
- Use Seal to layer two house die-cuts on top of each other and adhere to calendar layer.
- Use the Date It (retired) or similar small alphabet stamp set to stamp and emboss the month in white on Basic Gray Cardstock. Trim close. Adhere with Seal as shown.
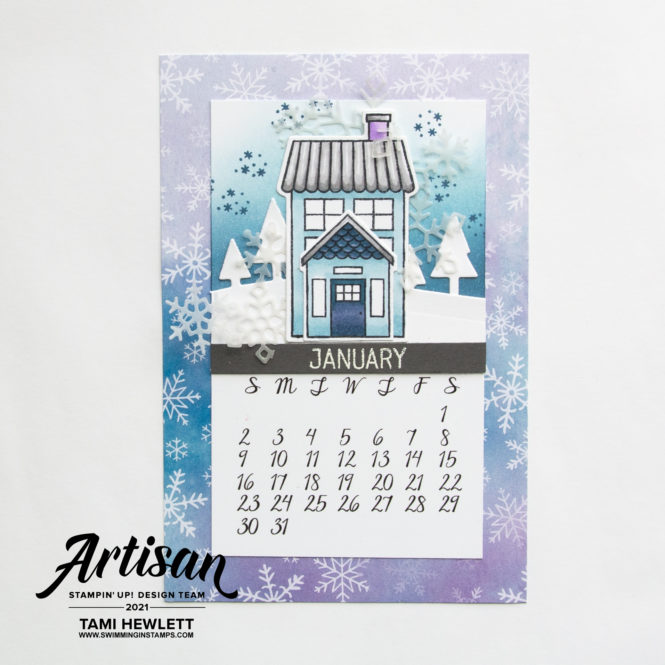
The trickiest part of this page is cutting the Basic White snow/tree layers. Try to focus on getting the trees straight and the rest will flow naturally.


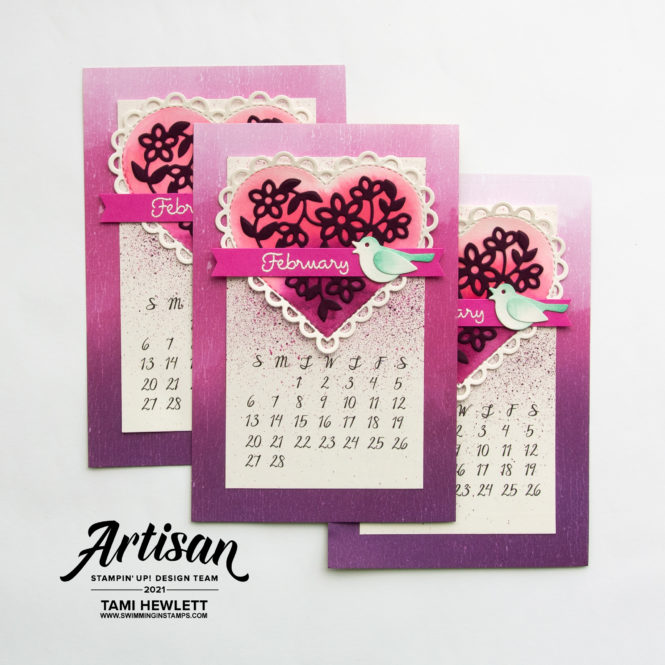
February 2022 Calendar Page:
The February page features two of my favorites: the Many Hearts Dies and Artistry Blooms Designer Series Paper. I love this die set and used it for many Valentine’s Day projects. It’s still available to purchase in the January-June Mini Catalog, and I have so many ideas floating around in my head for it that this is a new design. The paper is from the Annual Catalog and will be available through May 3, 2021.
February Tutorial:
- Cut the Artistry Blooms Designer Series Paper to measure 4″ x 6″.
- Print the calendar page on Shimmery White Cardstock and trim the calendar layers to measure 3″ x 5″. (See instructions below.)
- Use the cap and brush of a Rich Razzleberry Stampin’ Write Marker to flick splatter onto the calendar page. Tip: Turn the paper to orient the splatter from the center outward and focus on splattering more in the center area where the bottom portion of the heart will be placed. Repeat with a Magenta Madness Stampin’ Write Marker.
- Cut heart and bird from Shimmery White Cardstock and detailed vine from Blackberry Bliss Cardstock.
- Prepare to watercolor the heart. Squeeze both a Melon Mambo and Rich Razzleberry stamp pads to pool ink in the lids. I also like to have some paper towels and a cup of water nearby to quickly clean my brush. Using the large flat Water Painter, brush the center portion of the heart with clear water. Mix a little water with the Melon Mambo ink and watercolor the top portion. Use a paper towel to clean off a little color and fade towards the top. Mix a little water with the Rich Razzleberry ink and watercolor the bottom portion blending into the pink.
- Squeeze a Coastal Cabana ink pad to pool ink in the lid. Use the medium Water Painter to brush clear water over the bird body and wing. Brush concentrated ink on the top of the bird and wing and blend to white. Let all watercolored pieces dry naturally.
- Use the Date It (retired), or similar small alphabet stamp set, to stamp and emboss the month in white on Magenta Madness Cardstock. Trim close and notch the ends with the Banners Pick a Punch. (Leave the right side a little longer than the left.
- Adhere the detailed vine to the watercolored heart with liquid glue. Adhere all other layers with Seal.
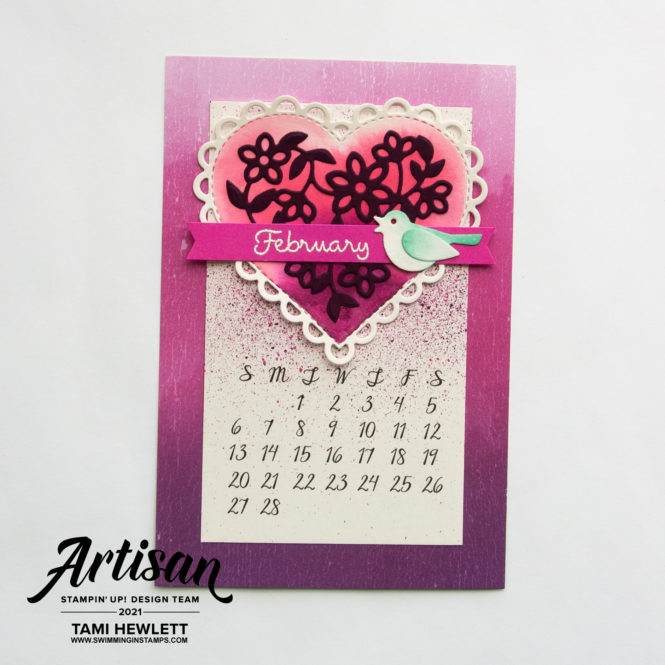
I particularly love the Artistry Blooms Designer Series Paper. It includes so many beautiful colors!


")


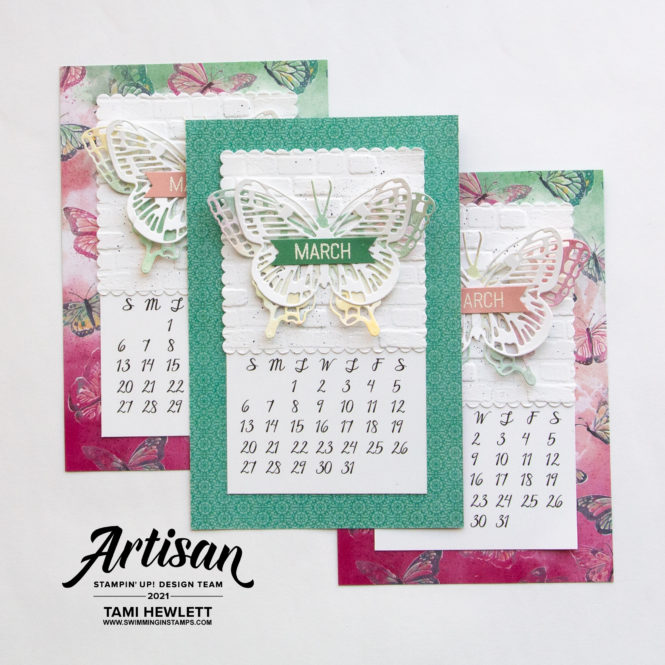
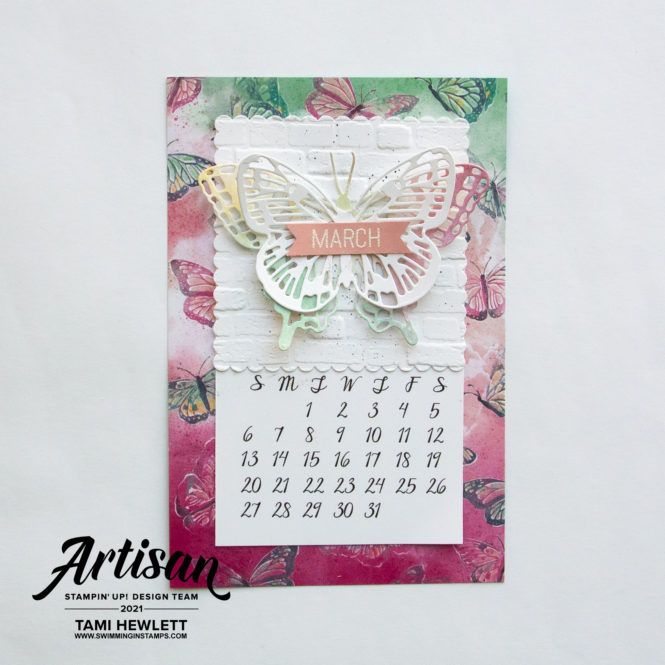
March 2022 Calendar Page:
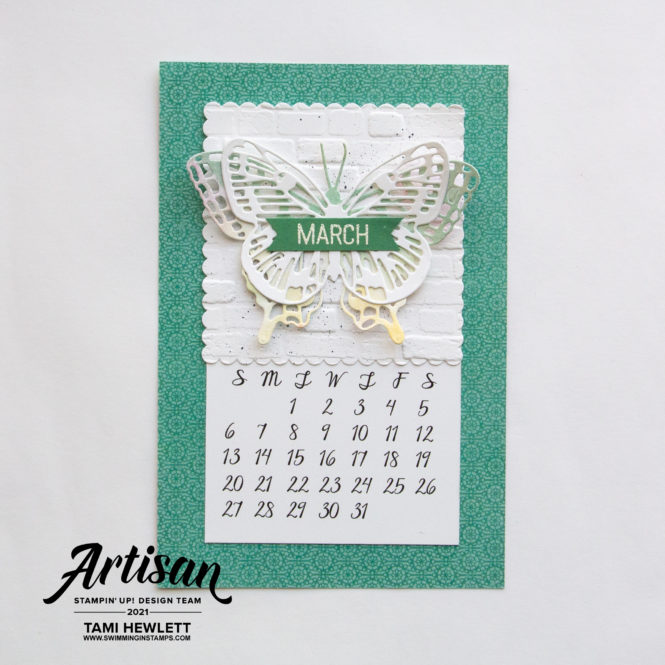
The March page features the Brilliant Wings Dies and Butterfly Bijou 6″ x 6″ Designer Series Paper. Unfortunately, this paper just sold out. However the dies (and coordinating stamps) will be included in the new 2021-2022 Annual Catalog! I particularly loved this paper with its soft watercolor designs. You’ll notice that I made one unique calendar page. That one goes to my husband. (He loves displaying the calendars in his office for clients.) I try to tone down some of the overly pink, girly designs for him. Considering the February page was very girly, I flipped the cardstock over for his page and used the Bermuda Bay side.
March Tutorial:
- Cut the Butterfly Bijou 6″ x 6″ Designer Series Paper (DSP) to measure 4″ x 6″.
- Print the calendar page on Basic White Cardstock and trim the calendar layers to measure 3″ x 5″. (See instructions below.)
- Use the Layering Squares Dies to cut the largest scallop square from Basic White Cardstock and dry emboss with the Brick & Mortar 3D Embossing Folder.
- Use the cap and brush of a Basic Gray Stampin’ Write Marker to flick a little splatter on the bricks.
- Use the Brilliant Wings Dies to cut the largest detail butterfly from Butterfly Bijou DSP and the top butterfly from Basic White Cardstock.
- Use the Date It (retired) stamp set, or small alphabet stamp set, to stamp and emboss the month in white on Blushing Bride (or Just Jade) Cardstock. Punch out with Classic Label Punch and then feed the ends back through the punch (see photo below) to notch ends.
- Adhere all layers with Seal.

Position the large butterfly die over different sections of the Butterfly Bijou DSP for different color combinations. Since the page below is for my husband, I tried to pick up more of the green and yellow tones.

 Designer Series Paper")


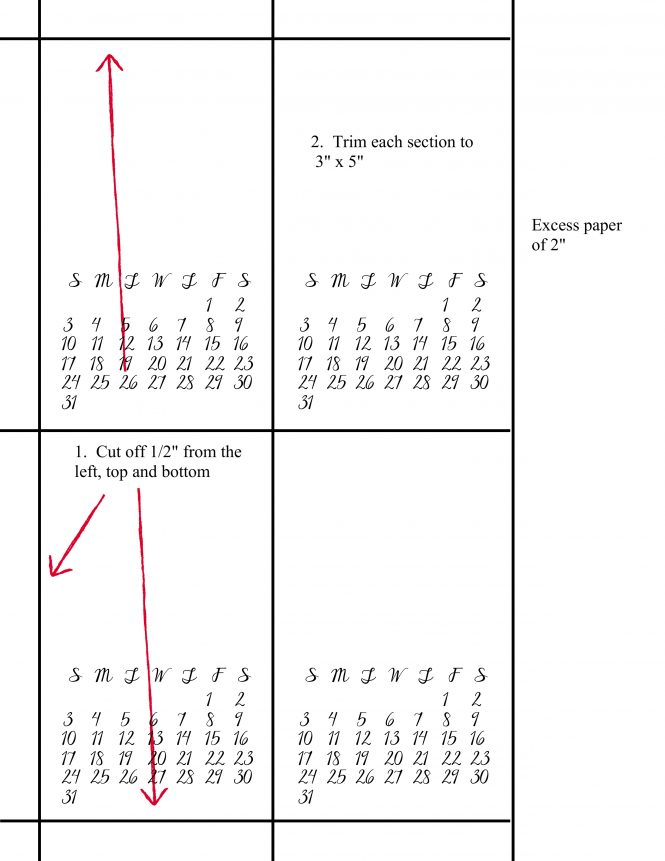
I created the calendar pages using My Memories Suite software. You can download the entire PDF of the 2022 calendar HERE. That way, if you want to work ahead and design your own pages, you’re all set! All the print is colored black right now. If I end up re-coloring any future months, I will post a download for that individual page then. I designed the pages to go all the way to the edges of a standard 8-1/2″ x 11″ sheet of cardstock. Trim as follows:
Watch my blog for more installments of the 2022 calendar pages! I will try to post every two or three months.
Have a wonderful and creative day!!!

Use Host Code 6JG9ACJS for purchases at my online store to qualify to receive free exclusive project tutorials and a special thank you card from me. This month’s PDF features 13 AMAZING tutorials from a group of super talented demonstrators. You are going to love them!!! (Please note that Host Codes are only valid for 30 days. You can always find the current Host Code on the right side bar of my blog.)
I love your individual calendar pages. In 2019 I made calendars for family gifts, just because, but made 1 base & attached a calendar pad. I made each person a base according to their likes. They were a hugh hit. I think your idea will be much better & easier to accomplish. TFS.
I am a Demonstrator too with limited customers.
Thank you Dianne! ❤
I’m not sure what you mean “Any 4×6 will do”. Are the calendar pages loose and are somehow put into the frame? I a visual learner.
Yes the individual pages are loose and go inside the frame just like a photo. ❤
These are really a terrific design and size for a desk top calendar. Thanks for all the instructions. What type of frame do you use, I might have missed that, information.
Thanks so much Penny. Any 4″ x 6″ will do, including the little clear acrylic ones sold at drug stores.