


For this month’s Stampin’ Fancy Friday, we have a theme of stripes or spots. It’s a broad theme allowing lots of creative interpretation. I decided to incorporate both into my project by using some striped Granny Apple Green paper from the Brights 6″ x 6″ Designer Series Paper pack and a dry embossed spotted background using one of the Basics 3D Embossing Folders (an Online Exclusive.)
To see all the designers’ projects this month, keep an eye on the Stampin’ Fancy Friday Facebook and Instagram pages. We’d also love to see your creative ideas! Be sure to tag them with @stampinfancyfriday so we can find and admire them!
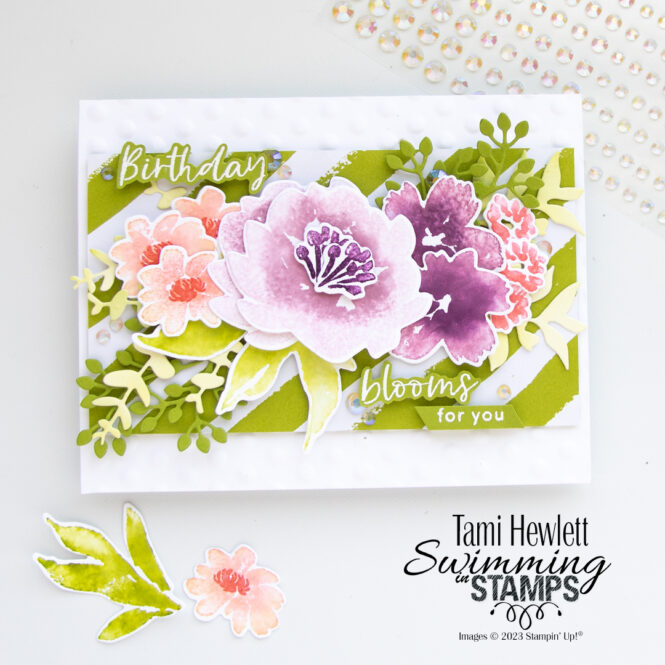
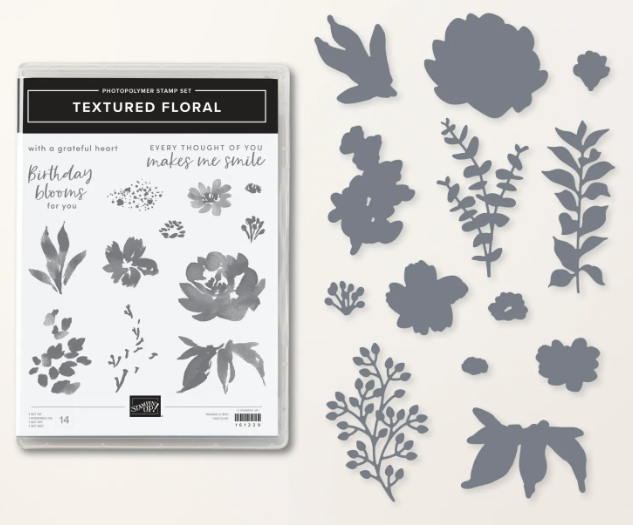
My card features the Textured Floral Bundle. I absolutely love the watercolor style of the stamps and gorgeous coordinating dies! This style of stamp works beautifully with one of my favorite techniques: watercolor stamping.
Watercolor Stamping Technique:
This technique is fun and WAY easier than you might think. Plus, I really love that it comes out different every time and there’s no right or wrong way to do it.
To stamp the large flowers, I inked up the stamp with Bubble Bath ink, stamped off on scratch paper two times, and then used a Sponge Dauber to add Moody Mauve ink directly to the center of the stamp. Next, I spritzed the stamp (2 to 3 times depending on how good a shot I am – Ha!) so I could see beads of water and then stamped on Basic White Cardstock. Stamping off the first color really lightens it up so you can see a big variance. Spritzing with water causes the ink to blend and look watercolored after stamping. I love it!
I stamped the rest of the flowers in a similar manner. For the ones on the left, I inked up the stamp with Petal Pink, stamped off three times on scratch paper, used a Sponge Dauber to add Flirty Flamingo ink to the center, spritzed, and then stamped on Basic White. Once dried, I stamped the centers with Flirty Flamingo ink. For the medium flowers on the right, I inked up the stamp with Moody Mauve ink, stamped off two to three times on scratch paper, used a Sponge Dauber to add Blackberry Bliss ink to the center, spritzed, and then stamped on Basic White Cardstock.
For the small flowers on the right, I inked up with Flirty Flamingo ink, stamped off once on scratch paper, used a Sponge Dauber to add Flirty Flamingo ink to the center, spritzed, and stamped on Basic White. Finally, for the centers of the large flowers, I did the same but with Blackberry Bliss ink.

The larger leaves are stamped with same technique using Granny Apple Green ink.
For the die-cut leaves, I did something a little different. I pre-painted a sheet of Fluid 100 Watercolor Paper with Granny Apple Green ink trying to get lots of light and dark areas, and then picked areas with lots of variation to cut out the dies.
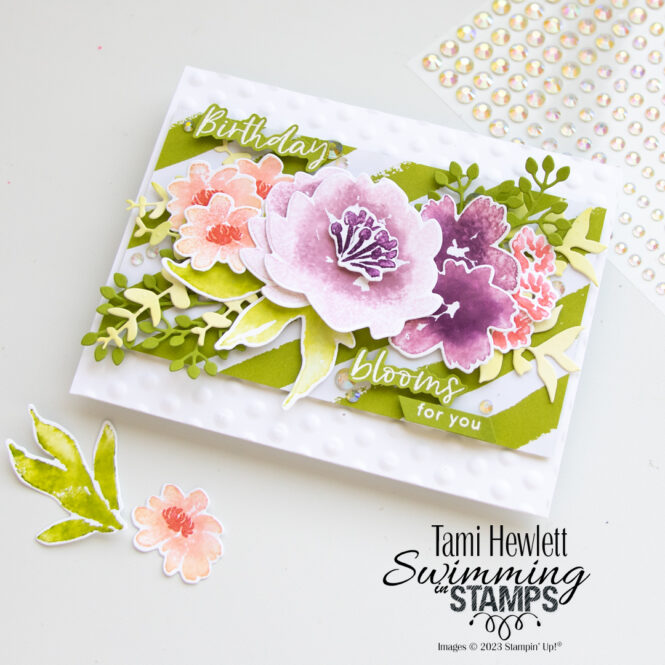
By using a Bone Folder to shape the flowers and adding multiple layers, the flowers really came to life.
I the colorful flowers to really stand out, so I only used Granny Apple Green monotones in the background.
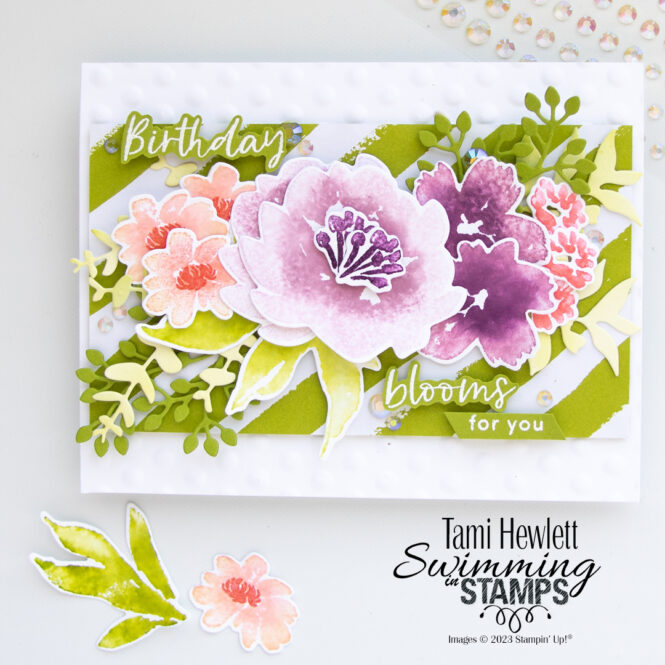
The last detail was to add some Iridescent Rhinestone Basic Jewels, because everyone needs a little sparkle for their birthday! 🙂
Have a wonderful and creative day!

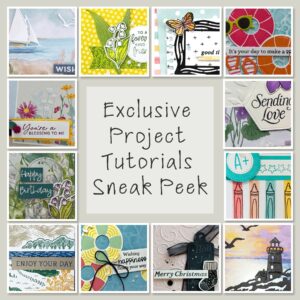
Purchase products from my online store to qualify to receive free exclusive project tutorials. This month’s PDF includes 12 creative tutorials designed by my demonstrator friends and I to inspire your paper crafting! The projects feature products from the May-August 2026 Catalog and current Online Exclusives. Enjoy!


 Designer Series Paper")


")


