


Hello! Hope your week is going well!!!
Now that it’s almost Christmas and I’ve finished all my holiday projects, I’m starting to look forward to the launch of the new January-June Mini Catalog and Sale-a-bration!!! Both will start on January 5, 2021. So today, I have a sneak peek of a cute new stamp set called Woodland Wonder.
Woodland Wonder Stamp Set:
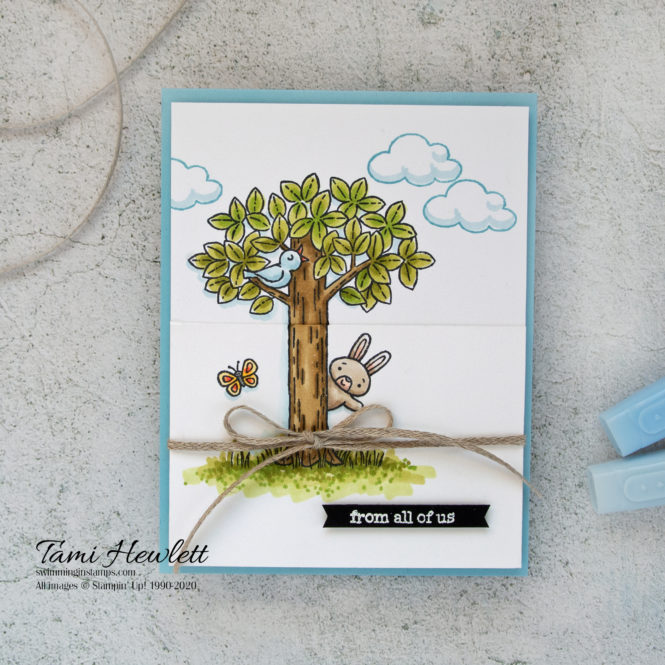
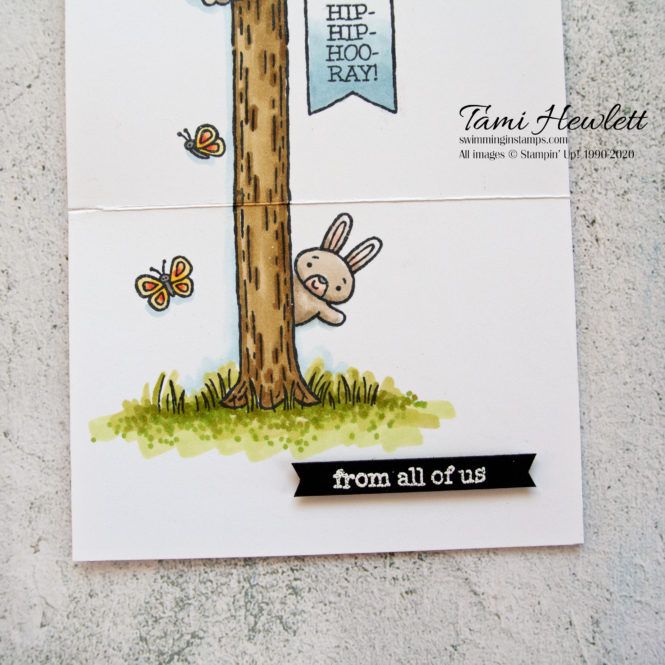
I saw a very similar card in the new catalog and thought it was so adorable that I wanted to re-create it. It’s for a friend/client of my husband who just recently had a baby boy. He’s an outdoor enthusiast, so it seemed like the perfect choice.
Tutorial:
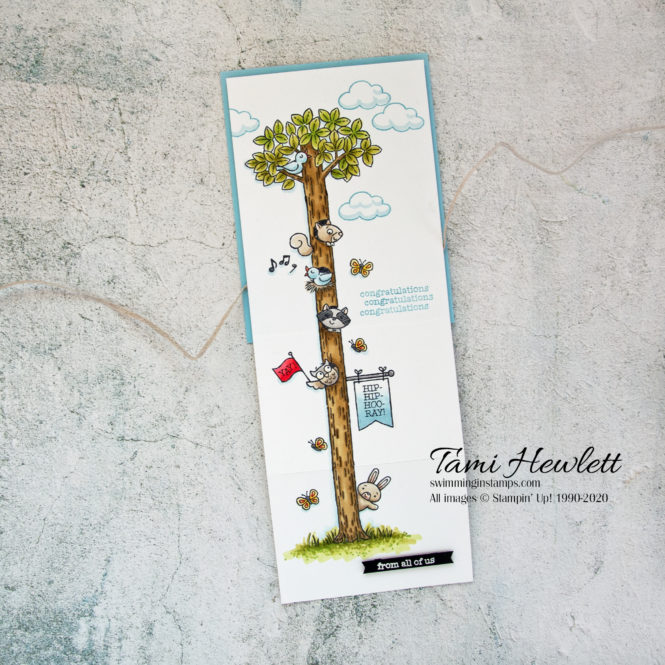
There are three stamps that fit together to create the long tree on this card, including a top, middle, and bottom. Lining them up was a challenge, so I’ll tell you how I accomplished it (after a few failed attempts!) Now that I’ve worked out the kinks, I think I could easily make it again.
- The catalog provides the measurements of the Whisper White layer that folds out. It measures 4″ x 10-3/4″ and is scored at 5-1/4″ and 8″.
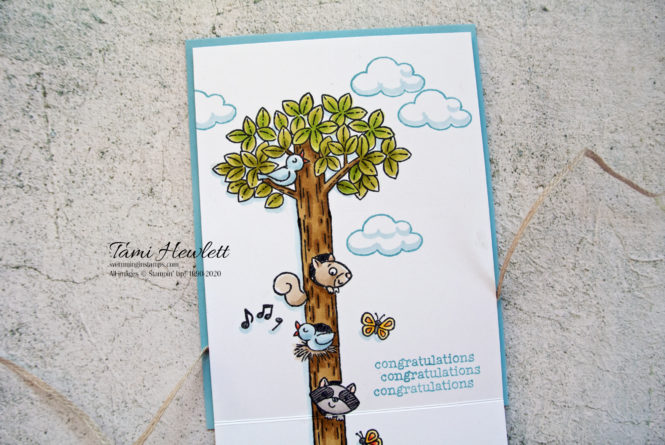
- I started by folding the layer together to determine where I wanted the top and bottom stamps to go. Then, I used my Stamparatus to stamp the top first. (All stamping is with Memento ink using a Stamparatus for perfect placement.)
- Getting the tree straight, in order to line up the top and bottom is critical. My tip is to use a ruler to draw faint lines to help place the stamps in the right place.
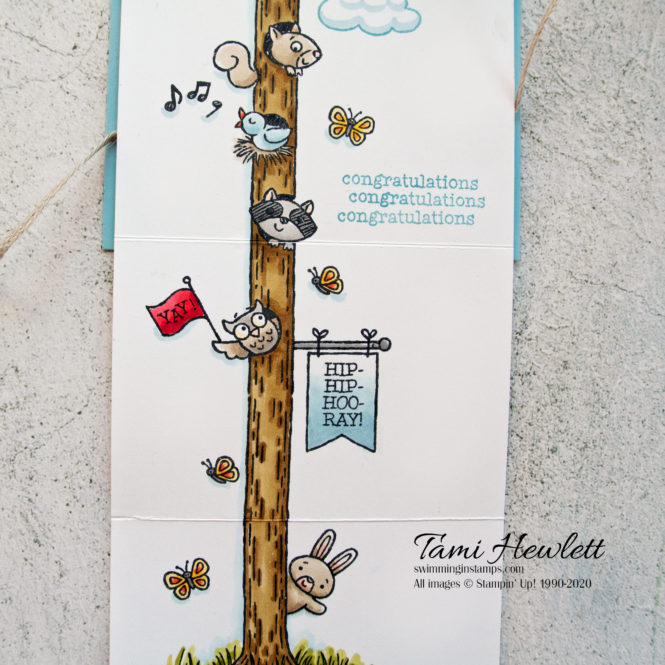
- Position the bottom stamp using the Stamparatus, so that the top of the stamp reaches the 8″ fold line and aligns with the pencil marks.
- I found that the middle stamp wasn’t quite long enough to fill in the remaining portion of the tree, but that’s OK! Here’s what I did. Align the middle stamp with the top of the tree, centered over the pencil marks and stamp. Next, use a Post-It note and the bottom tree stamp to fill it the remaining portion of the trunk! (Mask off the grassy portion, so you just stamp the trunk.)
- Add little critters, butterflies, signs, etc. as desired.
- Stamp clouds and greeting with Balmy Blue ink.
- Color with Stampin’ Blends Markers. I used the Light Balmy Blue marker to highlight the clouds and sky. To create the grassy area, I used Old Olive and Granny Apple Green markers.
- Adhere to Balmy Blue card base with Dimensionals, after tying together with some Braided Linen Thread.
See below for a list of all the Stampin’ Blends markers I used.
Have a great day!!!

Use Host Code FZHMTX34 for purchases at my online store to qualify to receive free exclusive project tutorials and a special thank you card from me. The latest PDF features 13 amazing tutorials that are sure to inspire you! (Please note that Host Codes are only valid for 30 days. You can always find the current Host Code on the right side bar of my blog.)


")


 Braided Linen Trim")


You could send in a slimline envelope also so you don’t have to bend your card.
Yes you could, but that’s the fun of this card … to open it up and see how tall the tree grows This stamp set would also make a great slimline card though. 🙂
I am making this card following your pattern. Like you said, it’s a little tricky lining them up. The only thing I did different was to get the tree longer, I used the bottom stamp and just inked the tree. It worked quite well.
Hi Mary. Thank you and so glad my instructions helped!