


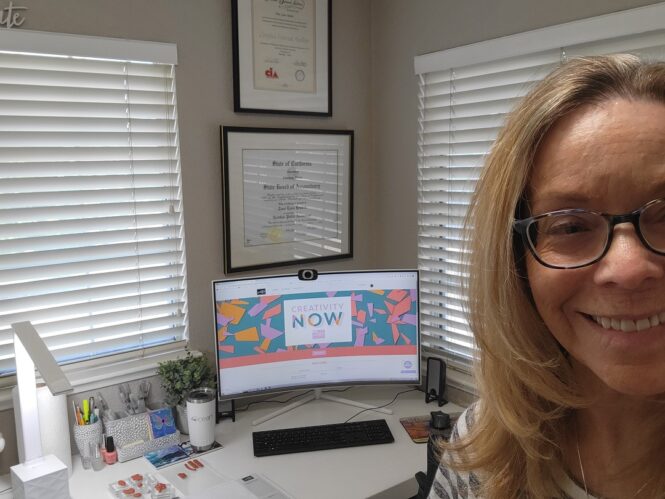
Last Saturday, Stampin’ Up! hosted a super fun online event for demonstrators called Creativity Now. This annual event just keeps getting better. It included four hours of crafting, presentations previewing new products, and behind the scenes videos from the home office. It was such a nice change of pace to just sit back, relax, and let others teach while I got to follow along and craft.
Creativity Now is open to all demonstrators, so if you’re interested in attending next year (along with other fun demo events such as convention), let me know. I’d love to have you join my team! The Stampin’ Up! community is wonderful; I love having so many crafty friends. As a reminder, there’s a great JOIN deal going on through the end of this month. Click HERE for more details on the June Starter Kit where you can pick an extra $30 of free products.
Here I am all ready to go with my coffee and stamps.
All the “make and take” crafting projects focused on the new Translucent Florals Bundle featured in the September-December Mini Catalog. This bundle is quite different from other florals and I really love it! The stamped images look like you can see right through them. The die set includes outline dies to cut out many of the stamped images, as well as coordinating flower builder shapes.
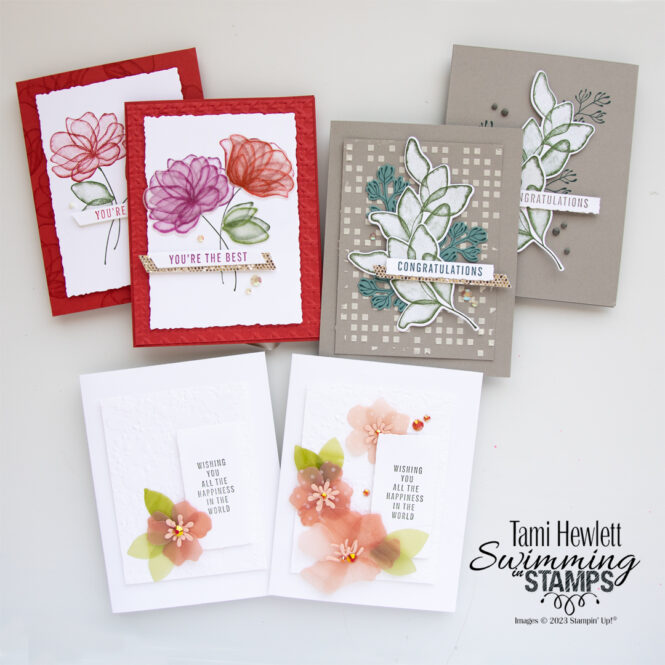
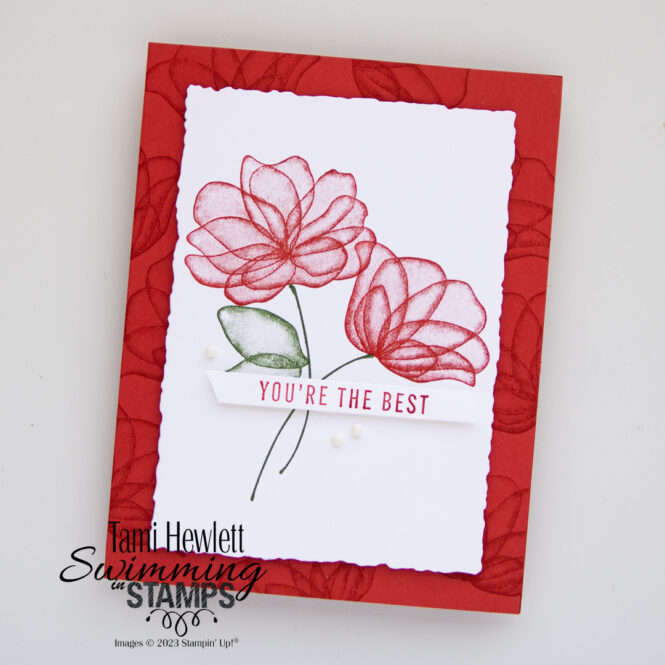
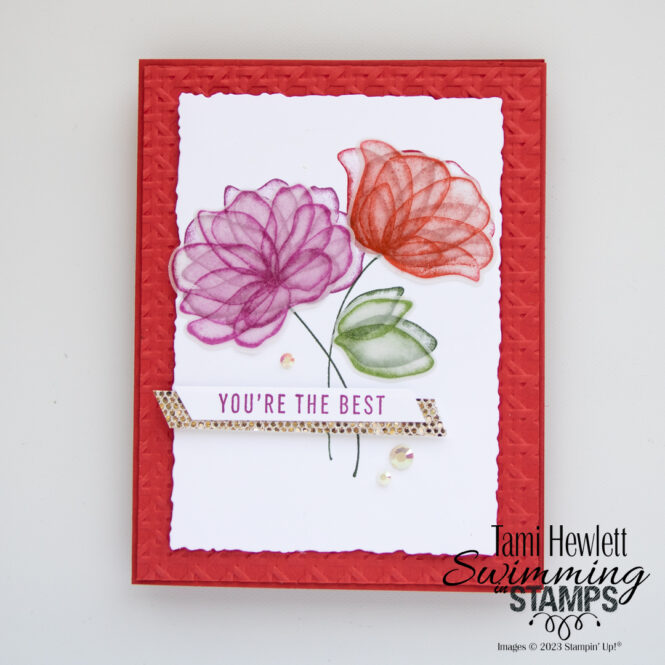
I thought it would be fun to share the three projects we made, along with the stepped-up versions. For this first one, we focused on stamping the see-through images. The color combination was Poppy Parade and Garden Green, and then we added Berry Burst to the stepped-up version.
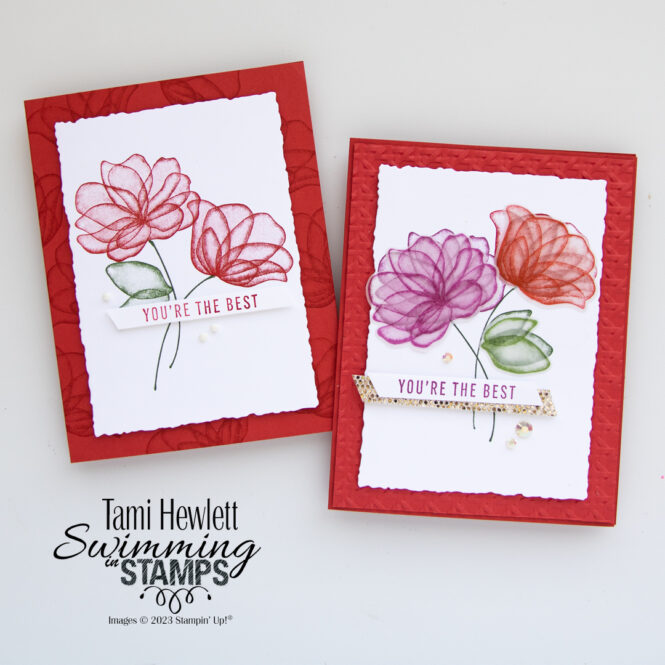
When using the stamps, I have a few tips. First, I like to prep my brand new cling stamps by inking them up and then rubbing them on scratch paper. This removes any film on the rubber that might cause the ink to bead and really improves the stamped image.
For the stepped up version, we basically created the same card, but then added layers of stamped Vellum. Stamping on Vellum is a little trickier. First, it takes longer for the ink to dry, so either wait or use a heat tool to speed up the process. Second, if you have a really juicy stamp pad (like my brand new Berry Burst), the image will turn out better if you either stamp off first or use a spoon to push the ink away from the center of the pad and out to the sides. I prefer the second option. That worked great for me.
I added a few of my own personal touches to this card as well. I dry embossed the background with the Cane Weave 3D Embossing Folder, added a strip of More Dazzle 6″ x 6″ Specialty Paper, and embellished with Iridescent Pastel Gems.
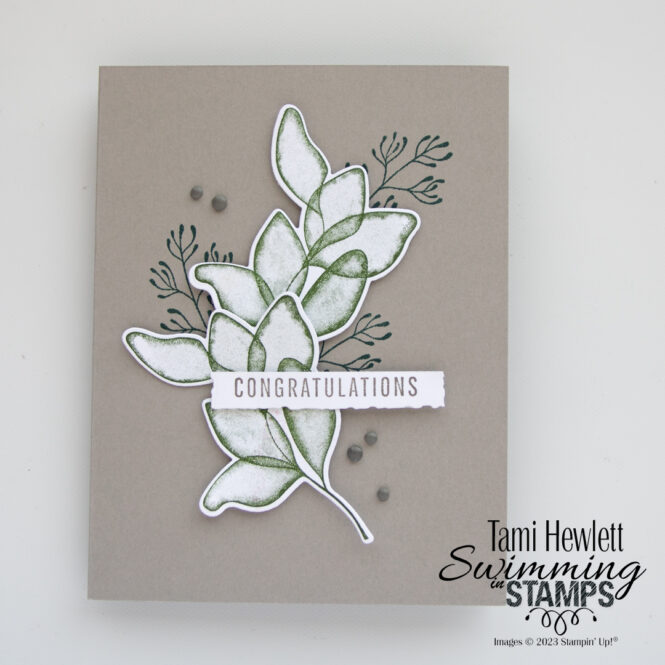
For the second card, we used a more “masculine” color combo and focused on the leaf stamp.

The original color combo was simply Gray Granite and Garden Green. I decided to switch things up a bit and added Pretty Peacock to the mix. I thought the Pretty Peacock twigs helped tie the other two colors together.
I love the technique used to cut the label on this card! We stamped the sentiment close to the top edge of a layer of Basic White and then used the bottom section of one of the smaller Deckled Rectangle Dies to cut out the sides and bottom. Very cool!
The embellishments are gray Classic Matte Dots.
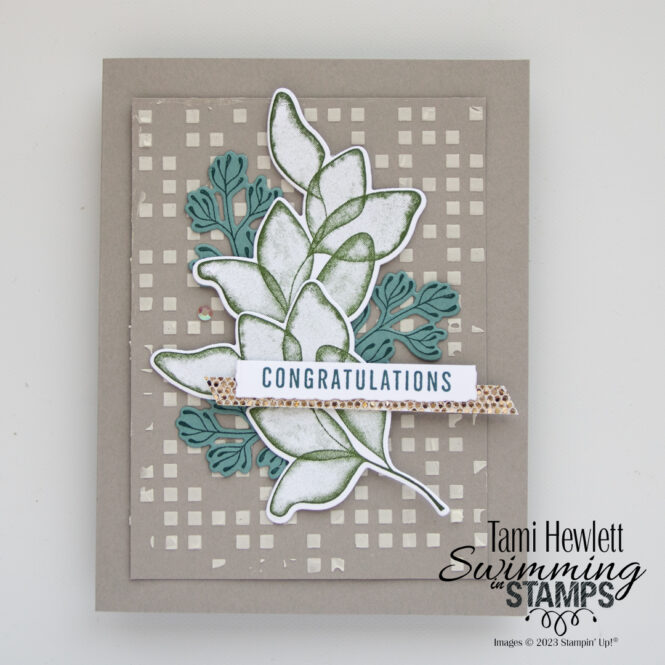
When I made the stepped up version, I added a bunch of personal touches. In the class, we used the Translucent Florals Dies to create a mask of leaves to use with embossing paste in the background. Instead, I decided to use the Foursquare Decorative Masks. (I just got them and was excited to use them:) Since the embossing paste covered the entire layer, I stamped the twigs with Pretty Peacock ink on Lost Lagoon Cardstock and cut them out with the coordinating dies. I also added a little strip of More Dazzle Specialty Paper and some Iridescent Pastel Gems.
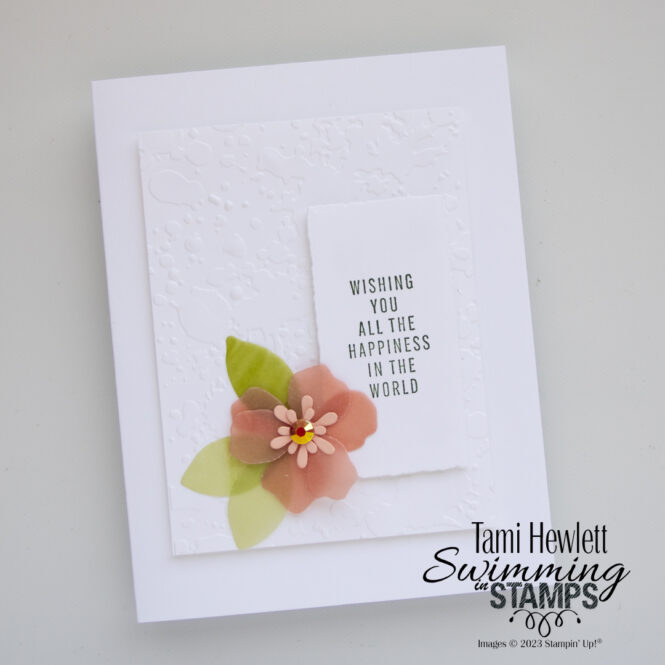
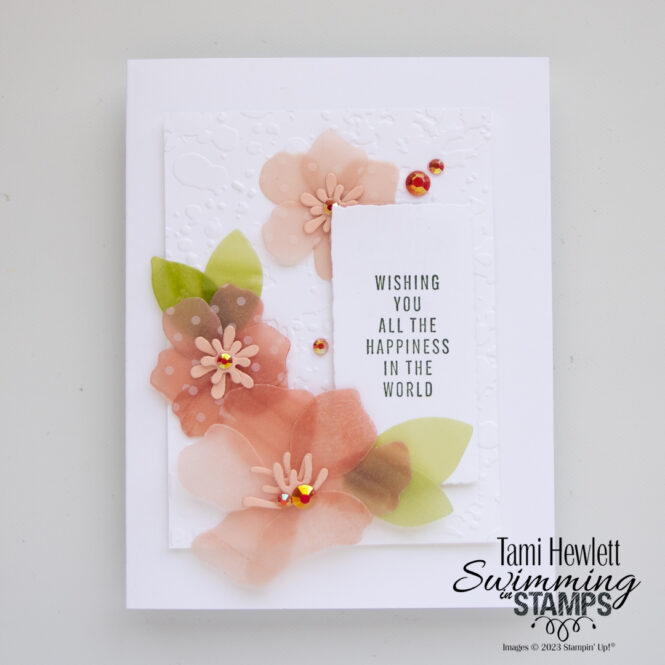
I think the last cards were my favorites! I love the technique we learned and it was so EASY!!!
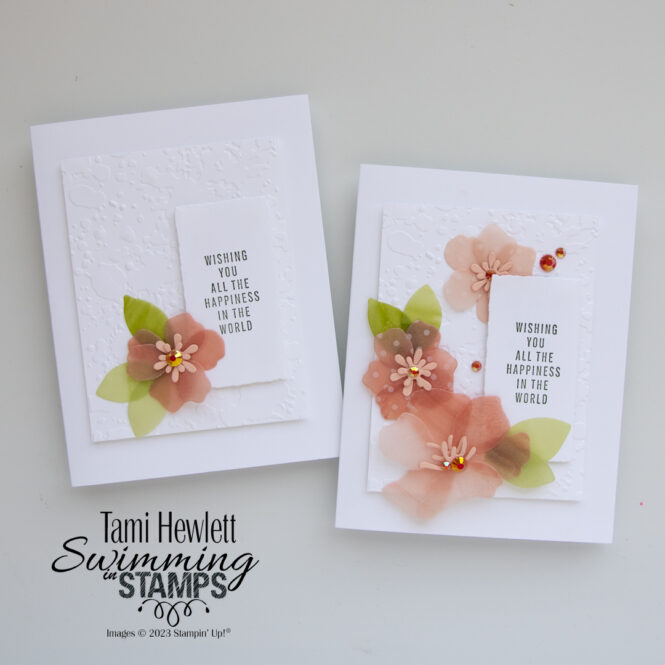
To create the flowers, we took a small layer of Vellum Cardstock and used the brush end of a dark Calypso Coral Stampin’ Blends Marker to color the paper. Simply hold the marker at an angle and brush back and forth to cover the sheet. Then, let it dry, flip it over and die-cut the flower petals. We layered two dies with a Mini Glue Dot to create each flower.
The leaves were created similarly, but with Granny Apple Green Stampin’ Blends. Then, I added a personal touch by die-cutting the centers from Petal Pink Cardstock and adding a Calypso Coral Iridescent Pastel Gem.
For one of the background layers, we used the Stripes and Splatters 3D Embossing Folder.
For the stepped up version, instead of Vellum Cardstock, we used Vellum Basics Specialty Paper (dot pattern) for some of the flowers. I also used both dark and light markers for a little more color variation.
I love the greetings and sentiments in the Translucent Florals Stamp Set! This is a great all-around bundle that I think you’re going to love it as much as I do. Watch for it in the new Mini Catalog coming out at the beginning of September.
Have a wonderful and creative day!

Purchase products from my online store to qualify to receive free exclusive project tutorials. This month’s PDF includes 12 creative tutorials designed by my demonstrator friends and I to inspire your paper crafting! The projects feature products from the May-August 2026 Catalog and current Online Exclusives. Enjoy!


 Specialty Designer Series Paper")
 Specialty Paper")


