


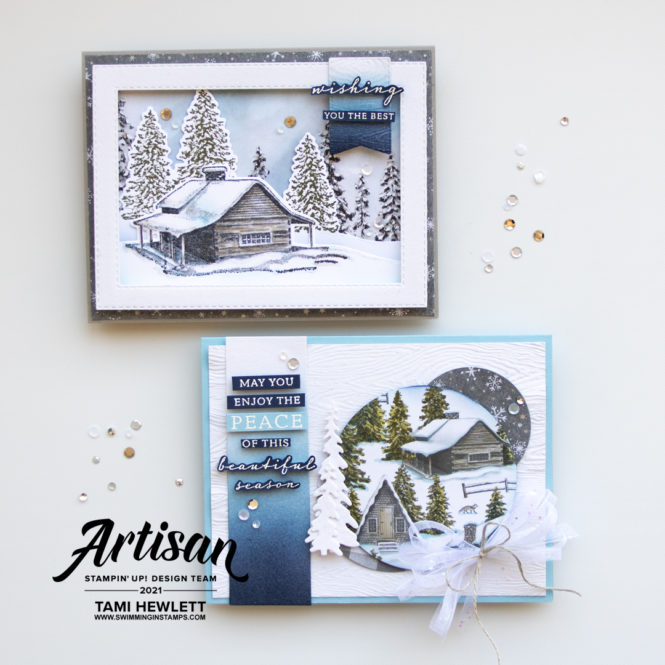
Hello and welcome! I’m Tami Hewlett from California, USA and today, I’m sharing my projects from the November Artisan Design Team Showcase. They feature the lovely Peaceful Place Suite! I have a soft spot in my heart for this collection because it reminds me of numerous trips to the Sierra Nevada to visit my family and enjoy Winter skiing. I absolutely LOVE the peaceful beauty of the snow and cozy cabins.
Be sure to check out the entire showcase on the Stampin’ Up! Facebook page. The inspiring projects are sure to get your creative juices flowing:)
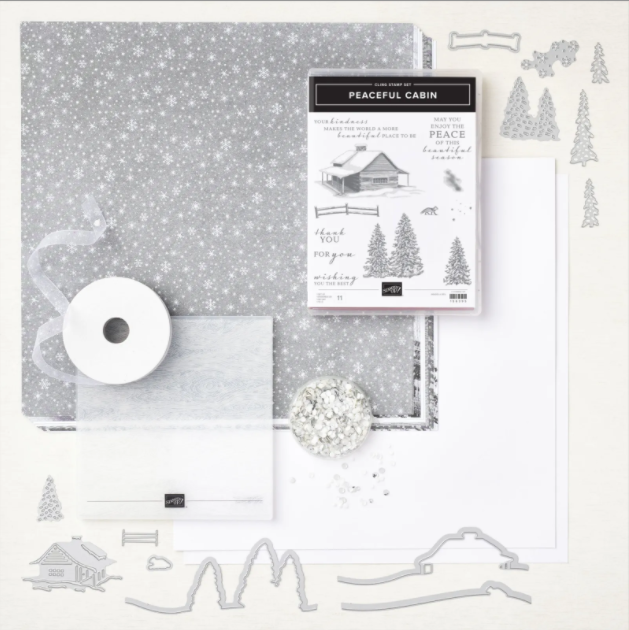
The Peaceful Place Collection can be found on pages 36 to 38 of the July-December Mini Catalog and includes a whole array of coordinating products! As if the stamps and dies weren’t enough, there’s also the super versatile Timber 3D Embossing Folder (one of my current favs), amazing Peaceful Place 12″ x 12″ Designer Series Paper (printed in black and white to use as is or add color). and gorgeous ribbon and sequin embellishments.
Beautiful Season Card:
For my first card, I decided to simply color the gorgeous Peaceful Place 12″ x 12″ Designer Series Paper with Stampin’ Blends Markers and Blending Brushes. I used Layering Circles Dies to cut a scene from the paper and then found my happy place coloring away. I find coloring very therapeutic, so this was a super fun card to make.

Look at the Supply List below for all the colors of Stampin’ Blends I used. I like mixing lots of colors to get a variety of shades and dimension. Then, I used the Light Balmy Blue, Light Smoky Slate and the Color Lifter Stampin’ Blends Markers to add shading to the snow and under the trees. I also added a little Light Petal Pink here and there to warm up the scene. I remember some good advice from my art teacher in High School to add warm hues to snow scenes so they don’t look too cold and uninviting.
I used the Snowy White 12″ x 12″ Velvet Sheets in the background, for the die-cut trees, and under the sentiment. You can dry emboss these sheets with the Timber 3D Embossing Folder and color them with Blending Brushes for a really different look!
To create the bow, I cut the White 3/8″ Glittered Organdy Ribbon in half vertically and then looped it several times and tied a knot in the center with Linen Thread.

Wishing You The Best Card:
For my next card, I used the Peaceful Cabins Cling Stamp Set and coordinating Cabin Dies to create a framed scene.
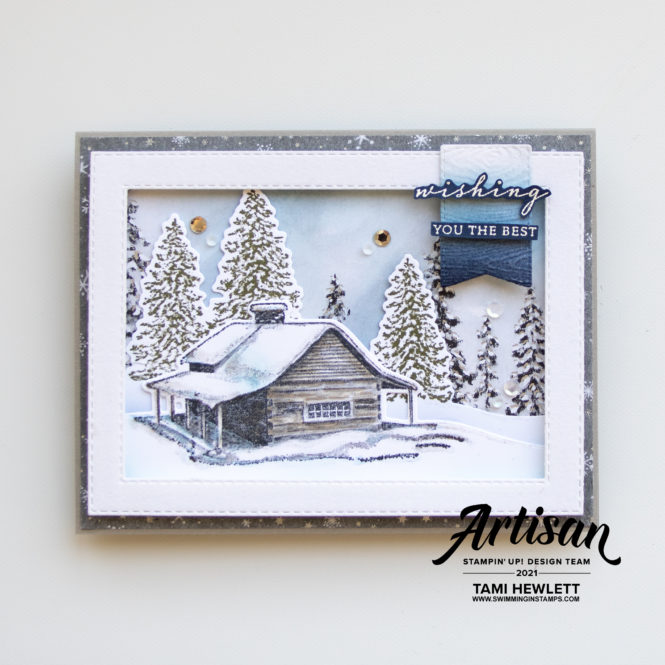
I stamped the cabin with Memento and the trees with Mossy Meadow ink on Basic White Cardstock. Then, I colored the cabin with Stampin’ Blends Markers and cut them out with the coordinating dies. What’s really cool about this bundle is that the coordinating dies cut out the snow banks!!! My tip is to stamp on the left side of a large piece of cardstock to allow some room to adjust the snow banks and layer. Also, when layering everything together, I used a ruler to ensure the vertical lines of the cabin were straight up and down.
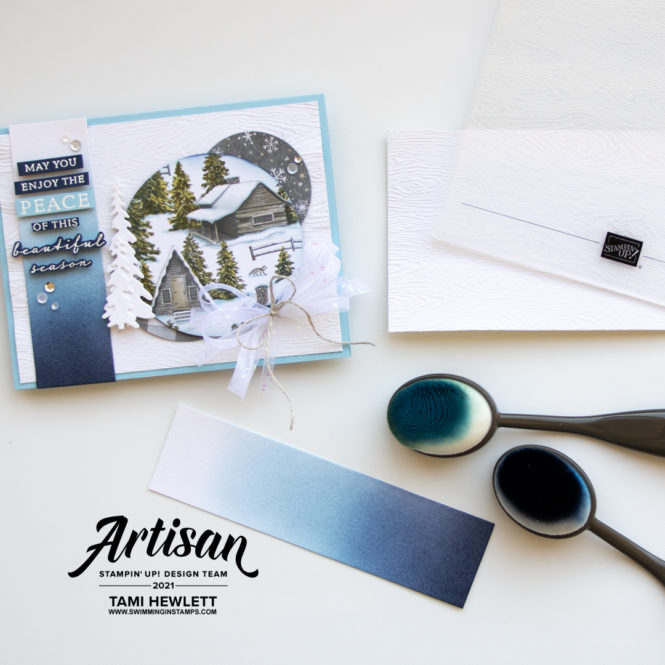
In the background, I used Blending Brushes to add both Night of Navy and Balmy Blue ink the the designer series paper. The silver foil on this paper is beautiful and resists the ink for a really pretty look.
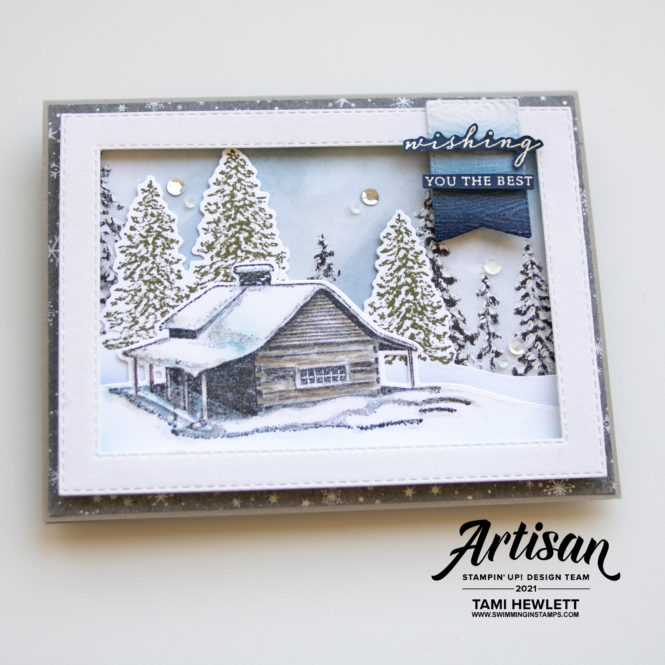
Before adhering all the layers together, I added shading to the snow banks with both Night of Navy and Balmy Blue ink. I also added some sparkle to the roof and snow banks with a Wink of Stella Glitter Brush.
Next, I cut the Stitched Rectangle frame and Tasteful Label banner from Snowy White Velvet Sheets. Then, for the banner, I both dry embossed it and added color with Blending Brushes, similar to my first card.

For the sentiments on both cards, I embossed the words in white on Night of Navy and Balmy Blue Cardstock and then trimmed the words close.
I hope these cards have inspired you to try out the Peaceful Place Suite. For lots more inspiration, be sure to check out the November Artisan Design Team Showcase on Facebook.
Have a wonderful and creative day!

Purchase products from my online store to qualify to receive free exclusive project tutorials. This month’s PDF includes 12 creative tutorials designed by my demonstrator friends and I to inspire your paper crafting! The projects feature products from the May-August 2026 Catalog and current Online Exclusives. Enjoy!
")

")
 Specialty Designer Series Paper")
 Velvet Sheets")


 Glittered Organdy Ribbon")


Hello, how did you make the little chalet in the first card? Your projects are always gorgeous.
Thank you Line. The snow scene on the first card, including the chalet, is printed paper from the Peaceful Place Designer Series Paper. I just cut it out with a circle die and colored the printed paper.
Ok Thank you!