


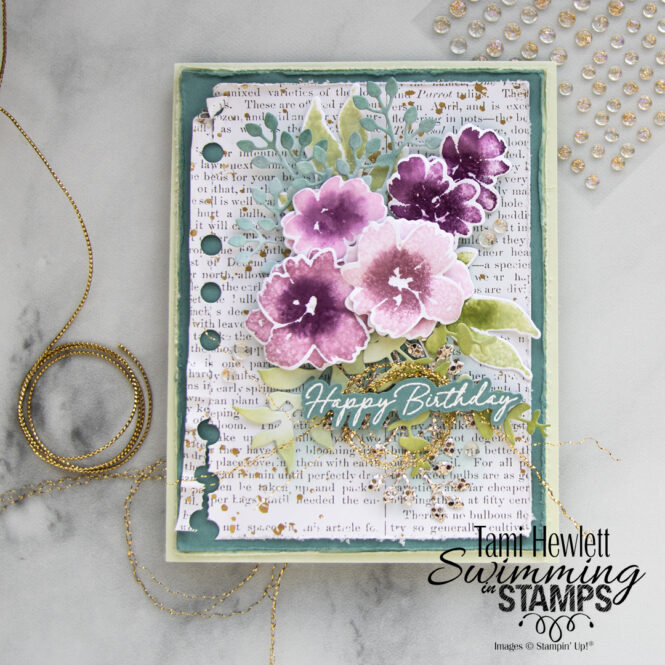
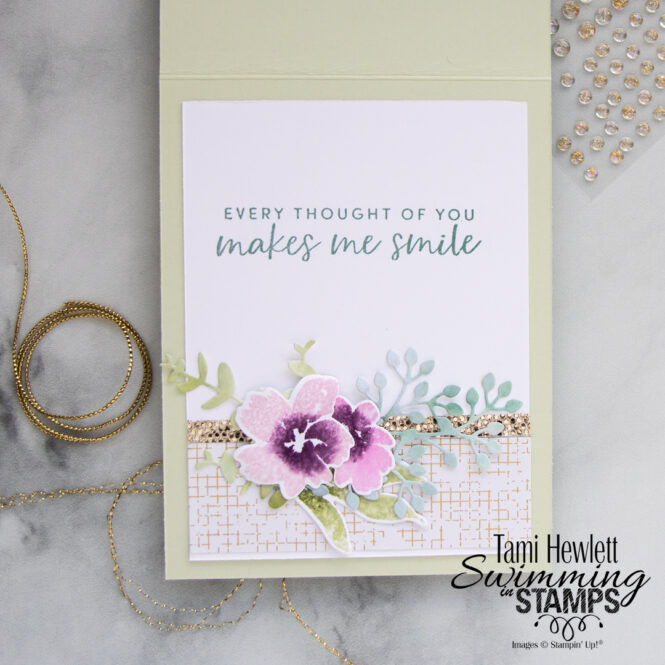
For this month’s Stampin’ Fancy Friday, we are focusing on techniques! One of my favorite stamping techniques is “watercolor stamping.” I love the look of watercoloring in general, and this technique makes it super easy! It’s a great way to create a “wow” card without a lot of effort. (I’ll explain how.) My card features the Textured Floral Stamp Set and coordinating dies, one of my favorite bundles.
To see all the designers’ projects, keep an eye on the Stampin’ Fancy Friday Facebook and Instagram pages throughout the month. We’d also love to see any of your projects using our theme! Be sure to tag them with @stampinfancyfriday so we can find and admire them!
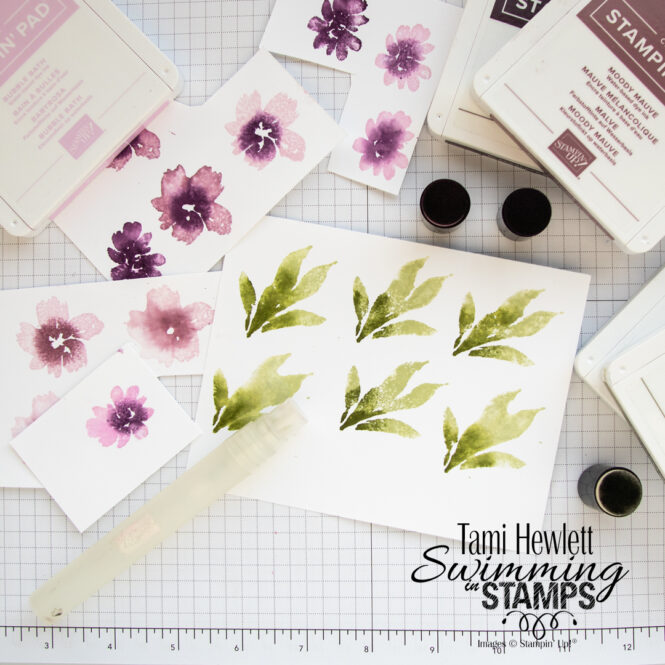
To stamp the flowers and leaves on this card, I used the same process. Ink up the stamp with one color, stamp off if necessary once or twice depending on the ink color, then use a Sponge Dauber to add a different darker color to a portion of the stamp. Give the stamp a little spritz of water and stamp on Basic White Cardstock. Play around with different color combinations and the amount of water spritzed to get different results, like I did below. Then, pick your favorites!!!
For the flowers, I used Bubble Bath, Moody Mauve, and Blackberry Bliss ink. Since Bubble Bath is a light color, I didn’t stamp it off. In comparison, I found that stamping off Moody Mauve once or twice yielded better results. For the leaves, I used Soft Sea Foam and Mossy Meadow ink. Don’t be discouraged if your results don’t look exactly like mine. I enjoy playing around with this technique, and it looks different every time. I simply throw away the ones I don’t like.
After cutting out the flowers with the coordinating dies, I curled them with a Bone Folder and layered them for a fuller look.
I also pre-painted some Basic White Cardstock scraps with Lost Lagoon ink and a combination of Soft Sea Foam and Mossy Meadow to use for die-cutting the intricate leaves. That’s another favorite technique, as I can cut a bunch of die-cuts from the same paper and save time.
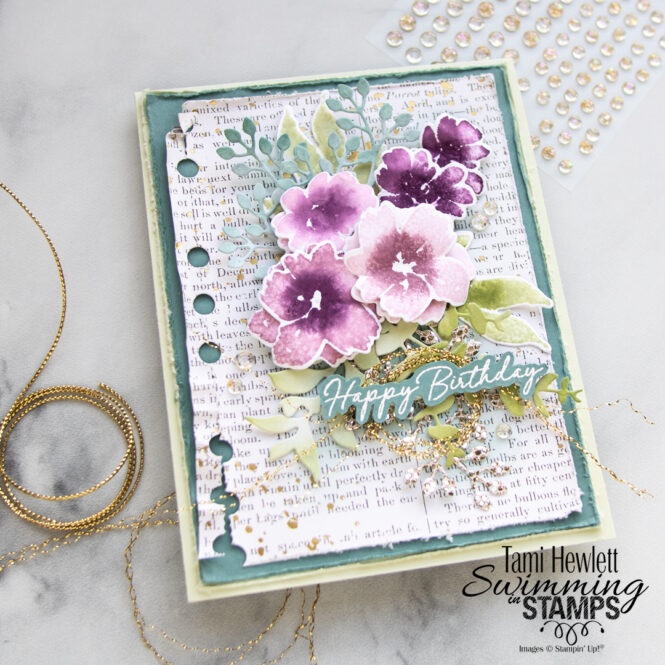
In the background, I used a layer of Nature’s Sweetness DSP that I cut with the spiral die from Notes of Nature. Afterwards, I ripped it, roughed up the edges, and worked the corners for a shabby chic look. I also used a Blending Brush to add Lost Lagoon ink to the center.
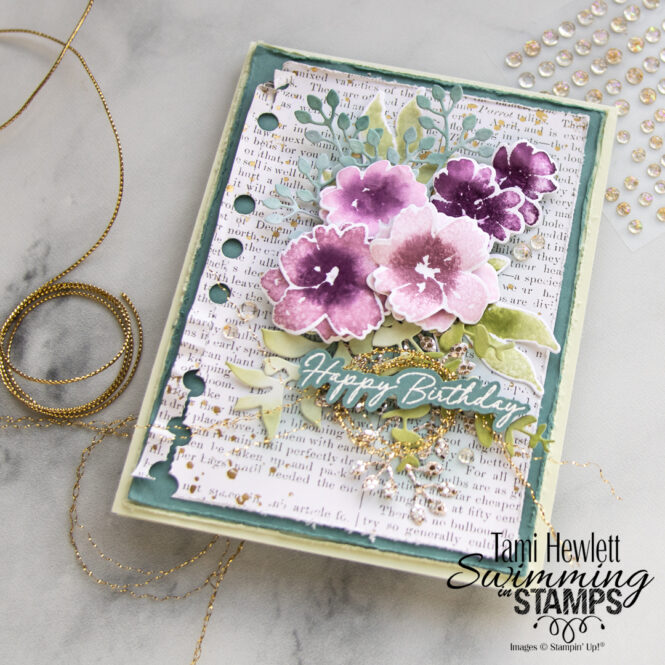
Since the DSP included gold foil splatter, I added a few gold embellishments, including a More Dazzle die-cut, Simply Elegant Trim (frayed), and Iridescent Foil Gems.
I made this card for a friend’s birthday, so I pulled a sentiment from the Magnolia Mood Stamp Set.
On the inside, I used a few leftover elements.
Have a wonderful and creative day!

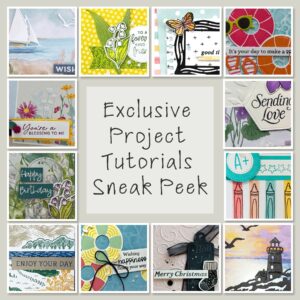
Purchase products from my online store to qualify to receive free exclusive project tutorials. This month’s PDF includes 12 creative tutorials designed by my demonstrator friends and I to inspire your paper crafting! The projects feature products from the May-August 2026 Catalog and current Online Exclusives. Enjoy!


")


 Specialty Paper")
 Specialty Designer Series Paper")


")


