


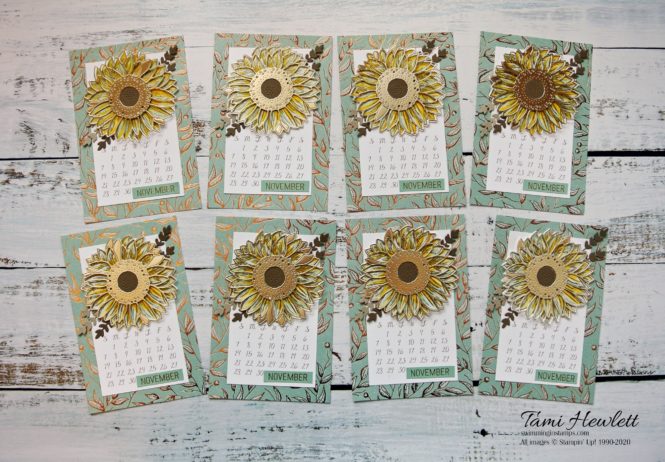
Time to share my last two 2021 Desktop Calendar pages!!! Each year, I design these 4″ x 6″ calendar pages, so by the time Christmas comes around, I have eight sets to give away as gifts. The individual pages fit in a standard frame. I always feel such a sense of accomplishment when I finish the last ones!

The November calendar features the Celebrate Sunflowers stamp set and the December calendar features the In The Pines stamp set.
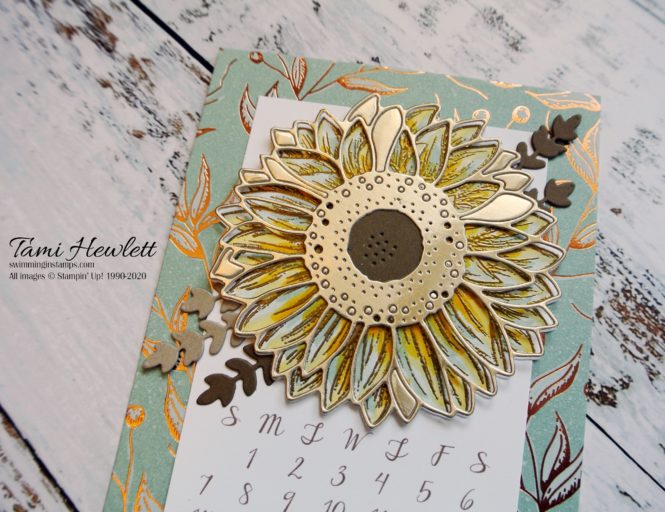
November 2021 Calendar Page:
Fall is such a beautiful time of year! I love the rich, earthy colors. So the Gilded Autumn Specialty Designer Series Paper seemed the perfect choice with its lovely copper foil accents!

I added additional metallic elements to this page as well. The sunflower and sentiment are embossed in gold and the detailed sunflower die cut is cut from Brushed Gold Metallic Cardstock.
NovemberTutorial:
- Trim Gilded Autumn Specialty Designer Series Paper (SDSP) to 4″ x 6″.
- Print calendars on Whisper White Cardstock and trim to 3″ x 5″. (See download and cutting instructions below.) Each sheet makes four calendar pages. Adhere to Gilded Autumn SDSP with Seal.
- Stamp the sunflower with Versamark ink on Whisper White Cardstock and emboss with Gold Stampin’ Emboss Powder. Cut out with coordinating die cut.
- Color sunflower with Stampin’ Blends Markers: Using the brush end of each marker, color a section of the petals with Dark Daffodil Delight, then add both Dark and Light Mint Macaron.
- Use the Sunflower Dies to cut out 1) the detailed sunflower from Brushed Gold Metallic Cardstock, 2) the center and both leaf dies from Soft Suede Cardstock, and 3) the double leaf die from Crumb Cake Cardstock.
- Adhere the sunflower pieces together with Seal and add to calendar over the three leaf die cuts.
- Use the retired Date It stamp set (or a comparable stamp set) to emboss the month in gold on Mint Macaron Cardstock. Trim close and adhere to calendar with Seal.
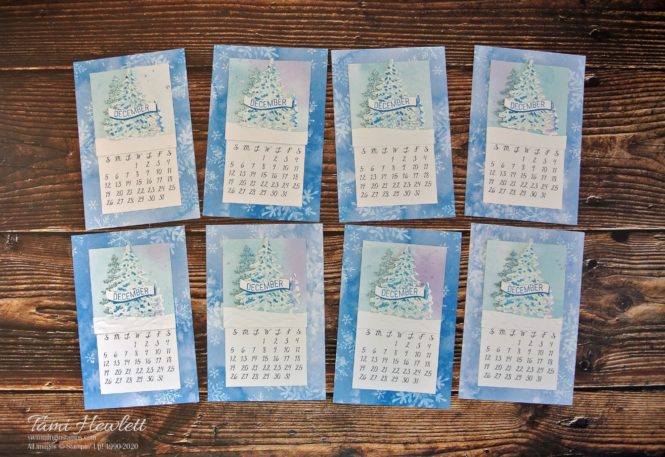
December 2021 Calendar Page
My December calendar page features the Snowflake Splendor Designer Series Paper, which is one of my favorites and currently on sale for 15% off!

I’m totally in love with the watercolor style of this paper; I used it for both the background and sky behind the trees.

I also used a fun stamping technique for the main tree that I’ll be demonstrating during my next online class in early December. (Watch my blog for details.)

December Tutorial:
- Trim Snowflake Splendor Designer Series Paper (DSP) to 4″ x 6″.
- Print calendars on Whisper White Cardstock and trim to 2-7/8″ x 5″. (See download and cutting instructions below.) Each sheet makes four calendar pages. Adhere to Snowflake Splendor DSP with Seal. Note: This layer is a little narrower so it fits behind the Layering Square die cut.
- Use largest Layering Square die cut to cut “sky” from Snowflake Splendor DSP. Adhere over top section of calendar layer with Seal.
- Cut a strip of Whisper White Cardstock 3″ wide and use the Pine Woods Dies to cut the top (approximately 1/2″ high) to create the snow bank. Dry emboss with Old World 3D Embossing Folder.
- Stamp detail tree with White Craft ink on Whisper White Cardstock and emboss in white. Squeeze Balmy Blue ink pad to pool ink in the lid and then use a Water Painter to paint a watercolor wash over the embossed trees. The white embossing will resist the color.
- Cut out embossed tree with detail die cut.
- Ink up solid tree with Pacific Point ink and use a Water Painter to add water directly to the stamp. Stamp on Whisper White Cardstock and cut out with outline die. Repeat with small single tree, but this time, ink up the whole stamp with Highlander Heather and then a little Pacific Point ink on one side.
- Layer detailed embossed tree die over solid tree die and adhere with Seal.
- Cut one medium detail tree from Balmy Blue Glimmer Paper.
- Adhere trees and snow bank with Seal as shown.
- Apply retired Date It stamp (or a comparable stamp) to an acrylic block, using the Ornate Frame die cut as a guide to curve the stamp to fit the die cut. Stamp with Pacific Point ink on Whisper White Cardstock. Cut out with Ornate Frame Die.
- Cut out one additional Ornate Frame die cut from Pacific Point Cardstock. Layer behind stamped die and add to tree with Seal.
I created the calendar pages using My Memories Suite software. You can download the November calendar HERE (PDF) or HERE (JPEG) and the December calendar HERE (PDF) or HERE (JPEG.) Print both calendars on Whisper White Cardstock with the smallest margins possible for your printer. The print is colored Soft Suede on the November calendar and black on the December calendar. I designed the pages to go all the way to the edges of a standard 8-1/2″ x 11″ sheet of cardstock. Trim as follows:

Well, that’s a wrap for 2021! Stay tuned for ideas on how to gift wrap all the calendar pages together!!!
Have a wonderful and creative day!!!

Use Host Code NNXQD4NY for purchases at my online store to qualify to receive free exclusive project tutorials. The latest PDF features 11 creative tutorials to help inspire you! (Please note that Host Codes are only valid for 30 days. You can always find the current Host Code on the right side bar of my blog.)

Select Designer Series Papers are on sale for 15% off during the month of October 2020. Get the details HERE.

November Calendar:
Product List")

")


")


December Calendar:
Product List


