


Hello! I’m Tami Hewlett from the Artisan Design Team and today I’m sharing one of my favorite stamping techniques. Occasionally, Stampin’ Up! asks the team to contribute these ideas to its Facebook page and Instagram feed and today is my turn!
My favorite style is watercoloring so I love any technique that makes that process easy. I think you’re going to love technique and be amazed at how easy it is to recreate this card.
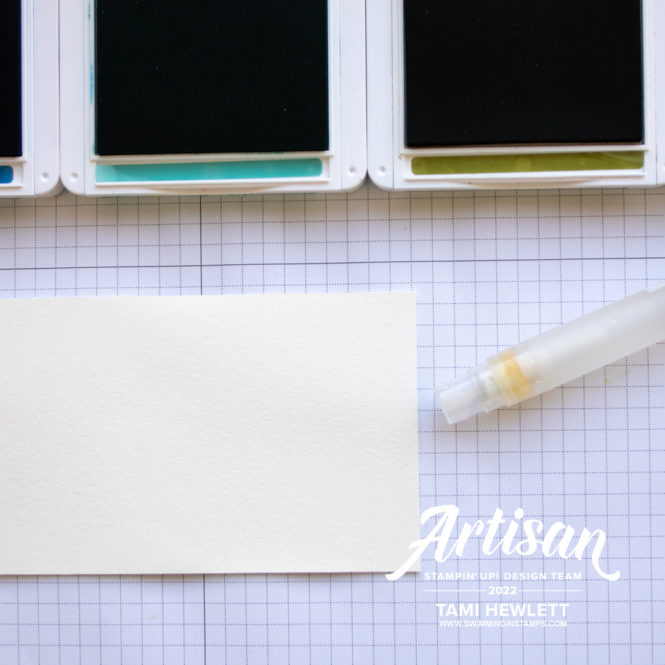
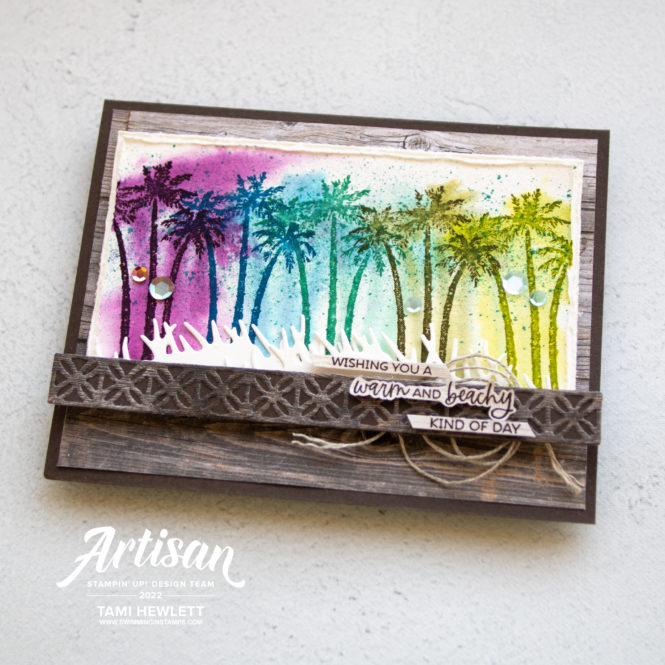
To start, you’ll need a layer of Fluid 100 Watercolor Paper, a variety of stamp colors, and a Stampin’ Spritzer. For my card, I used the Paradise Palm stamp set and Blackberry Bliss, Pacific Point, Bermuda Bay, Old Olive, and Granny Apple Green. I opened all the stamp pad so they were ready to go, because it helps to work quickly.
Step 1: Spritz the watercolor paper thoroughly on both the front and back. This helps the paper stay flat and avoid curling while you’re working. Also, the paper needs to be quite wet.
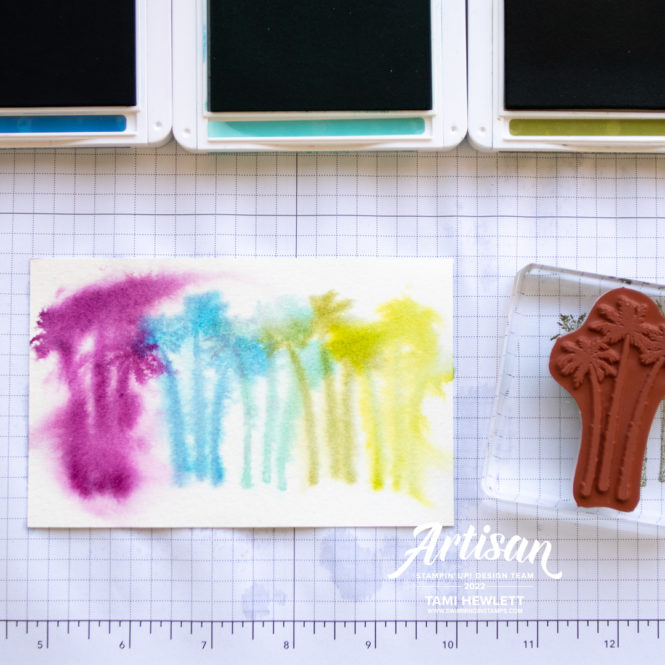
Step 2: Ink up each color, stamp off (stamp on scratch paper one to two times without re-inking), and then stamp on the wet paper. The ink will run and the color will be fairly light. If your paper dries too quickly, you can re-spritz, but do this sparingly as it will dilute the ink color.
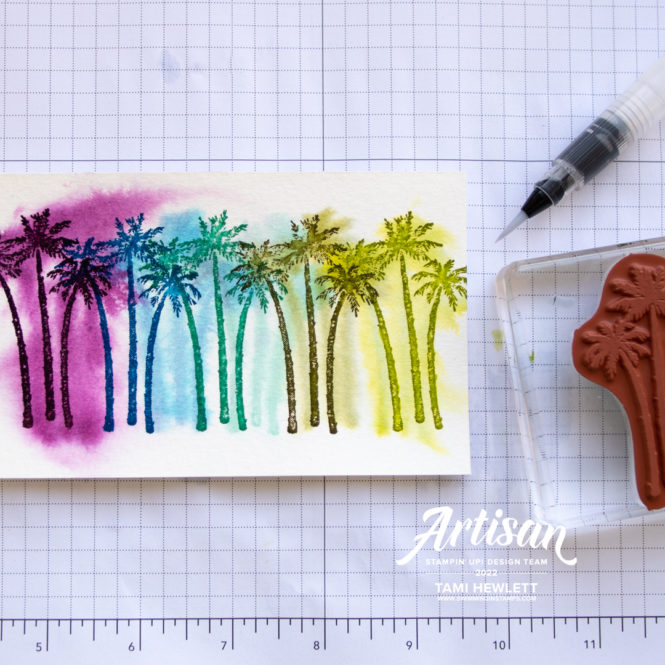
Step 3: Dry the paper with a Heat Tool and stamp again with each color. This time stamp with full ink color (no stamping off.) If needed, touch up the stamped image with a Water Painter. Tip: Stamp slightly off from the initial stamping so you see a shadow.
That’s it! It’s super easy, but looks artsy and complicated.
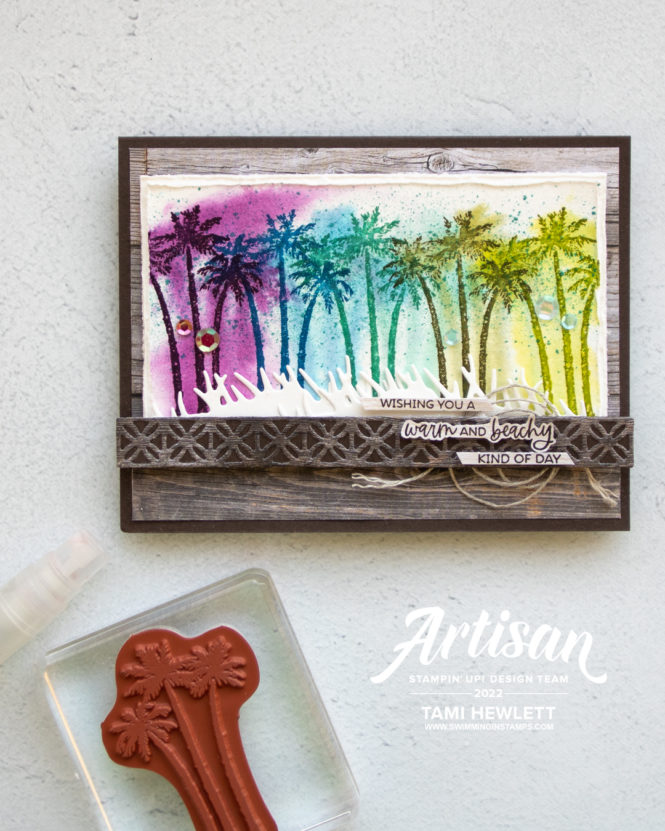
To complete my card, I added splatter to the watercolor panel with a Bermuda Bay Stampin’ Write Marker. I held the cap in one hand and used it to flick the brush end of the marker towards my paper. Then, I trimmed down the layer and used Paper Snips to rough up the edges.
Next, I layered another sheet of watercolor paper behind it and some grass die-cuts in front. I also used In Good Taste Designer Series Paper for the background, sentiment, and border die-cut. The final touch was some Artistry Blooms Sequins.
I love this technique and encourage you to experiment with other stamps and colors. It works great with flowers in particular and stamp sets that have both solid and matching fine line stamps.
Enjoy and have fun creating!

Purchase products from my online store to qualify to receive free exclusive project tutorials. This month’s PDF includes 12 creative tutorials designed by my demonstrator friends and I to inspire your paper crafting! The projects feature products from the May-August 2026 Catalog and current Online Exclusives. Enjoy!

")


Thanks Nadine! So glad you like it!!!
Majorly fun technique! Fantabulistic! Thank you….