


Hello and thanks for visiting. I’m Tami Hewlett from California, USA, and today I’m sharing projects I designed for the June Artisan Design Team Showcase featuring the Texture Chic Suite Collection. This collection is absolutely fabulous!
Be sure to check out the Stampin’ Up! Facebook page to see all the Artisans’ projects featuring this gorgeous suite of products.
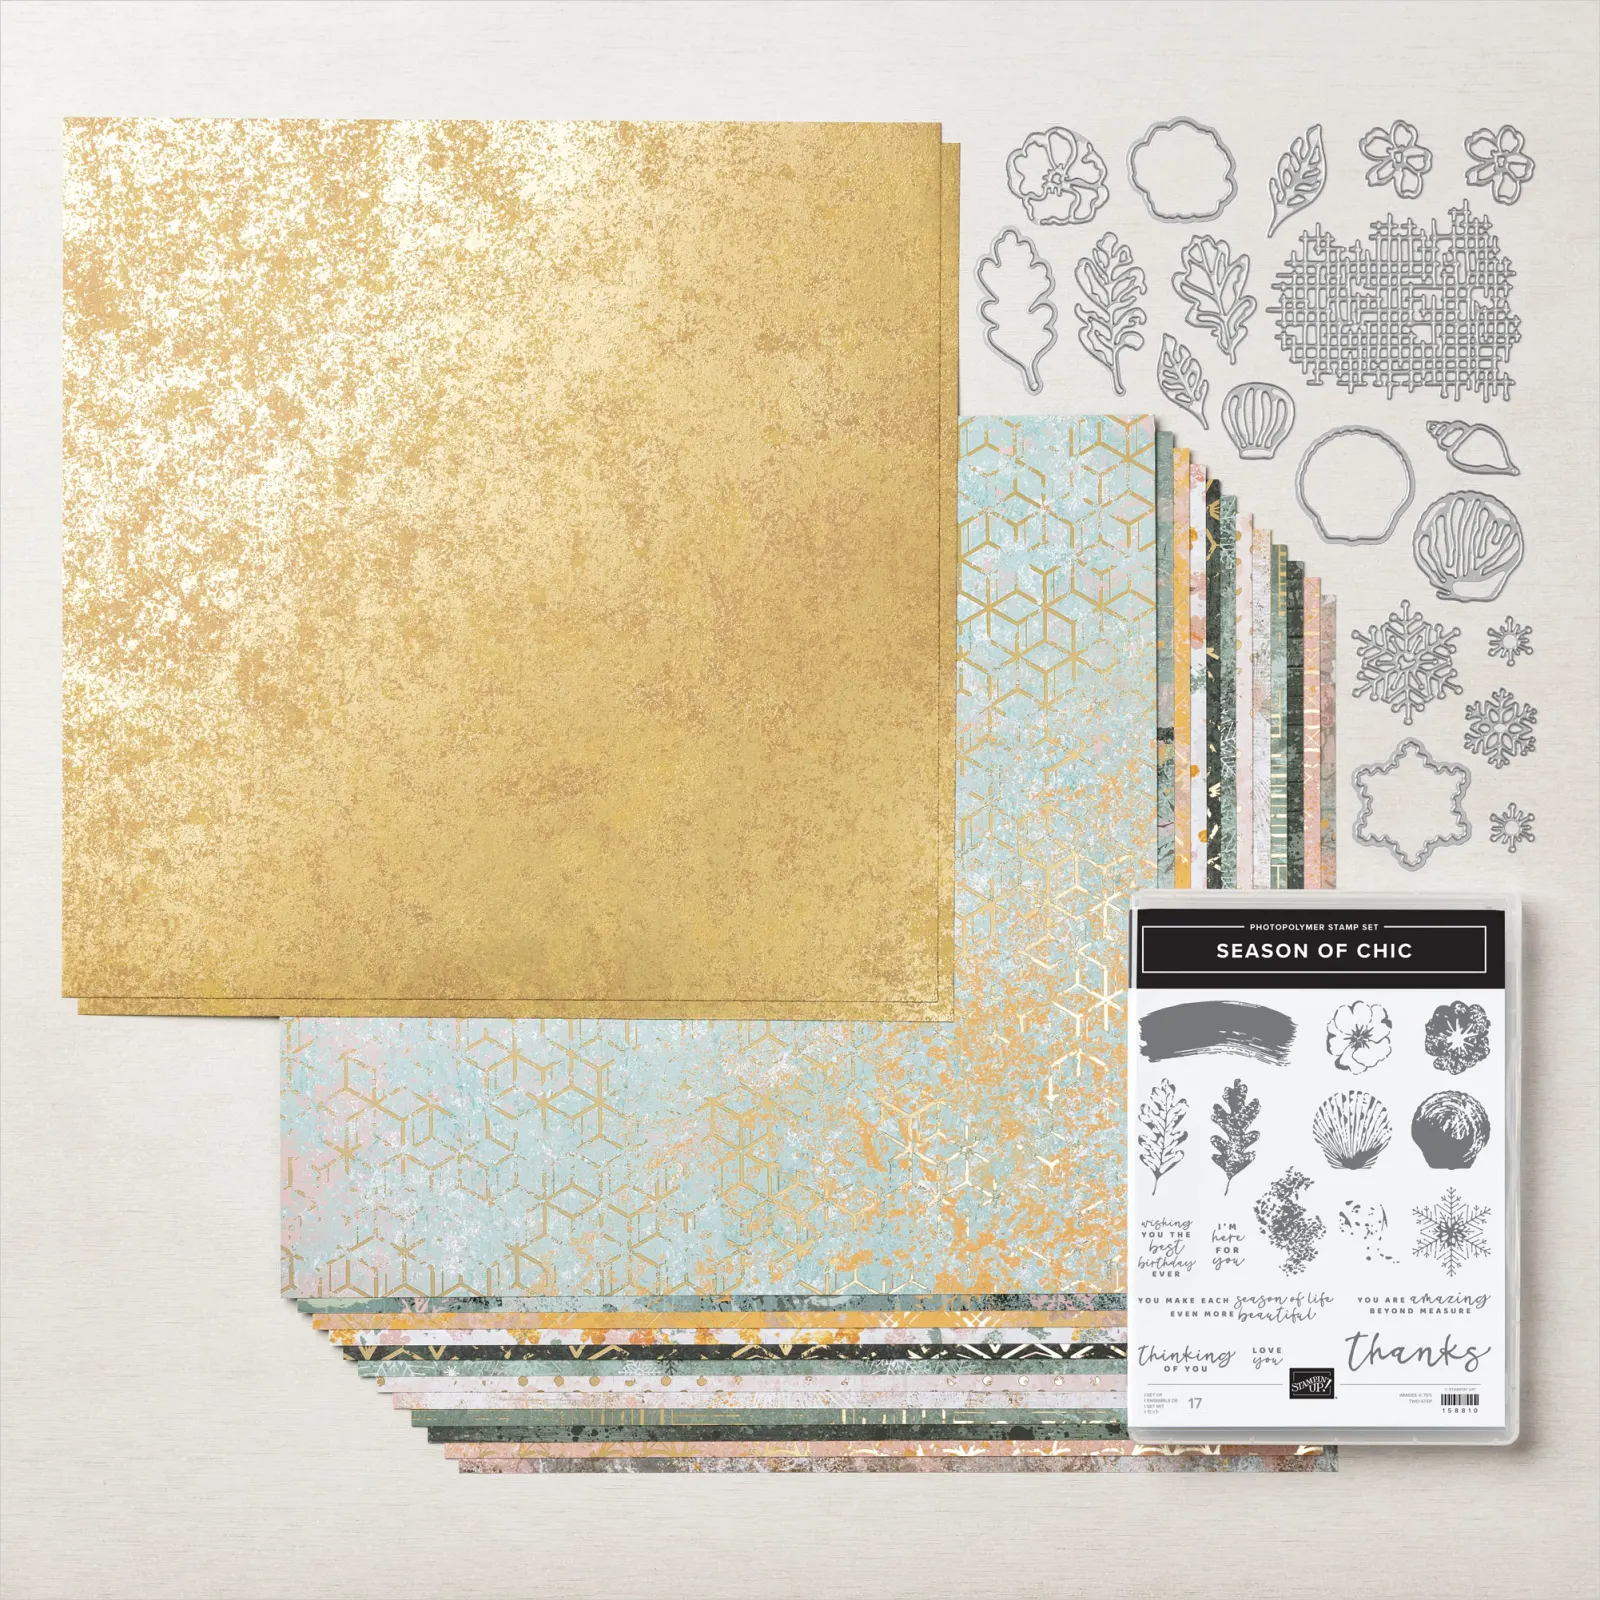
The Texture Chic Suite Collection includes the Season of Chic Photopolymer Stamp Set, Chic Dies, Texture Chic 12″ x 12″ Specialty Designer Series Paper, and Distressed Gold 12″ x 12″ Specialty Paper. There’s so much to love about these products! First, there’s something for every season, so it’s super versatile. I also love the shabby chic style and the interesting background stamps and dies for added interest and style. But my absolute favorite is the Distressed Gold paper!!! It is truly gorgeous in real life and enhances the gold foil in the coordinating designer series paper.
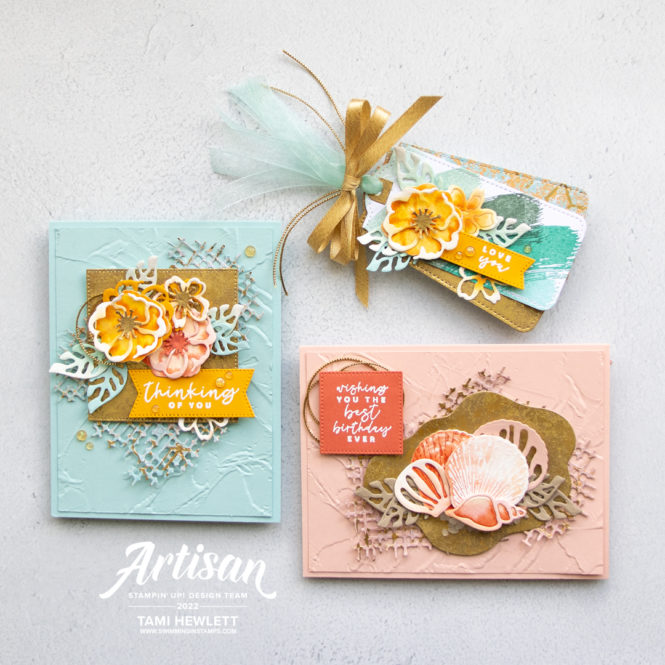
Spring — Thinking of You
I decided to focus my projects on Spring and Summer. I love the warmth, beauty, and colors of these seasons.
My first card came together so quickly! I started by collecting all the ink colors from the designer series paper, (Pool Party, Mango Melody, and Petal Pink) and then added Pumpkin Pie and Calypso Coral to highlight the flowers. This is not a color combination I would have normally picked, but I ended up absolutely loving it!
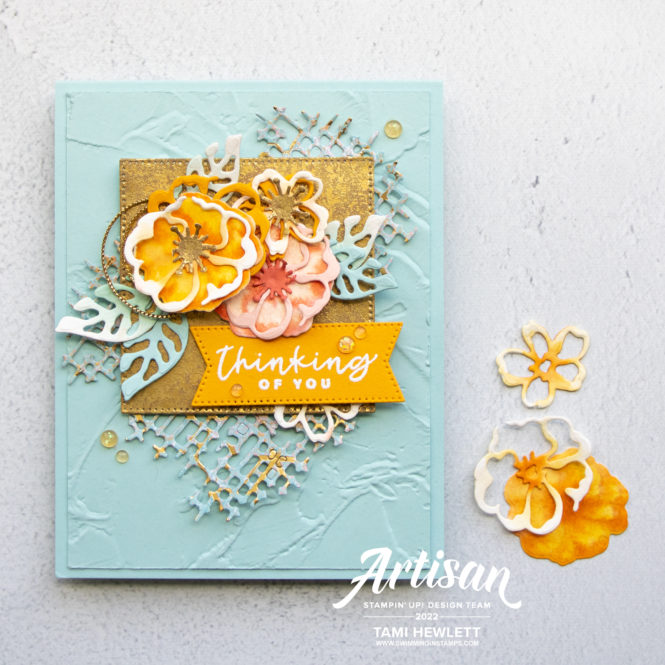
I cut the background hatch die from the DSP, which already included the gold foil. Super easy, but super pretty and effective.
Several stamps in this set have coordinating “two-step” stamps, including the flowers. But rather than just stamp them, I felt like playing around with technique to figure out some artsy alternatives. So I ended up using a wet stamping technique. First, I spritzed Fluid 100 Watercolor Paper. Then, I inked up the “fill” stamp with a light color ink (Petal Pink on the first and Mango Melody on the second), added a darker color ink to the edges of the rubber with a Blending Brush (Calypso Coral on the first and Pumpkin Pie on the second), and then stamped on the wet paper. As the paper was drying, I stamped the detailed image over the original with the darker colored ink. Then, I used a Bone Folder to slightly curl and shape the flowers before adhering them to the card.
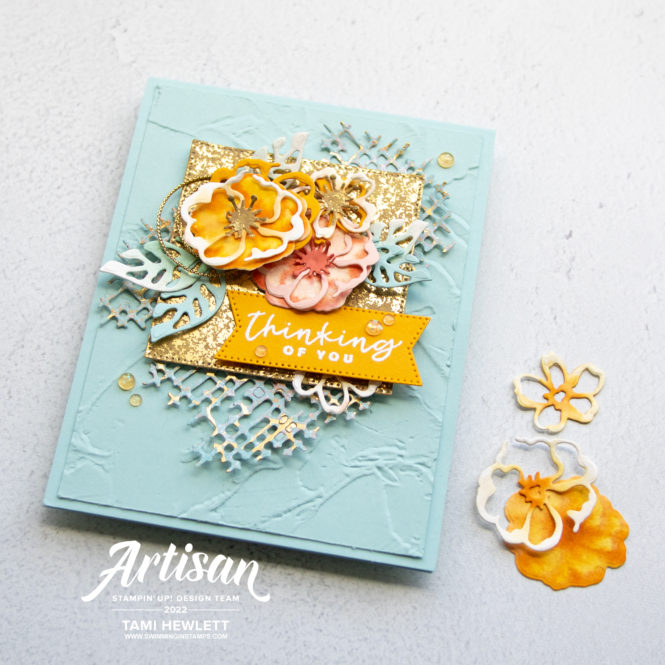
Next, I cut the detailed flower and leaf die-cuts from Fluid 100 Watercolor Paper and gave them a light watercolor wash. Then, I cut the flower centers and background Stylish Shapes square die-cut from Distressed Gold Specialty Paper. That paper is so elegant and pretty! I’ve already purchased two more packs! I’m IN LOVE!
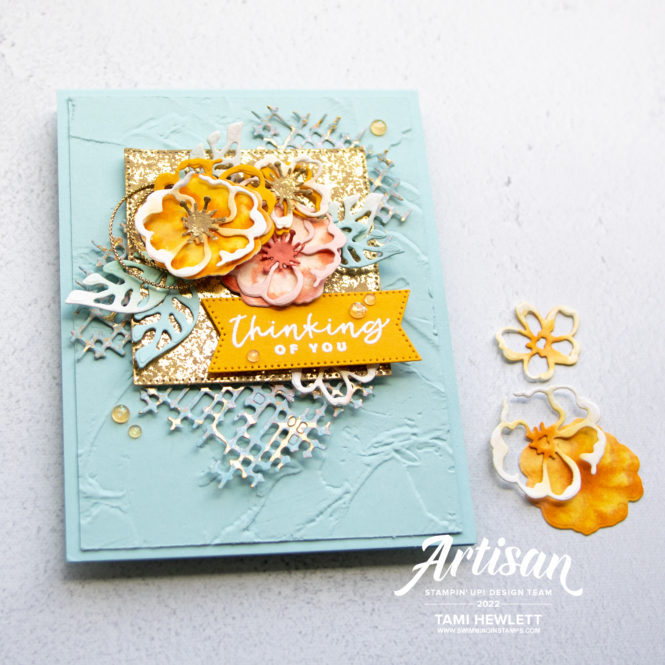
To finish my card, I added some gold Simply Elegant Trim and a few Pale Papaya In Color Opal Rounds.
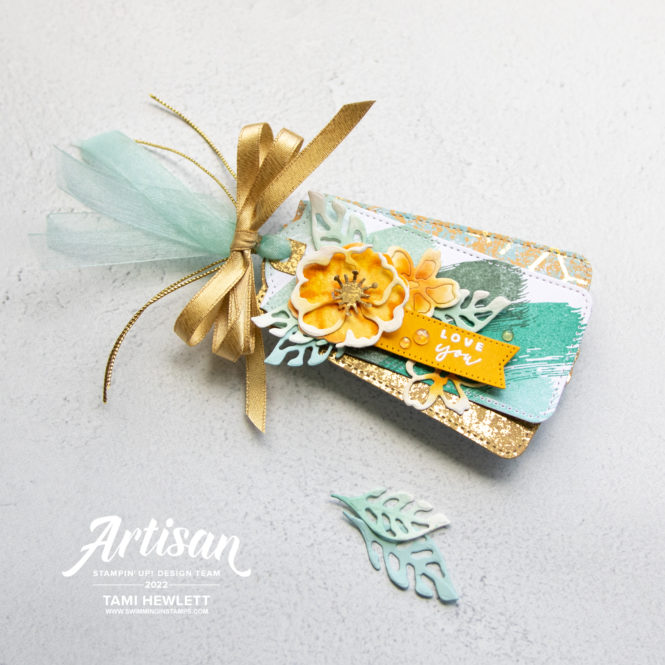
I also designed a coordinating gift tag. Several elements are the same, but this time, I added them to some Tailor Made Tags cut from Basic White Cardstock, Textured Chic Designer Series Paper, and Distressed Gold Specialty Paper.
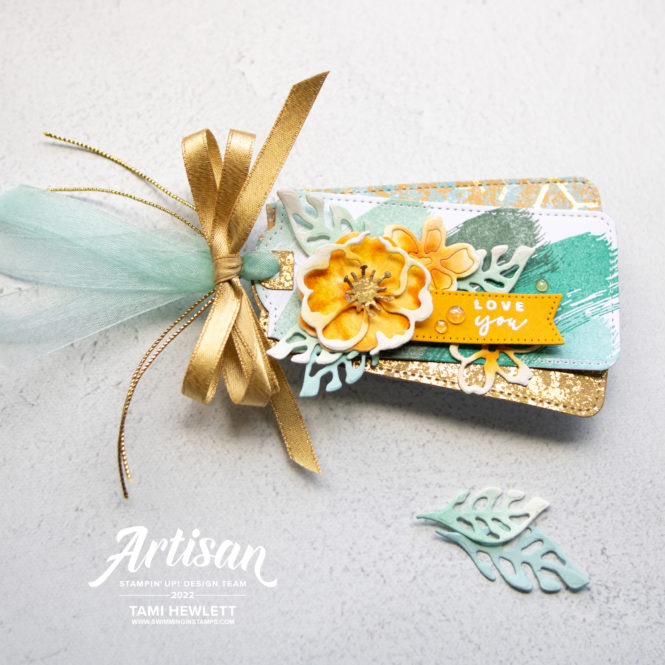
I used the brushstroke stamp to stamp the background of the Basic White tag with Pool Party, Bermuda Bay, and Soft Succulent ink.
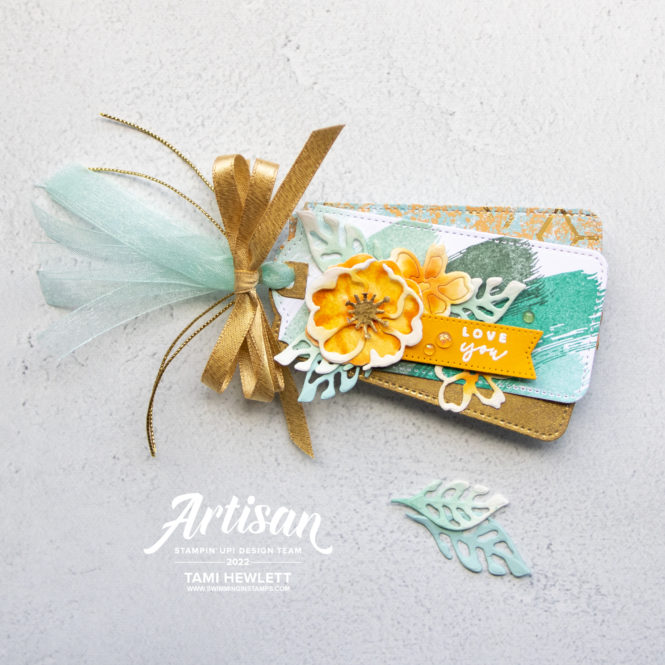
Then, to tie all three tags together, first I fed four strips of Pool Party 3/8″ Sheer Ribbon through the holes and tied the top together with some Gold Simply Elegant Trim. Then, I tied a double bow with some Gold 1/4″ Shimmer Ribbon and adhered it on top with Mini Glue Dots.
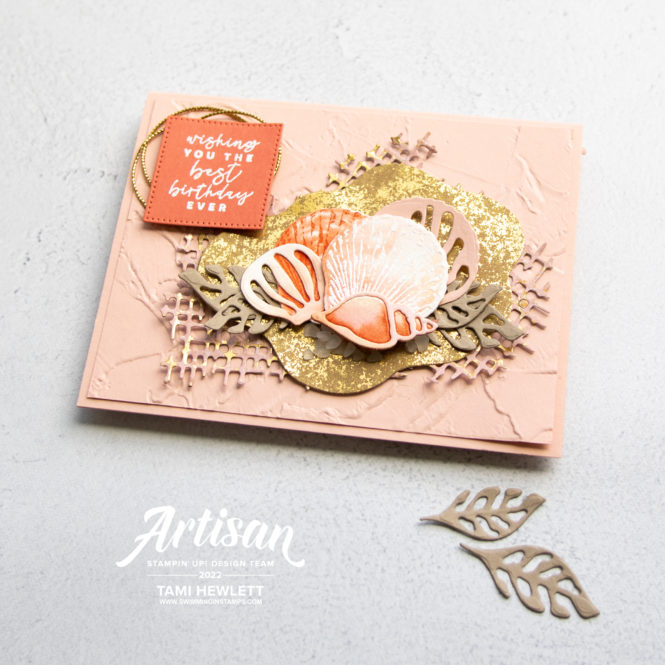
Summer — Wishing You the Best Birthday Ever
My second card has a Summer theme, using a bright, cheerful color combination of Petal Pink, Calypso Coral and gold.

I used a similar wet stamping technique for the large shells. For the darker shell in the back, I inked up the “fill” stamp with Petal Pink and then added Calypso Coral to the edges with a Blending Brush before stamping on wet paper. Then, I stamped the detail shell over the original image with Calypso Coral ink. For the lighter shell, I added less Calypso Coral ink to the edges of the “fill” stamp, and then embossed the detail stamp in white over the original image.

To create the small shell in front, I cut the die from Fluid 100 Watercolor Paper. Then, I added a small strip of old washi tape to the back of the pieces so they would stay together. Next, I watercolored the front with Petal Pink and Calypso Coral ink. Finally, I cut a second “outline” die, which I watercolored very lightly, and adhered over the front of the taped dies.
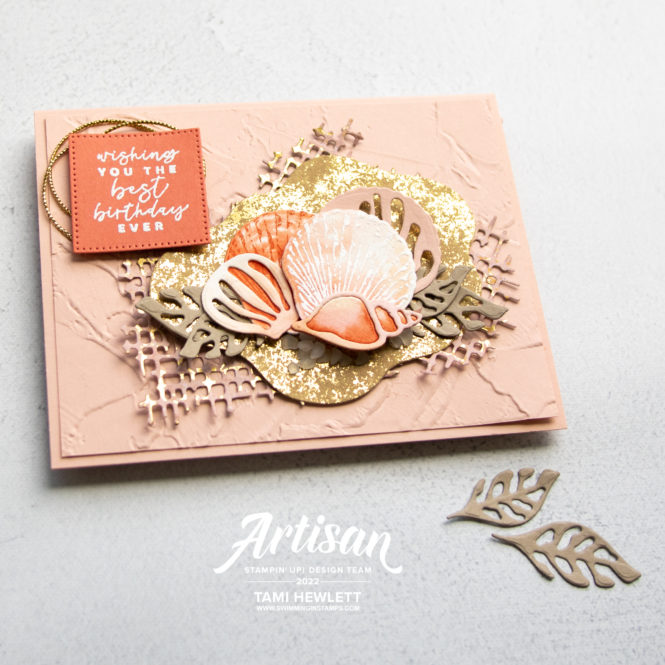
I think a lot of the die-cuts and images in this bundle work for multiple seasons. For example, the “leaves” look great as seaweed on my Summer-themed card.
In the background of this card, I used a Layering Diorama die to cut a piece from Distressed Gold Specialty Paper. Then, on both cards I selected the Painted Texture 3D Embossing Folder to add a subtle dry embossed background.
I hope these cards have inspired you to use the Texture Chic Suite Collection. I’m so glad it’s in the Annual Catalog and that it will be around to enjoy for a long time! My head is spinning with additional ideas.
Have a wonderful and creative day!

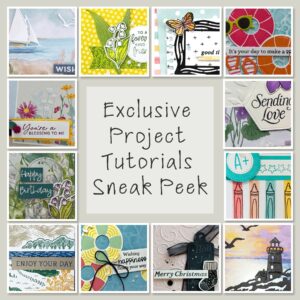
Purchase products from my online store to qualify to receive free exclusive project tutorials. This month’s PDF includes 12 creative tutorials designed by my demonstrator friends and I to inspire your paper crafting! The projects feature products from the May-August 2026 Catalog and current Online Exclusives. Enjoy!
")
")
")

 Specialty Designer Series Paper")
 Specialty Paper")


 Sheer Ribbon")
 Shimmer Ribbon")


Absolutely beautiful cards! So talented!
Thank you CJ! That means a lot.
Thanks so much Donna!
Absolutely love your designs and color combinations!!! Thanks so much for sharing them!