


Hello and welcome to the Stamping Sunday Blog Hop hosted by Sara Levin. I’m Tami Hewlett from the Central Valley in California, and this month our theme is the Peony Garden Suite on pages 82 to 84 of the Stampin’ Up! Annual Catalog.
This elegant suite of products includes exquisitely beautiful stamps, die cuts, designer series papers, embellishments, and ribbon in a classic color combination.

For this blog hop, the designers have the option of designing 1) three cards for beginner, casual, and avid crafters, or 2) a card and a 3-D project. This month, I selected the first option with a focus on showing stepped-up techniques for coloring.
Beginner Crafter:
For my beginner card, I focused on using Blender Pens to color the lovely Peony Garden Designer Series Paper.

Coloring with Blender Pens is super easy and forgiving and perfect for beginner crafters. After cutting the main panel out of Peony Garden Designer Series Paper, I colored one flower with Petal Pink, Flirty Flamingo, and So Saffron ink. Simply squeeze your ink pad to pool ink in the lid, then dip the tip of the Blender Pen into the ink to pick up color. Start coloring at the darkest point. The more you color, the more the ink will fade. Then, simply repeat. To clean the pen between colors, simply draw on scratch paper until the pen runs clear again.

To finish the card, I stamped the sentiment with Basic Gray ink on Gray Granite Cardstock, trimmed it down to 1″, and then used a Banner Triple Punch on the end. I also stamped some of the diamonds with Basic Gray ink on the Basic Gray card base. Easy peasy!
Casual Crafter:
For my casual card, I flipped the orientation of the card to portrait and changed the coloring method to watercoloring with Water Painters.
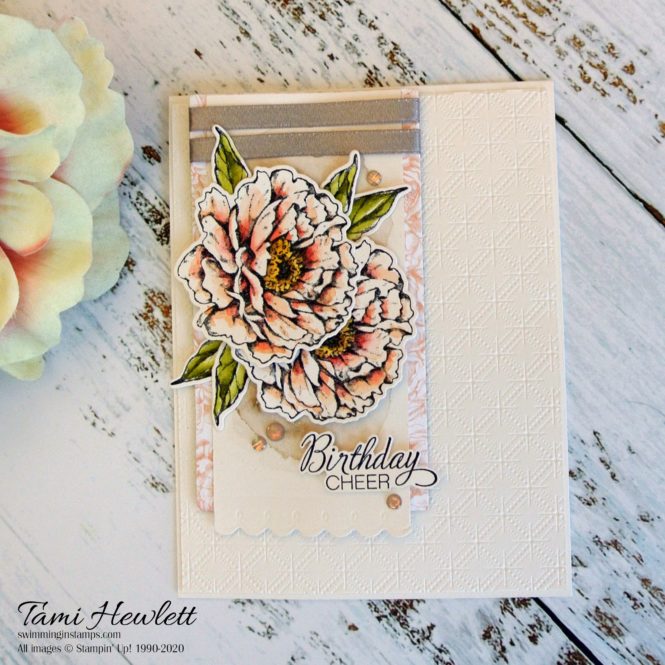
The morning I created these projects, I walked downstairs and remembered that I had a vase of silk Peony flowers on my dining room table! I used one of them as inspiration.
I stamped the flowers with Stazon ink on Shimmery White Cardstock and then watercolored them with Petal Pink, Flirty Flamingo, So Saffron, and Crumb Cake ink. I squeezed my ink pads to pool ink in the lids and then dipped the tip of my smallest Water Painter in the ink to paint. This coloring method is a little more time consuming, and I only painted 3 to 4 petals at a time, starting with a light wash and then adding darker color to the base. When the petal was nearly dry, I added Flirty Flamingo ink as well. Then, I colored the centers with both So Saffron and a little Crumb Cake ink and the leaves with Old Olive ink.
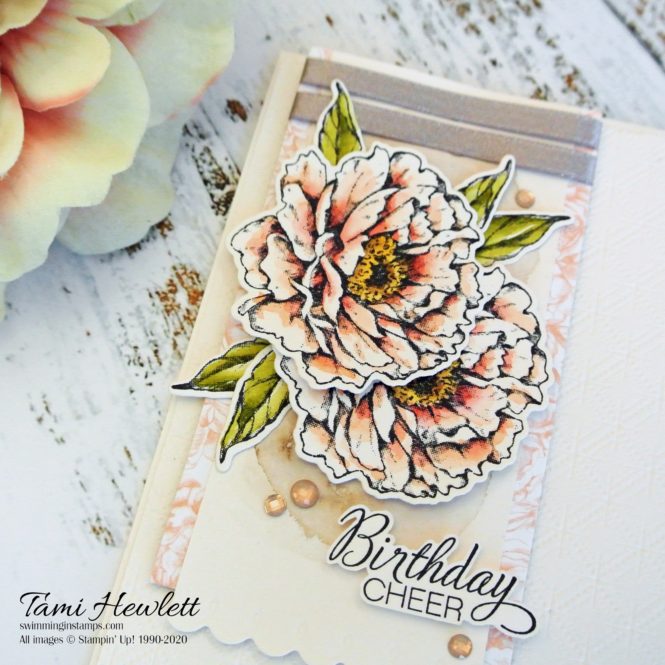
After cutting the edge of the Shimmery White banner with the scalloped Peony Die, I watercolored a quick wash in the background with Gray Granite ink. I like the way this added more depth behind the flowers.
To finish the card, I add an extra dry embossed layer using the Dainty Diamonds 3D Embossing Folder … so delicate and pretty! I also used some of the GORGEOUS Gray Granite 1/4″ Shimmer Ribbon and Elegant Faceted Gems. Can you tell that I sort of LOVE this suite. I’m guilty of buying the whole entire thing (and proud of it!!!)
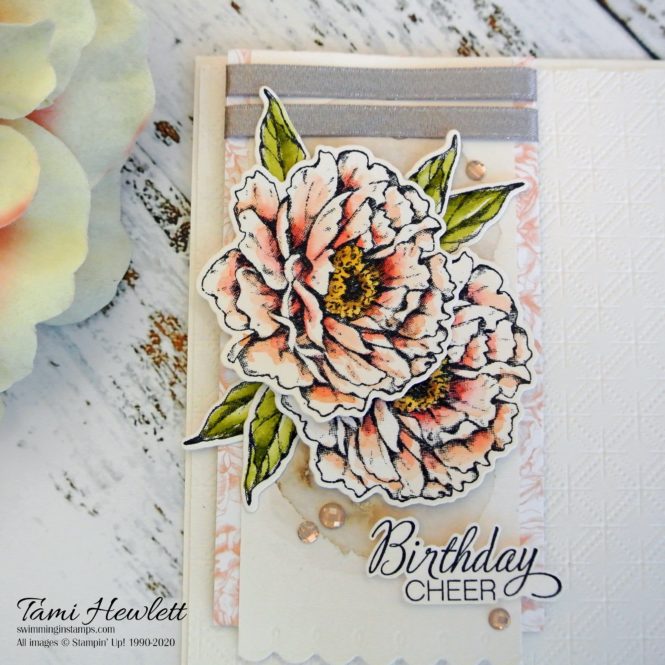
Lastly, I cheated a little and grabbed a sentiment from the Parcels & Petals stamp set because I really needed another birthday card. (We have a lot of July birthdays!)
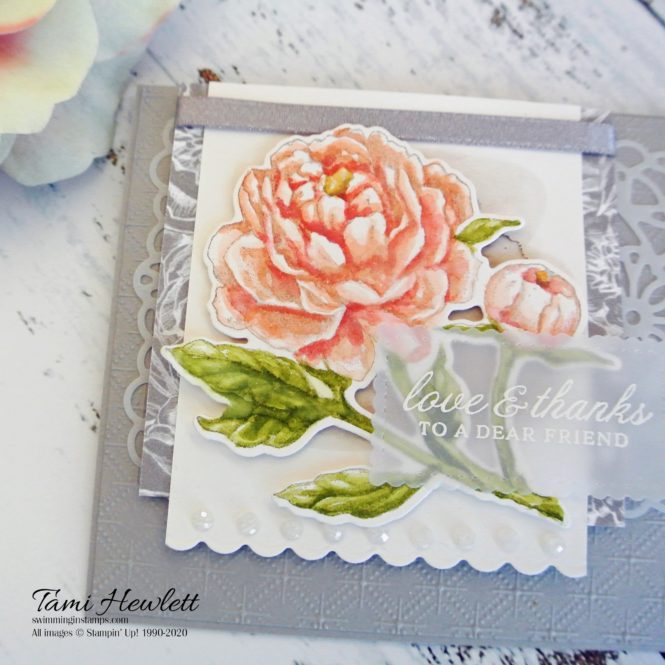
Avid Crafter:
So where do you go from watercoloring? How about No-Line Watercoloring? In my mind, this is the most difficult coloring technique, but I was up for the challenge!
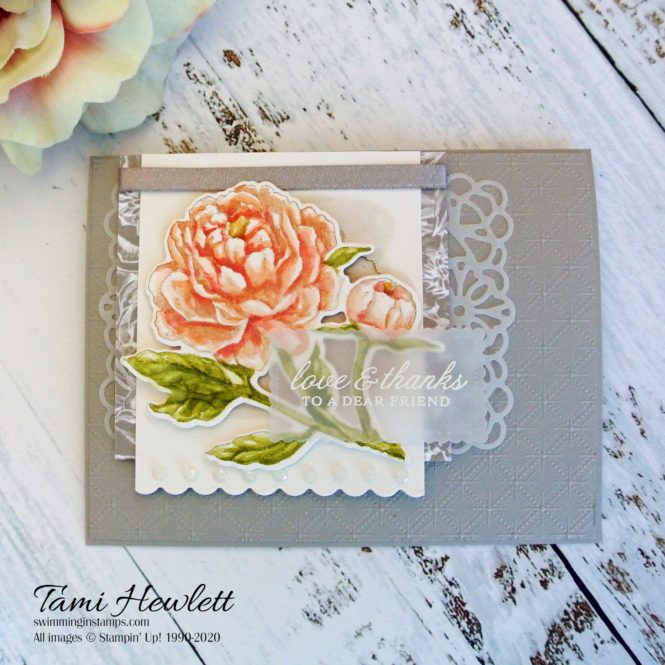
This time, I stamped the flower with Gray Granite ink on Shimmery White Cardstock after stamping off once on scratch paper. The goal of no-line watercoloring is to stamp light enough so you end up not seeing the stamped image after watercoloring, making it look like a real watercolor painting.
As I watercolored, I consciously painted over the stamped lines with the darker colors to make them disappear. I’m actually pretty thrilled with the way this turned out!
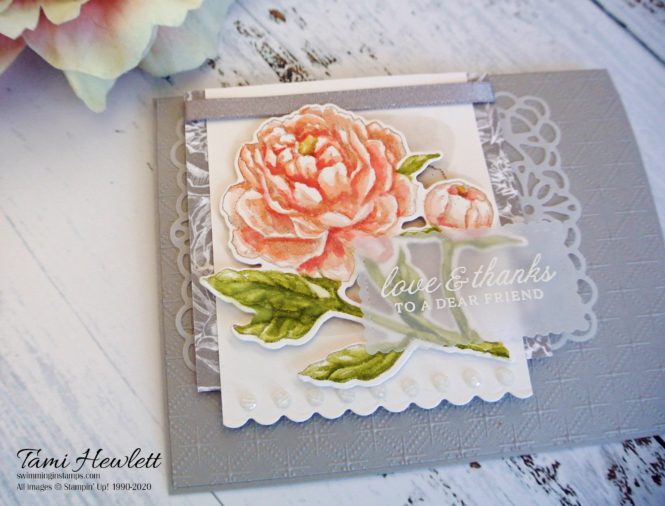
To step up the card even more, I added an extra layer using the beautiful Square Vellum Doilies and a pretty row of Elegant Faceted Gems. Swoon, this suite is sooo my style!
Hope you liked my coloring ideas! Thanks so much for visiting and be sure to continue on through the Stamping Sunday Blog Hop using the links below. I can’t wait to see what these talented ladies come up with!!!
Enjoy your Sunday and happy crafting!

Use the July Host Code MB6CVB73 for purchases at my online store to qualify to receive free exclusive project tutorials and a special thank you card from me. This month’s PDF features 12 tutorials using new products, fun stamping techniques, and new colors!
For every $50 spent at my online store in July, you can earn a $5 Bonus Days Coupon to spend in August! No limits!!! (Must enter valid email on order.)

")

")


 Shimmer Ribbon")

")


")


Oh my goodness Tami these card are absolutely stunning. I am completely on awe of your colouring talents. 😍😍😍😍
Thank you from the bottom of my heart!
Oh Tami, your colouring in all three of these delightful cards is divine! I actually can’t decide which one I like the best, love them all. xxxx
Thank you so much Cheryll! 💕
Tami, the no line water coloring is stunning. WOW. The friend who receives will certainly feel very special.
Thank you Michelle! 💕
Oh Tami … These are absolutely gorgeous!! So very elegant and beautifully tasteful. I love each and every single one and the detail is just wonderful. Fabulous work xx
Thanks so much Mikaela! 💕
Gorgeous, Tami! Your coloring is beautiful. And, I adore the spotlight you created with your coloring on the designer paper.
Thank you Sara!
What a pretty cards have you made.
Love your coloring 😉
Thank you so much Janneke! 💕