


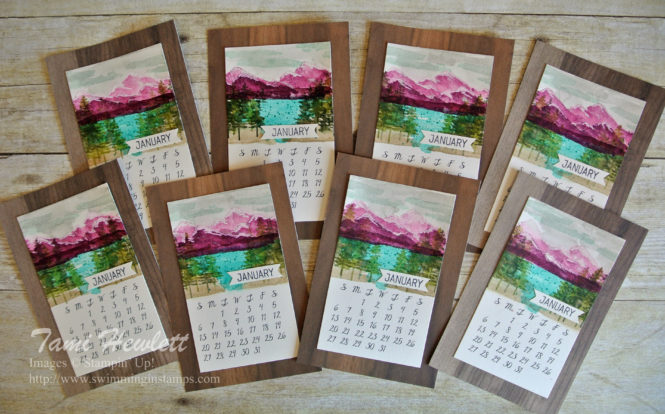
It’s time to start new desktop calendars!!! Each year, I make 4″ x 6″ desktop calendars for my friends and family for Christmas. I start a year ahead of time, so today’s post is my January 2019 calendar. I try to design one calendar page a month so that by the end of the year, I have a whole set to hand out as gifts. I’ve been doing this for so long that I can’t even remember! What I do know is that my friends and family love them and look forward to them each year.
The individual calendar pages fit into any standard 4″ x 6″ frame. I have a stash of acrylic ones I bought at Walmart to include with the gift for the first year. (Afterwards, it just refills.) Typically, I make eight sets so it’s not too overwhelming of a task.

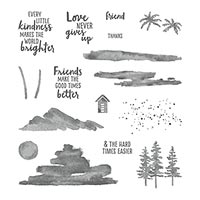
For my January page, I used the Waterfront stamp set. This should be no surprise considering it’s one of my favorites! A lot of times, I like to base the calendars on some of my favorite cards so I can stare at them for a whole month the following year! Frequently, I visit my mom in Mammoth Lakes in January, so this page makes me think of her. Usually, there’s more snow than this, but I’m just going with it!!!
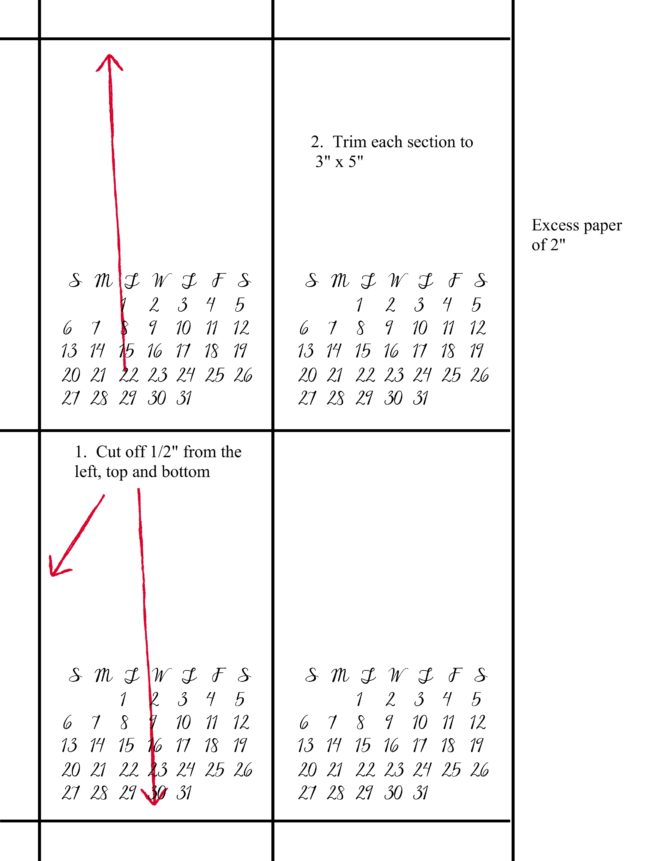
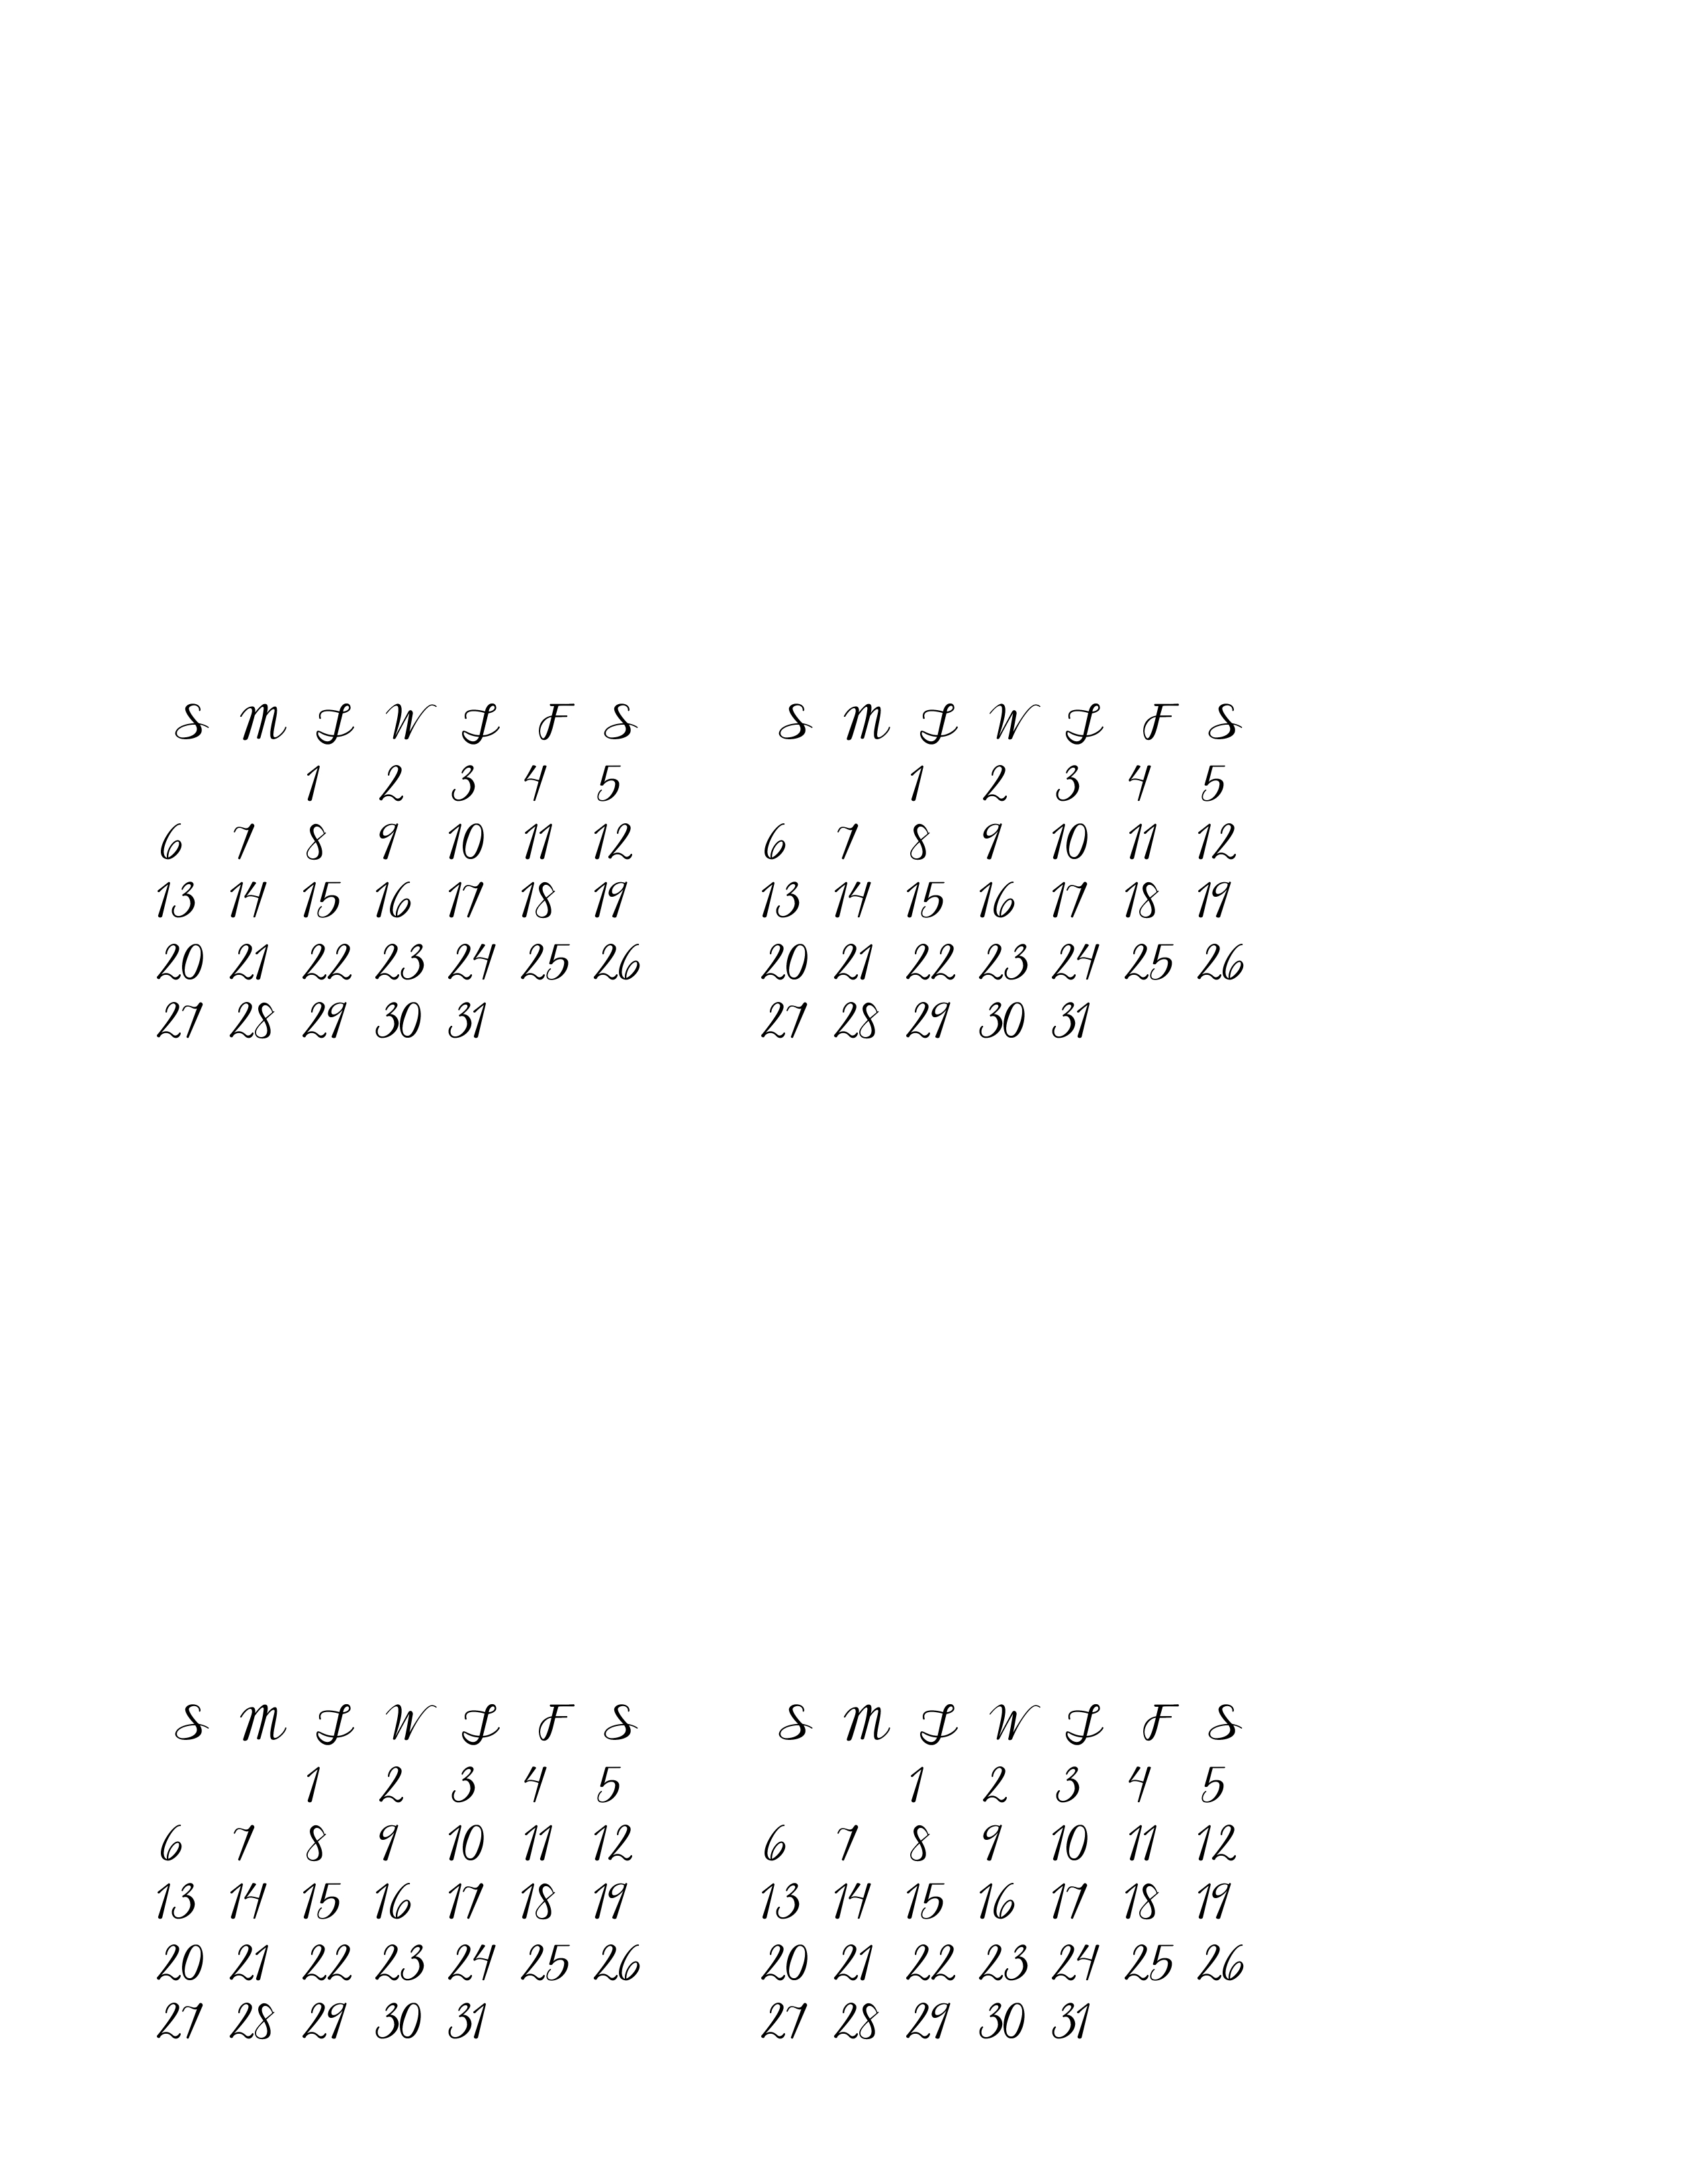
I have a link to a printable calendar page below, as well as instructions on how to cut four calendar layers out of each 8-1/2″ x 11″ sheet. For January, I printed the calendars on Shimmery White Paper so I could watercolor.

I started with the mountains using Rich Razzleberry ink. I inked up the mountain stamp, then used an Aqua Painter to brush clear water over the stamp before stamping it on the left about halfway up. Adding the water to the ink on the stamp really makes the stamped image look watercolored. You will need to play around with this technique on some scratch paper to determine the right amount of water to add. Less will give you a slightly watercolored look. More may result in hardly recognizing the image. It really depends on what you’re trying to achieve. I used this technique for all the waterfront stamped images on this page, except the splatters and the month, so from here on out, I’ll just let you know if I used full strength ink or how many times I stamped off.
For the mountain on the right, I stamped off once. And then for far mountain on the left, I stamped off twice. Afterwards, I stamped the straight brush stroke with Rich Razzleberry straight across the whole page to act as a horizon line below the mountains.
Next, I stamped the large brush stroke stamp with Bermuda Bay ink, stamping off once to form the lake. Then, I flipped it upside down and used that same stamp with Crumb Cake ink to stamp the ground on both sides of the lake. Afterwards, I used that same stamp with Pool Party ink to fill in the sky. Depending on the positioning of the mountains, I stamped two or three times to fill in most the sky. I learned with this stamp that I liked it better when I kept the brush strokes fairly horizontal. That’s my taste though, yours might differ.

For the trees, I stamped with Old Olive. For the background trees higher up, I only inked the top of the trees to make them look smaller and further away in the distance. Then, I stamped darker trees with Always Artichoke ink using the same method.
I highlighted the sky with the double brushstroke stamp and Smoky Slate ink. After everything was dry, I used the splatter stamp (and no Aqua Painter or water this time) to stamp the lake with Bermuda Bay ink.
For the final touch, I used a White Signo Gel Pen to draw white highlights on the mountains. This is a retired product. You can buy them at Art stores like Michaels, or you could try using Stampin’ Up!’s Chalk Marker.
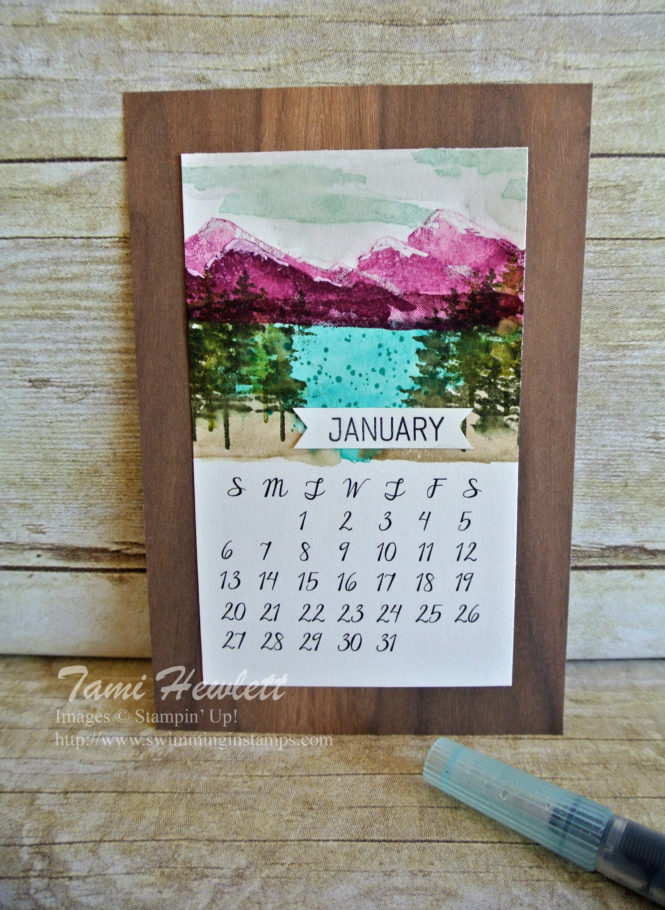
For the January label, I used a retired stamp set called Project Life Date It. I stamped it with Basic Black Archival ink on Shimmery White Paper, and then punched it out with a Classic Label Punch. To shorten the label and create Vs, I re-punched the ends.
Lastly, I mounted my calendar layer on Wood Textures Designer Series Paper.
I created a printable calendar page on My Memories Suite. To download the JPEG, click HERE. Print the JPEG on 8-1/2″ x 11″ Shimmery White cardstock with the smallest margins possible for your printer. This page has black days of the week and numbers, so you don’t need color. Each sheet will make 4 calendar layers. Trim each one down to 3″ x 5″ as follows:
Supplies used on my calendar page:


