


Hello and welcome to my blog! I’m Tami Hewlett from the Artisan Design Team, and today I’m sharing a fun Pastel Watercoloring technique. Stampin’ Up! shared this project on its Facebook Page yesterday, so I’m super excited to demonstrate how I accomplished this simple technique. It’s WAY easier than it looks.
I love experimenting with new coloring techniques, so when I got the new chalk pastels I started looking for some non-traditional ways to use them. I was so excited when I found this technique on Pinterest and decided to give it a try.
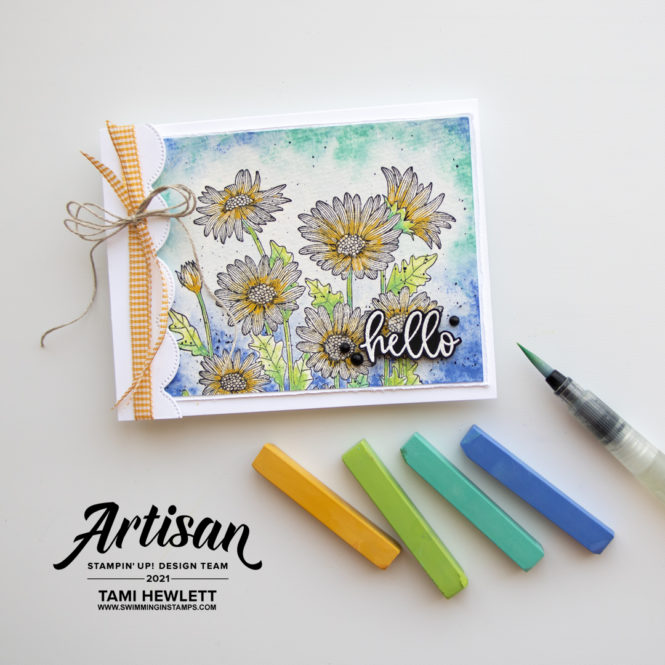
My card features the Daisy Garden Cling stamp. It’s one big background stamp with lots of pretty details. I stamped it with Jet Black Stazon Ink on Fluid 100 Watercolor Paper using a Stamparatus. The Stamparatus allowed me to stamp multiple times in the exact same place to ensure I got good ink coverage on the textured watercolor paper. Stazon ink is perfect for any technique that includes water, because it won’t run.
I started with the background by randomly coloring the chalk directly onto the watercolor paper. Then, I used a Water Painter to add water and blend. Once the paper was wet, I reapplied the chalk in the darker areas for more contrast.
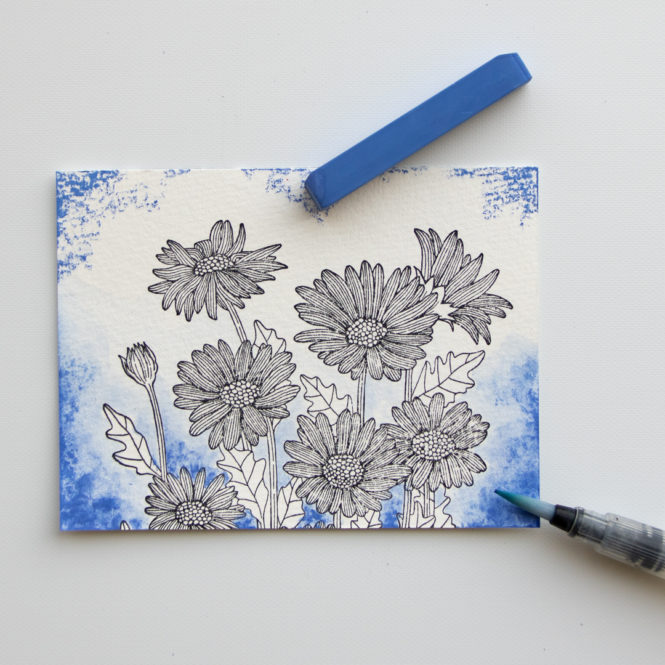
Next, I added a second color to the background using the same process.
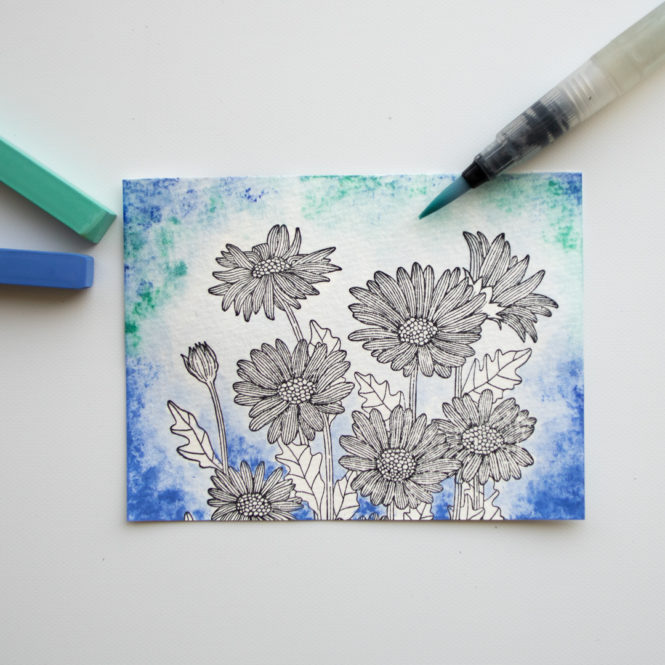
For smaller and more detailed areas, I crushed the chalk pastel on an acrylic block, added a little water, and mixed it together to create a paste. Then, I used a Water Painter to “paint” the detailed area. The process is almost like watercoloring, but the “chalk paste” is far more opaque, so I found that I needed to add color with a light hand.
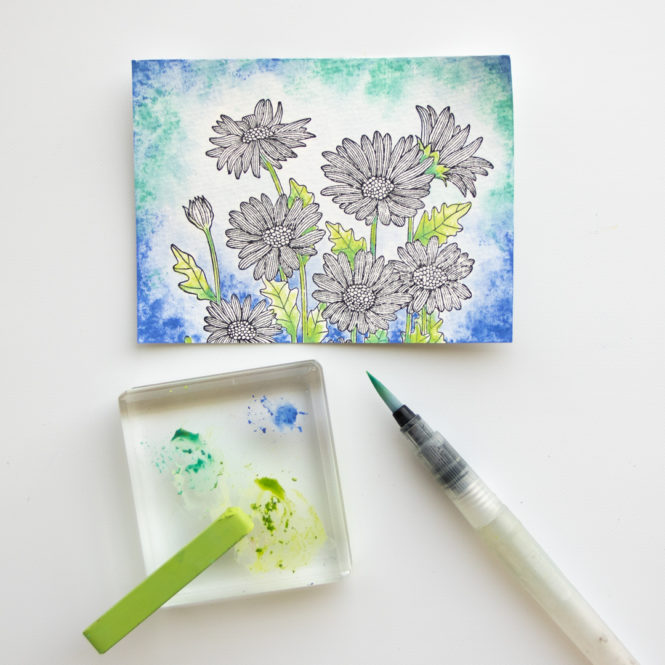
Then, I added some yellow chalk to the flower centers in a similar manner. I also cleaned up the centers of the flowers with a Chalk Marker.
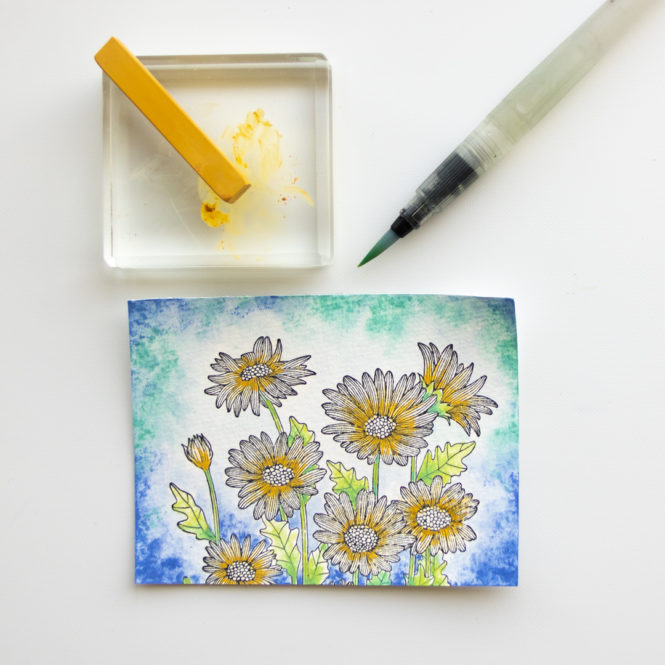
Finally, I splattered the entire layer with a Basic Black Stampin’ Write Marker by flicking the brush end against the cap.
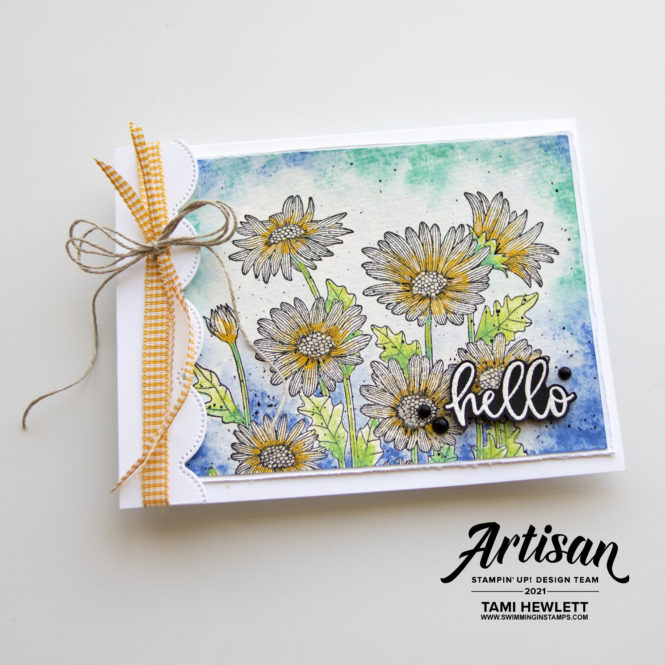
To complete the card, I adhered the chalk pastel layer to a second, slightly larger layer with edges I had distressed with the blade of my scissors.
Then, I added a Basic White layer on the left side, cut with the Scalloped Contours die border, which I had tied with some 1/4″ Bumblebee Gingham Ribbon and Linen Thread.

The final touch was a white embossed sentiment stamped with the Biggest Wishes stamp on Basic Black Cardstock and some Matte Black Dots.
Chalk Pastels are vibrant and beautiful, and you’ll find all kinds of coloring techniques on social media. Check out the Stampin’ Up Facebook and Instagram pages for several great ideas from the Artisan Design Team. I know you’ll love these pastels as much as I do.
Have a wonderful and creative day!

Use Host Code RJGMM6GK for purchases at my online store to qualify to receive free exclusive project tutorials and a special thank you card from me. This month’s PDF features 12 fantastic tutorials that include a huge variety of products and techniques! I just know you’re going to love them!!! (Please note that Host Codes are only valid for 30 days. You can always find the current Host Code on the right side bar of my blog.)

")


