


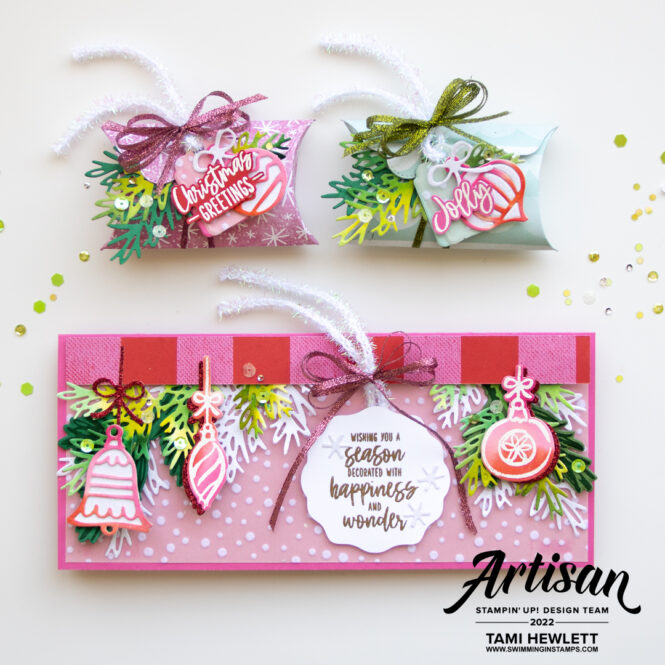
Hello! I’m Tami Hewlett from California, USA, and today I’m sharing my August Artisan Design Team projects featuring the Decorated With Happiness Bundle. This bundle is super versatile and includes beautiful watercolored images and a variety of great dies. I really enjoyed working with it!
Be sure to check out the Stampin’ Up! Facebook page to see all the Artisans’ amazing projects featuring this awesome bundle.
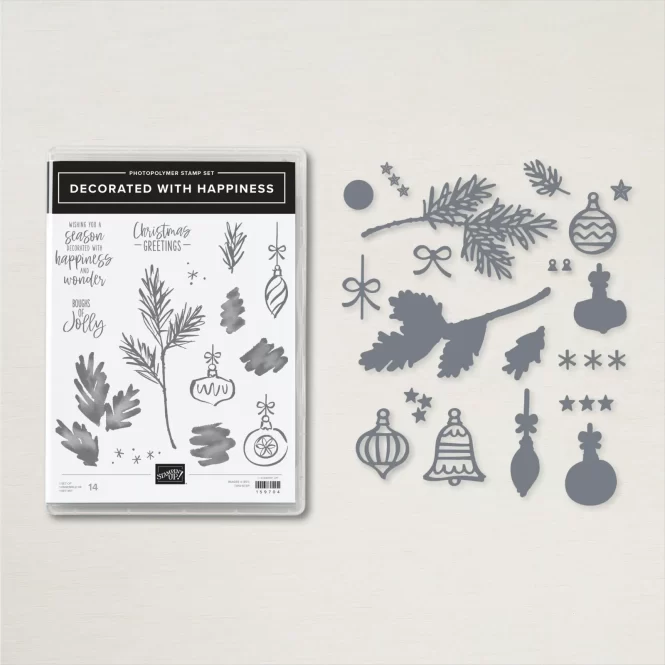
You can find the Decorated With Happiness Bundle on page 27 of the July-December Mini Catalog. It includes the Decorated With Happiness Photopolymer Stamp Set and coordinating Decorated Pines Dies. The outline images have coordinating brushstroke “fill” stamps to use individually or for two-step stamping. I also love the delicate die-cuts!
Festive Slimline Card:
My first project is a slimline card! I love this style, because it gives me extra room for lots of pretty decorations. On this card, I focused on the lovely Decorated Pines Dies. I pre-painted Fluid 100 Watercolor Paper with Shaded Spruce, Garden Green, and Granny Apple Green ink and then used the sheet to cut out the pine dies.
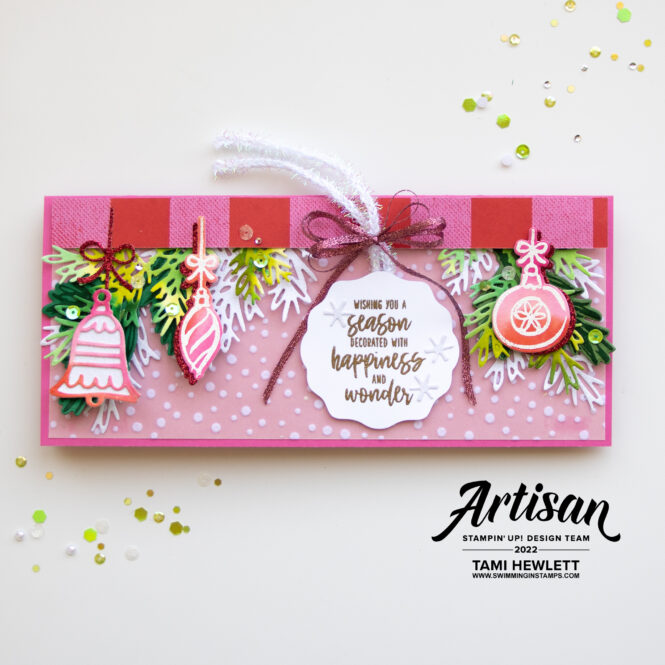
My color combination was inspired by the Host Celebrate Everything 12″ x 12″ Designer Series Paper on page 87 of the July-December Mini Catalog. This paper is a hidden gem! It includes 48 sheets of beautifully colored sheets (4 of 12 designs) for just about every occasion. I love the bright colors including the Poppy Parade and Polished Pink sheet that I used along the top of my card. You can earn this paper when you host a workshop or place an individual order over $150.00.
I also used some Snowflake12″ x 12″ Specialty Vellum in the background. I love how it adds a subtle softness to the card.
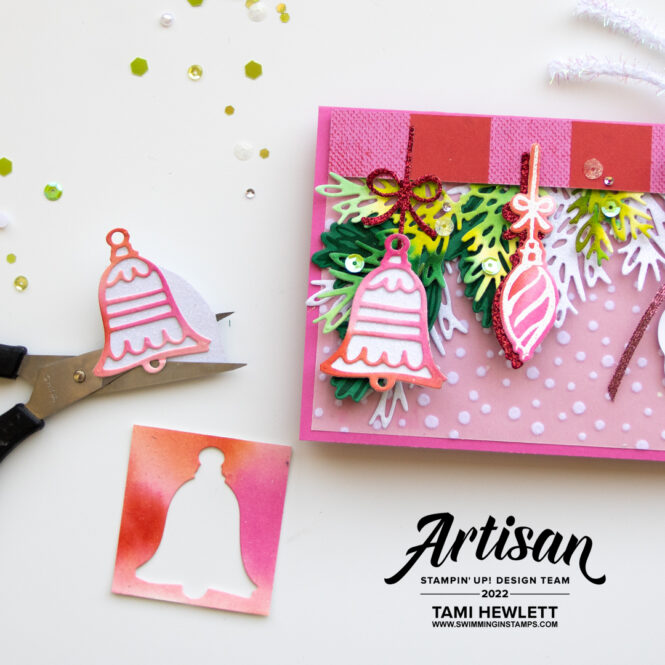
For the ornaments, I watercolored another sheet of Fluid 100 Watercolor Paper with Polished Pink and Poppy Parade ink and used it for my die-cuts. For some of the ornaments, I embossed the images in white and simply cut them out with the coordinating dies. For the detailed ornament die-cut, I added some White Glimmer Paper behind it. First, I used Multipurpose Liquid Glue to adhere the die-cut to the glimmer paper and then I placed my Paper Snips between the two layers and slightly undercut the bottom layer.
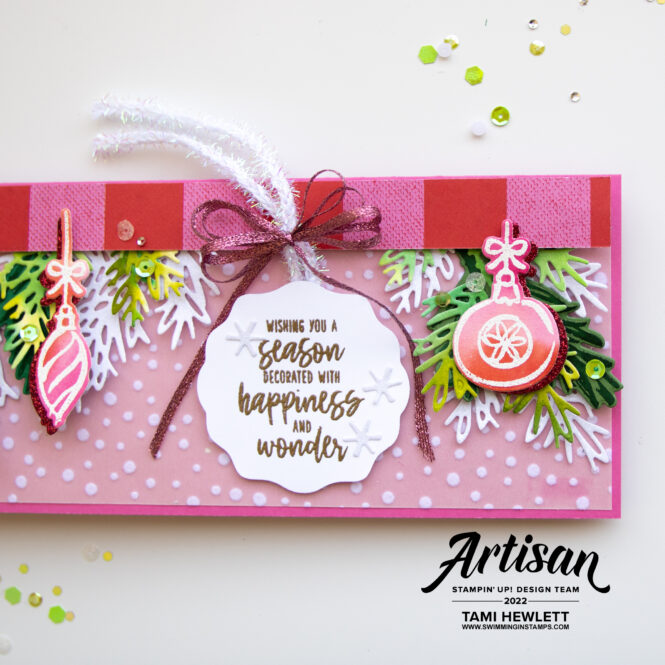
To create my label, I used the Decorative Circle Punch. The shape looked like another ornament, so I decided to build on that thought and add a tie and bow on top. Don’t you just love the 3/16″ Iridescent Trim? It’s so festive and perfect for holiday projects!
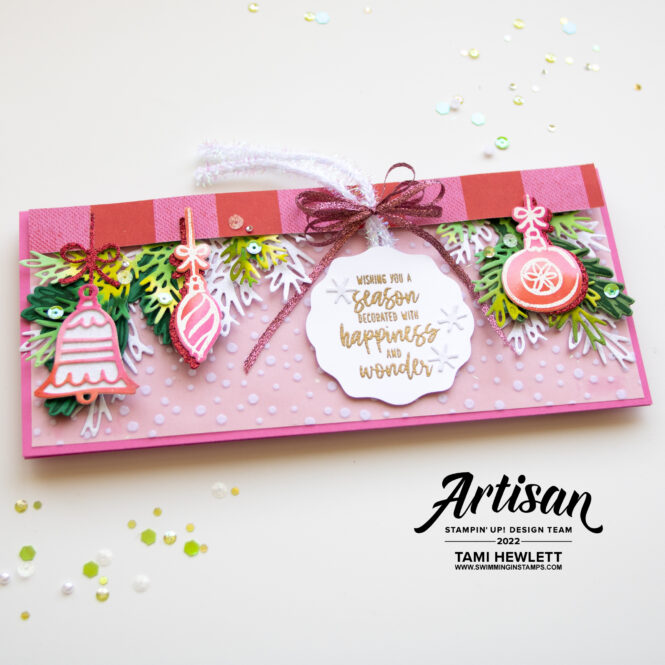
I love sparkle and glimmer on holiday cards, so I finished off the card by adding some Red Glimmer Paper and For Everything Fancy Sequins:)
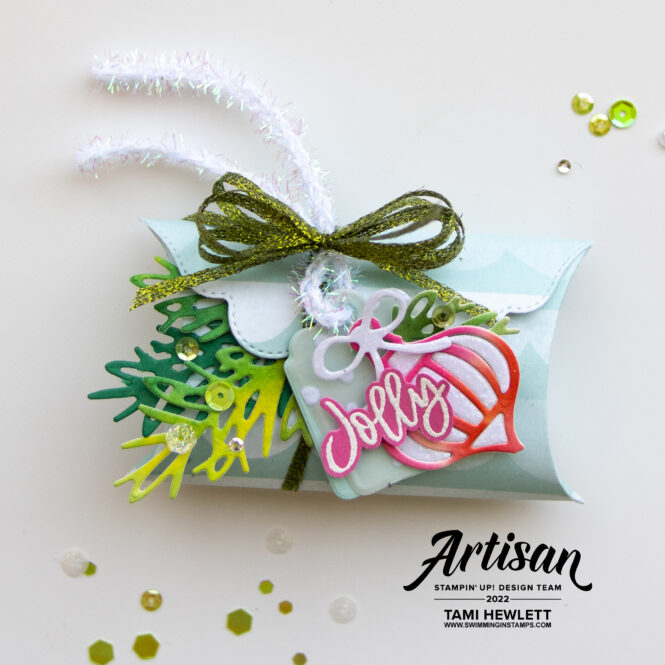
Pretty Pillowbox Gifts:
Next, I created two small gift boxes using the Pretty Pillowbox Dies and more sheets of Celebrate Everything DSP! These boxes would be great for small Christmas treats, party favors, or even table decorations.
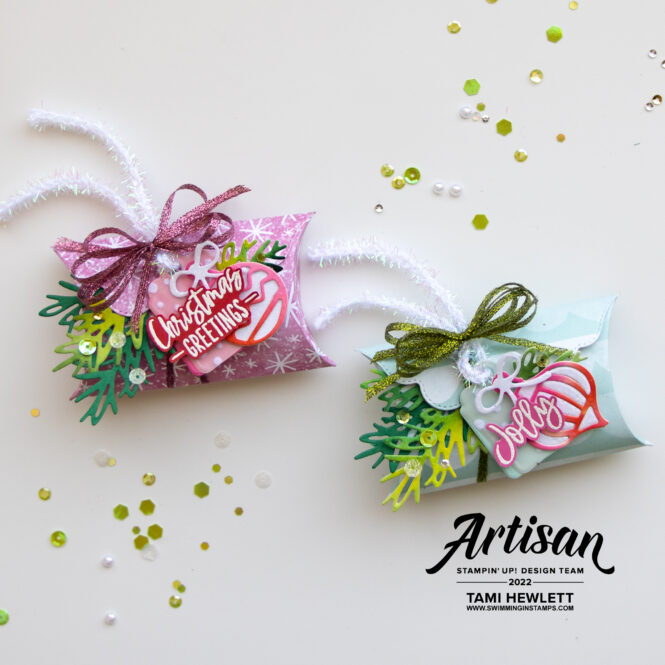
To assemble the boxes, cut out one large die-cut and use your fingers to gently fold the indentations left by the die. Afterwards, I used a Bone Folder to gently round out the shape of the box. Then, to adhere the box sides, I used Multipurpose Liquid Glue. The glue gave me a little time to make small adjustments and get the pieces lined up perfectly.
That cute little tag is included in the Pretty Pillowbox Dies. I cut one from plain cardstock and one from Snowflake Specialty Vellum to layer on each box.
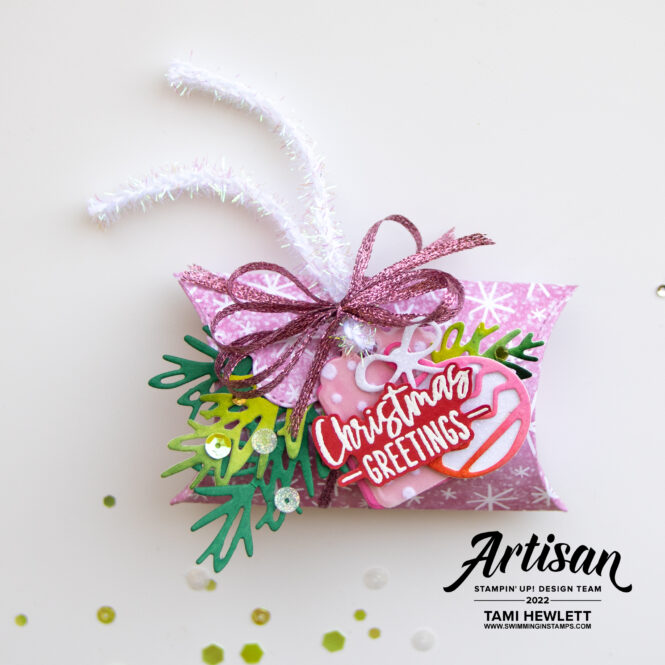
Next, I stamped and embossed the greetings in white and fussy cut them to layer on the tags.
And finally, I layered more watercolored pine die-cuts.
On the box below, I show another way to add White Glimmer Paper behind the detailed ornament die-cut. This time, I used the die on both watercolor paper and glimmer paper. Then, I placed the glimmer paper pieces in the holes and used Washi tape to secure the pieces on the back.
The Decorated With Happiness Bundle is super fun and festive and I can’t wait to use it again. I hope these projects demonstrate some of the possibilities.
Have a wonderful and creative day!

Purchase products from my online store to qualify to receive free exclusive project tutorials. This month’s PDF includes 12 creative tutorials designed by my demonstrator friends and I to inspire your paper crafting! The projects feature products from the May-August 2026 Catalog and current Online Exclusives. Enjoy!
")
")


 Designer Series Paper")
 Specialty Vellum")
 Glimmer Paper")


 Metallic Woven Ribbon")
 Metallic Woven Ribbon")
 Iridescent Trim")


")


Beautiful as always! I love, love, love your style and have CASED it a few times. Thanks for the inspiration.
Love this stamp set. It;s on my wish list. Such beautiful projects. Just right for stocking gifts. Thank you for sharing.
Thanks so much my friend!!!