Welcome to the October Stamping Sunday Blog Hop. This month, our theme is “Treats Not Tricks” or packaging for any occasion. I decided to break out the Cottage Wreaths Bundle and create a bunch of Fall-themed treat bags! Stampin’ Up! has such a great collection of gift packaging products; I had a lot of fun picking different ones for each project.
Whether you’re already following along or just starting here, be sure to continue on through the rest of the blog hop by clicking on the navigation buttons at the bottom of this post.
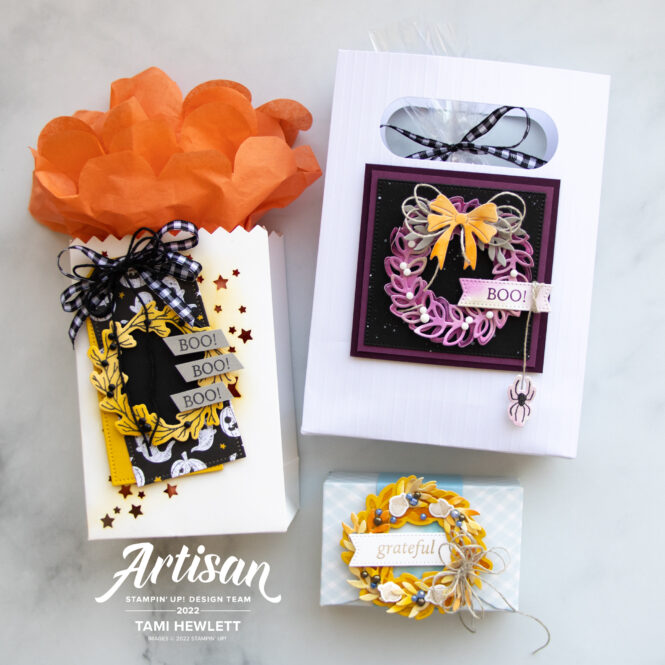
Halloween Stars Treat Bag:
My first project is a Stars Treat Bag filled with Halloween goodies. These bags are the perfect size for a couple handfuls of small candies.
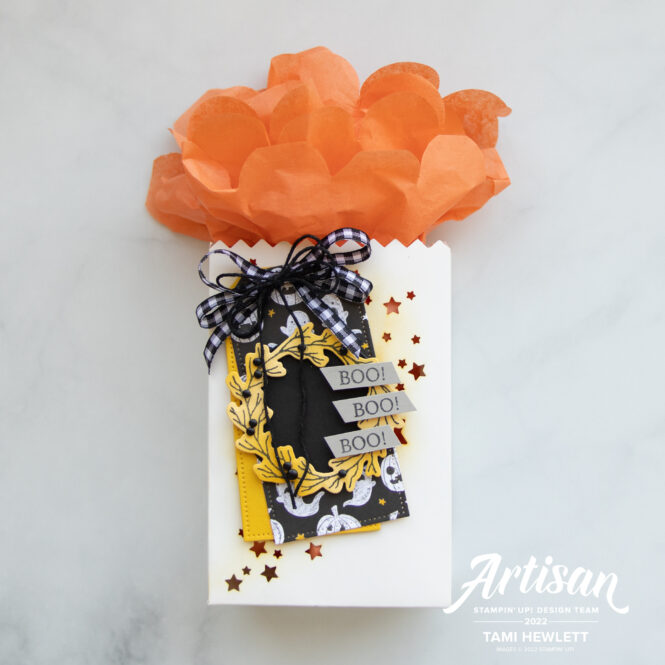
Before filling the bag, I used a Blending Brush to apply Crushed Curry ink over the stars. Then, I used the Tailor Made Tags Dies to cut two tags from Celebrate Everything Designer Series Paper and Crushed Curry Cardstock. I stamped the wreath on So Saffron Cardstock, and then used a Blending Brush to add variegation with Crushed Curry ink. Lastly, I stamped each “Boo” on Gray Granite Cardstock and trimmed them close.
The final touches included some black Classic Matte Dots and a bow of Black & White Gingham Ribbon and black baker’s twine.
Scary Embossed Treat Bag:
My next project is an Embossed Treat Bag. I wish the dry embossing on this bag showed up better in the photos. They are super pretty! This bag is a little bigger than the last one, so I was able to fill a 6″ x 9″ Cello Bag with Halloween candy, tie the top with more of that cute Black & White Gingham Ribbon, and insert it inside the treat bag.
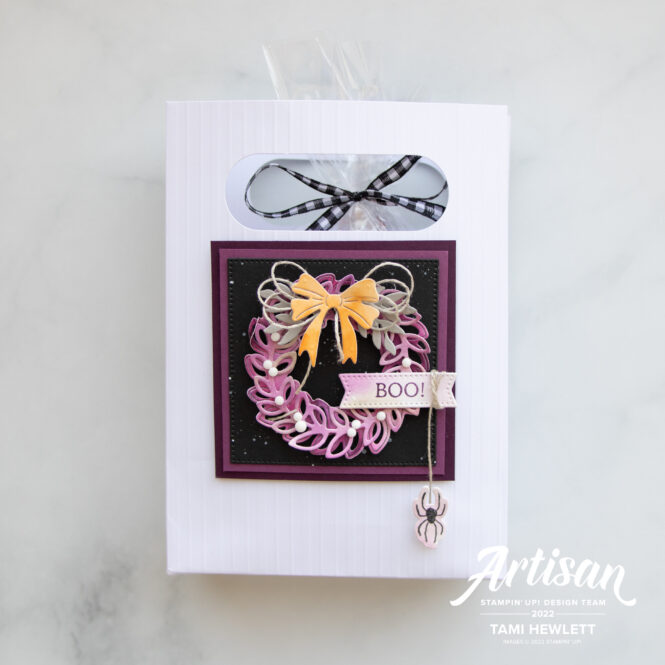
For my wreath, I used some techniques demonstrated during World Card Making Day last weekend. I pre-watercolored three different pieces of Shimmery White Cardstock and used them to cut the two wreaths and bow. For the bottom wreath, I used Blackberry Bliss, Rich Razzleberry and Gray Granite ink and purposely painted them fairly dark. For the top wreath, I used the same colors, but painted lighter and left some white spaces. After cutting out the top wreath, I used that same sheet to stamp the sentiment and spider. Then, for the bow, I pre-painted the Shimmery White with Pumpkin Pie ink.
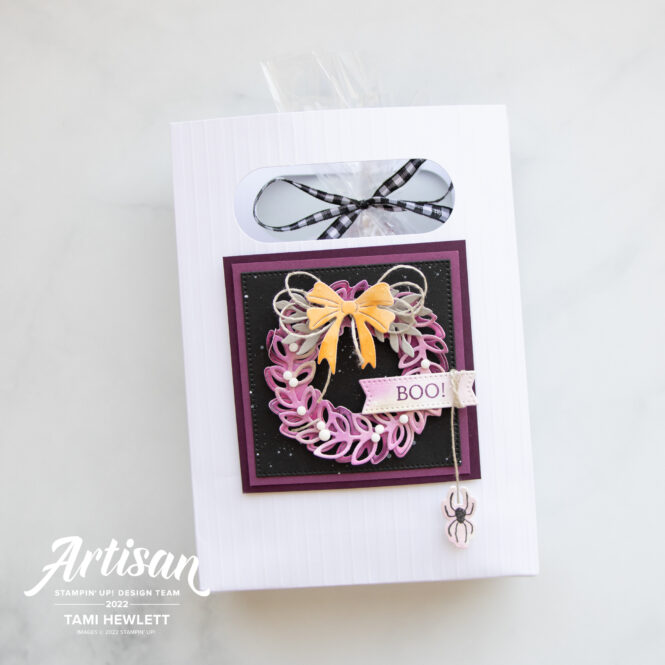
In the background, I layered squares of Blackberry Bliss, Rich Razzleberry and Basic Black Cardstock. Then, for a little more pizzazz, I splattered the black square with white craft ink. Final touches were some Gray Granite sprig die-cuts, a Linen Thread bow, and white Matte Decorative Dots. And, of course I had to add that cute little spider.
Grateful Envelope Treat Box:
My last project is an envelope treat box. These are so cute! They are the perfect size for small favors and hold about 2-4 candies depending on the size. They’re also super easy to assemble.

Prior to assembling my box, I used a light Balmy Blue Stampin’ Write Marker to hand draw all the stripes in a criss-cross pattern. I saw this idea on Stampin’ Up!’s Instagram Page and loved the idea, so I thought I’d try it. As you can see, my stripes are not perfect and this part of the charm.
To build this wreath, I stamped the bottom layer on Crushed Curry Cardstock. I inked up the stamp with Pumpkin Pie ink then used a Blender Brush to add Crumb Cake ink to a few sections, and finally gave the stamp a little spritz before stamping.
Next, I watercolored a layer of Shimmery White Cardstock with Crushed Curry, Pumpkin Pie, and Crumb Cake ink and used it to cut out the leaf die-cuts. I also stamped the acorns with Crumb Cake on Shimmery White Cardstock.
Final touches were some Iridescent Pearls that I colored with a light Night of Navy Stampin’ Blends Marker, some Rustic Metallic Dots, and a Linen Thread Bow.

Be sure to continue on through the rest of the Stamping Sunday Blog Hop to see the other designers’ festive treats! (If you are looking at this post via email, you may need to click on it so it goes to my actual blog.)
Stampin’ Sunday Blog Hop Designers:
Have a great day!

Purchase products from my online store to qualify to receive free exclusive project tutorials. This month’s PDF includes 12 creative tutorials designed by my demonstrator friends and I to inspire your paper crafting! The projects feature products from the 2025 Annual Catalog, Online Exclusives, and January-April Mini Catalog. Enjoy!
