


Hello and welcome to the Control Freaks Blog Hop for June! This month, we are featuring products from the new Stampin’ Up! Annual Catalog. I selected a fun, “beachy” stamp set called Seaside View found on page 46.
If you’re already following the bog hop, then you just came from Melissa Davies’ blog. For lots more inspiration, be sure to continue through the entire Control Freaks Blog Hop by clicking on the button at the bottom of this post.
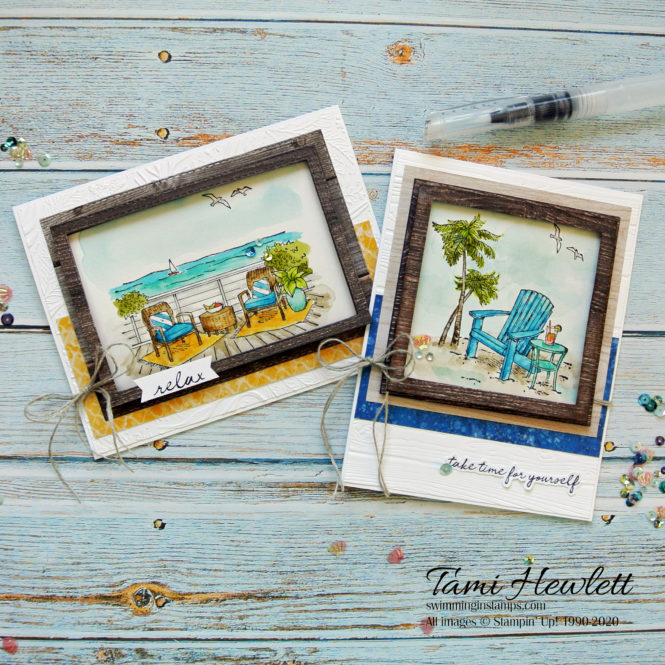
For both card, I created watercolored images framed with wood designs using In Good Taste Designer Series Paper. I’m quickly learning that this is my favorite paper pack! I seem to be reaching for it every time I craft.

I stamped the images with Stazon Ink on Shimmery White Cardstock and watercolored with bright colors using Water Painters. Simply squeeze your ink pads to pool ink in the lids or use an acrylic block to press into the pad and gather ink. Then, use Water Painters to mix a little water with the ink and paint away. I like having a paper towel nearby to control the flow of water and mop up mistakes. Start with light colors and then add darker layers.
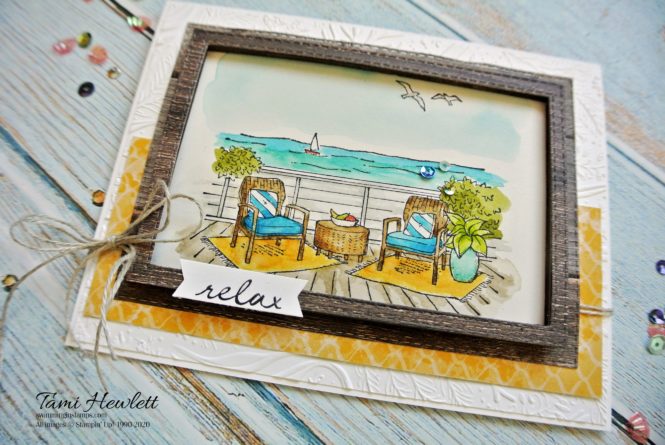
To build the frames, I cut layers of In Good Taste Designer Series Paper with either Stitched Rectangle Dies or Layering Squares Dies. (For the square frame, I only used the largest die for the inside square. The rest was cut with a Paper Trimmer.) Then, I popped up the frames with Foam Adhesive Strips. I decided I wanted to color the sides of the foam with a Dark Soft Suede Stampin’ Blend Marker to hide the stark white foam. However, there was a learning curve, so here are some suggestions based on my mistakes!
Tips: Color the foam sides first with the brush end of the marker, BEFORE adhering the foam to the frames! That way, you can avoid accidentally writing on the backside of the frames with the Stampin’ Blends Marker and having the color bleed through to the front side. On the first one, I made that mistake, and then I tried to correct it with a Color Lifter. That worked, but it also got the frame so wet that the adhesive stopped sticking!!! In the end, it all worked out, but it was definitely easier to color the sides ahead of time!!! Haha!

In the background, I used the new Seabed 3D Embossing Folder on the first card and Pinewoods Planks 3D Embossing Folder on the second card. I also layered some strips of Whale of A Time 6″ x 6″ Designer Series Paper and added a few of the coordinating sequins as well. Don’t you just love that little shell sequin?
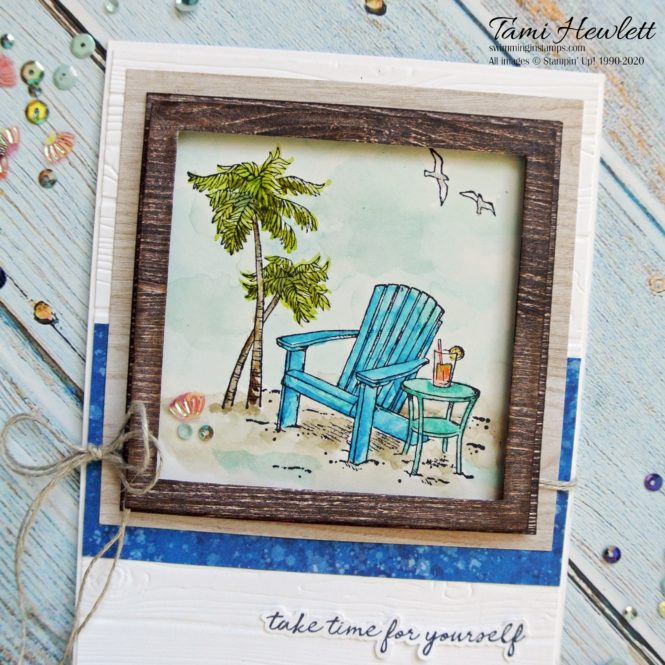
I’m going to use one of these cards for a co-worker who is retiring soon and loves the ocean. I decided to only include the word “Relax” on the one card, versus the whole sentiment, so I used a Basic Black Stampin’ Write Marker to add ink directly to the rubber for just to that one word.
Be sure to continue on through the rest of the Control Freaks Blog Hop by clicking the button below. Next up is LeeAnn Greff! I can’t wait to see her amazing project!!!
Have a wonderful and creative day!


 Designer Series Paper")


WOW! These are absolutely gorgeous, Tami! Thanks for sharing, especially the tip for coloring the foam strips.
Thank you Debra! 💕
Beautiful cards – it seems like utopia!
Thanks so much Connie! Let’s go!!!