


Welcome to the September Stamping Sunday Blog Hop. This month, our theme is Unfold Funfolds. I have to admit that I don’t make fun fold cards very often, and they intimidate me a little. Lately, I’ve tried to push myself to create more and even focused a whole class on them a few months ago. I recently saw a video by Stampin’ Up! CEO Sara Douglass who demonstrated a couple fun fold designs used for the Million Dollar Achievers and thought I’d use one of those designs here.
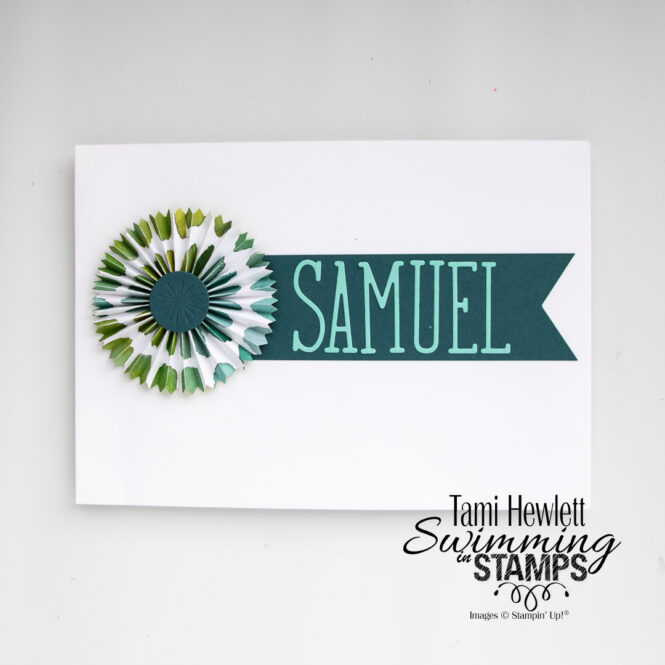
This card is a special one for my son who just turned 30!
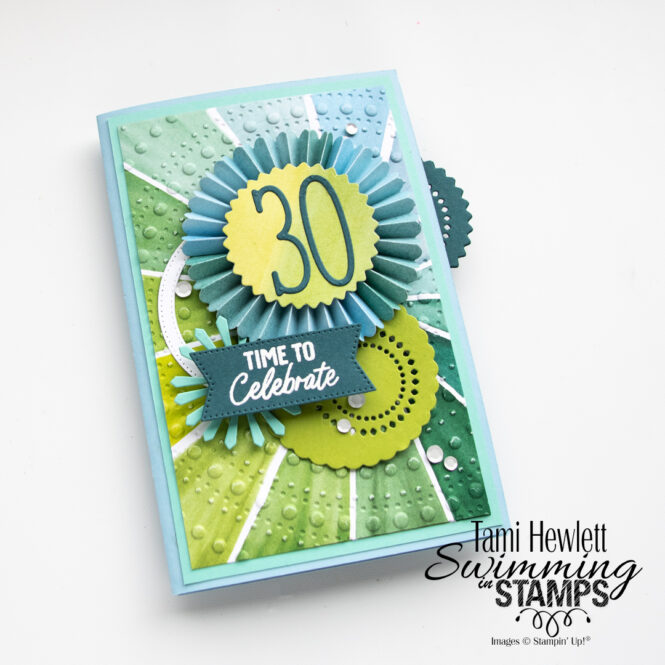
I used the Round We Go Bundle and Full Of Life Designer Series Paper to create this card. Both are so fun and festive and work well for both female and masculine cards.
The card measures 4-1/2″ x 6-1/2″ excluding the circle to pull open the card. The oversized shape worked well with the 6″ x 6″ DSP and gave me lots of space to decorate. Also, I happened to have some 5″ x 7″ envelopes on hand that fit perfectly. But, you could also elect to make a custom envelope.
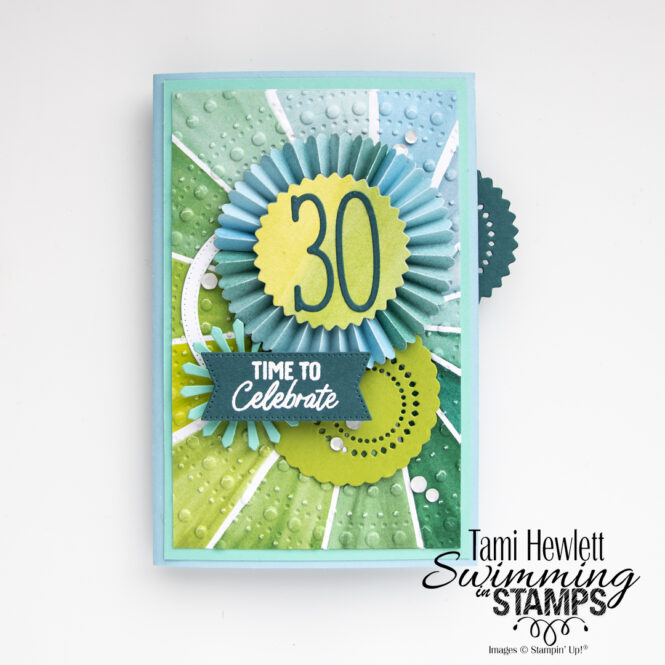
I started by dry embossing the background layer with the Dotted Circles 3D Embossing Folder. The large size made it easy to align the center of the dots with the design of the paper.
Next, I created my rosette. I cut three die-cut strips from a different pattern of the Full Of Life DSP. (Three makes for a really full rosette.) I adhered the pieces together with Tear & Tape and then formed the rosette and glued the back to a circle die. Tip: Use a large acrylic block to weigh down the rosette while it dries. Afterwards, I flipped the rosette over and glued the top circle in a similar fashion.
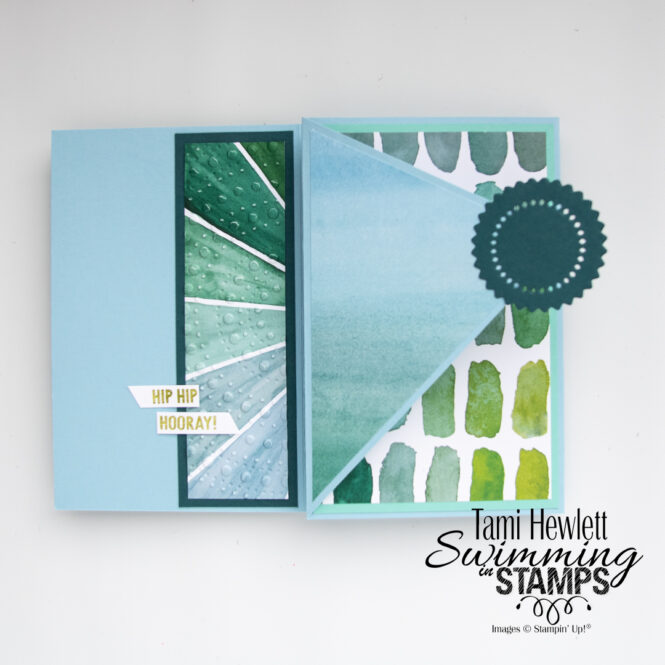
This is what the card looks like with the front flap open:
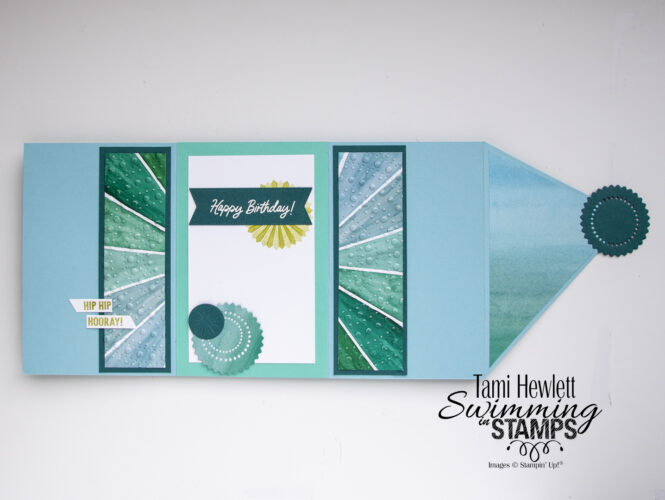
Then, pull the circle die and it opens all the way.
I decorated several sides with layers of the Full Of Life DSP with similar colors. I also used the Round We Go circle dies to cut multiple layers, including the pull tab.
Under the Happy Birthday, I stamped the pinwheel once full strength with Granny Apple Green ink and then rotated it and stamped it again without re-inking. I love all the great birthday-themed stamps in this set!
I made another rosette for the envelope and then decorated the envelope with the Alphabet A La Mode die-cuts.
The fun fold card base is fairly easy to make. I cut the two base pieces: 1) 8-1/2″ x 6-1/2″ scored at 4-1/4″ and 2) 8-15/16″ x 6-1/2″, scored at 1/2″ and 4-11/16″. (The slightly smaller size allows this piece to sit inside the card base without showing.) Burnish all the folds. The 1/2″ flap adheres to the inside/right of the main card base. But before adhering, trim the right flap to create the diagonal pull-out.
Cut two matching circle dies to create the pull and sandwich them around the diagonal pull. Then, decorate and have fun. Be sure to cover the seam that adheres the two card base pieces together with some decorative papers.

Click below to follow along the entire Stamping Sunday Blog Hop. I can’t wait to see everyone’s fun fold projects! (If you are viewing this view email, click on my Swimming In Stamps header to click over to my blog and you’ll see all the links.)
Stamping Sunday Blog Hop Designers:

Purchase products from my online store to qualify to receive free exclusive project tutorials. This month’s PDF includes 12 tutorials designed by my demonstrator friends and I that are sure to inspire your paper crafting hobby! The projects feature products from the 2025 Annual Catalog, Online Exclusives, and January-April Mini Catalog. Enjoy!
")


 Designer Series Paper")


")


This is so extremely cute….and in the way of Scrapbooking…clever!
Thanks so much Sherrie! That means so much, as it was a special card.
Wow Tami … the card that keeps on going and going. Such a great statement piece for a special event. And i love that you have also made the envelope a statement! xxx
Thanks so much my friend! xxx