
Welcome to the July Stamping Sunday Blog Hop. This month, our theme is “Bish, Bash, Bosh” or tips (for us Americans – haha.) Our creative design teammate Mikaela Tithridge from the U.K. came up with this great idea. It should be a lot of fun! I can’t wait to see what the team dreams up!!!
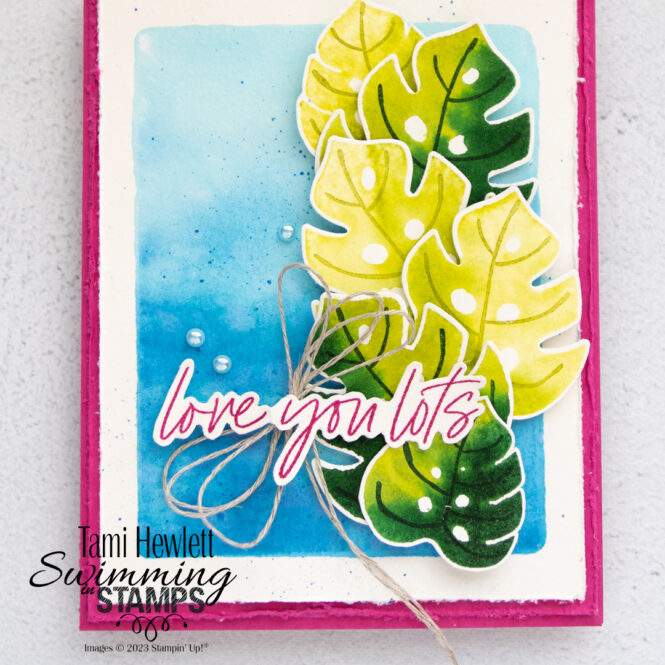
I decided to focus on tips/techniques for easy watercolor stamping. I used the Tropical Leaf Bundle for my card. Both the stamps and punch are available in the Online Exclusives section of my online store.
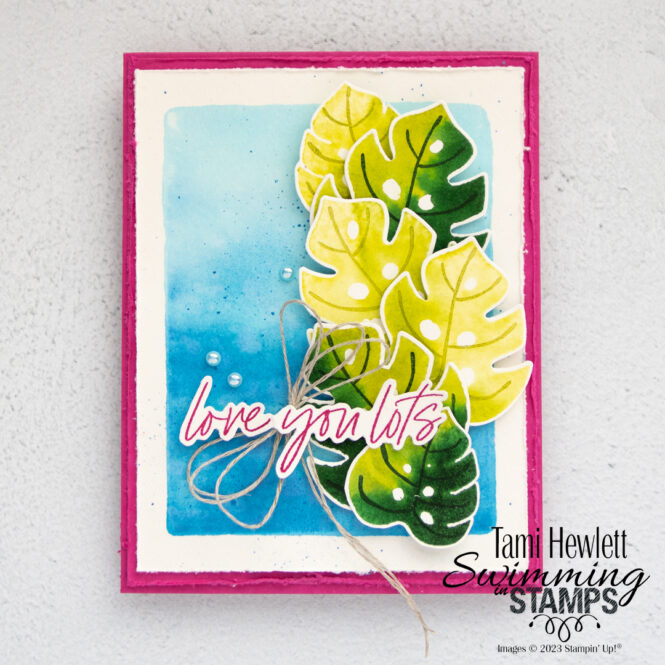
I really adore the Tropical Leaf stamp set. It’s got beautiful, big leaf stamps that work great with this technique. And, it’s so easy!!! I inked up the stamp with a light ink color and then used the side of a darker ink pad to add ink to just a portion of the stamp. No sponging or anything fancy. Next, I liberally spritzed the stamp and stamped on Fluid 100 Watercolor Paper. You may have to play around a bit to figure out the right amount of water to spritz, but once you’ve got it, it’s a snap!
For my leaves, I stamped with a combination of Lemon Lime Twist and Granny Apple Green for the lighter ones, and Granny Apple Green and Shaded Spruce for the darker ones. For the lighter ones, I noticed there wasn’t enough variation between the two colors. To increase the difference, I ended up inking the stamp with Lemon Lime Twist, then stamping off once on scratch paper, and then I added a little Granny Apple Green ink to a portion of the stamp, spritzed, and stamped.
This technique works best with watercolor paper, but it can also work with Basic White and even colored cardstock. When I’m using watercolor paper, I like to spritz the stamp a little more and hold the stamp on the paper to let it thoroughly absorb. If you look at my stamped images, they are not perfect, and I’m totally OK with that. I think it looks artsy.
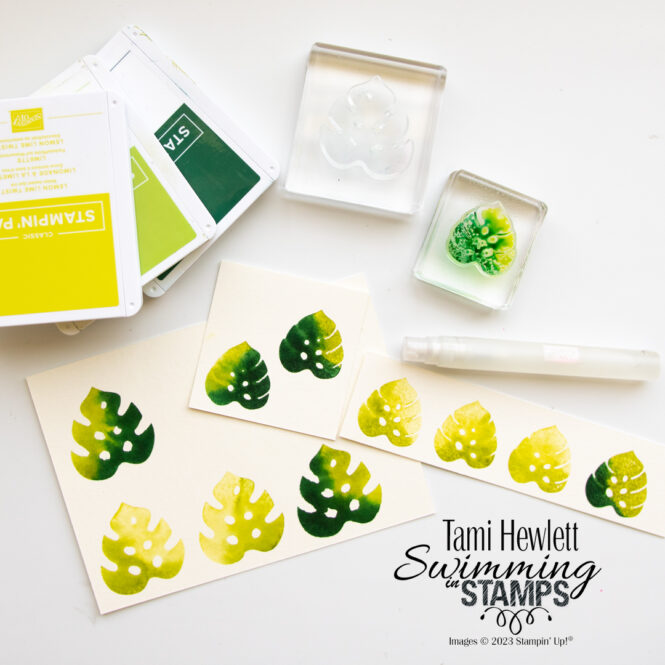
The large leaf in this stamp set has a coordinating punch, but the little one does not, so I had to fussy cut those. Also, there are coordinating two-step stamps to add the veins. (And I have to say, they’re really easy ones to line up!)
In the background, I used an Acrylic E block to stamp the watercolored rectangle. I inked up the top two-thirds of the block with Tahitian Tide ink and the bottom with Azure Afternoon ink. Then, I liberally spritzed the block and stamped on an oversized sheet of Fluid 100 Watercolor Paper. Again, my tip is to hold the block on the paper for about 30 seconds to let the ink absorb well. It’s such an easy way to achieve a watercolored background!
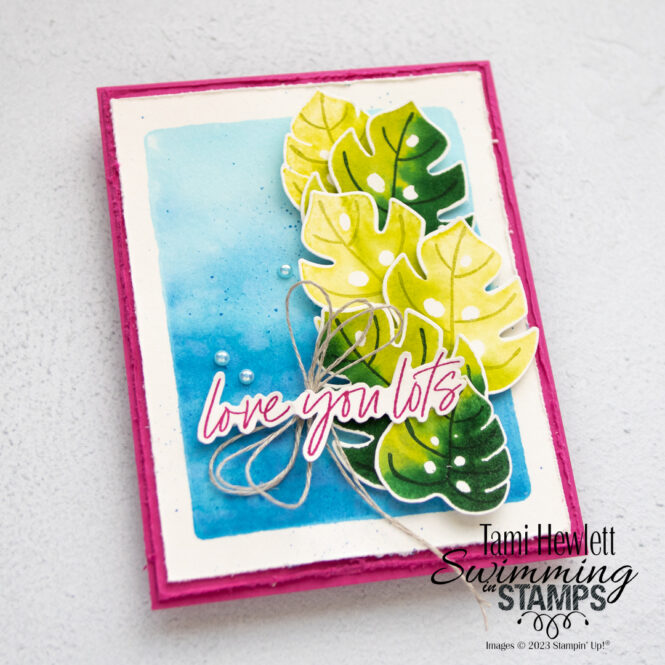
Again, there are little imperfections, and I’m fine with that. In fact, there was a big drip mistake on the right side when I lifted up the block, so I strategically placed a leaf over it.
After stamping the background, I splattered water over the layer with a Water Painter, let it dry, and then added more splatter with an Azure Afternoon Stampin’ Write Marker.
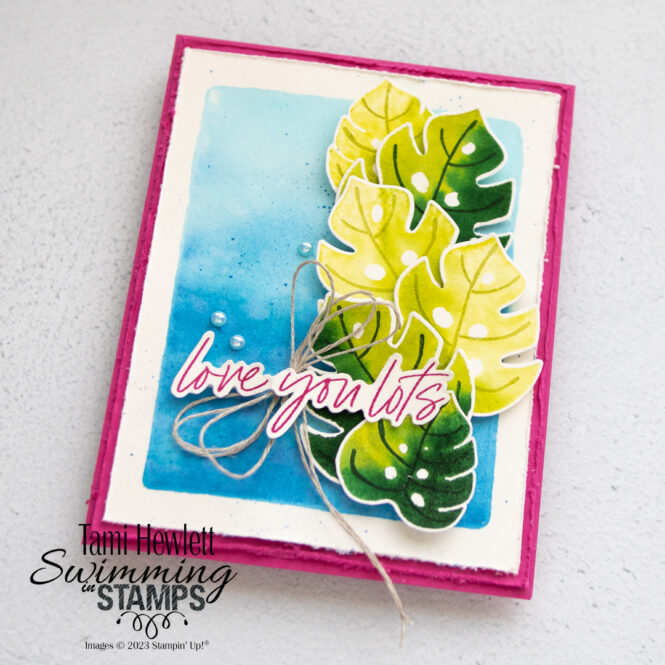
To brighten up the card, I used Melon Mambo ink to stamp the sentiment and create the card base. This stamp set has the most beautiful font, I totally love it!
Final details included a Linen Thread bow and some Tahitian Tide pearls.
I hope you enjoyed these tips/stamping techniques. Use the list below to continue on through the rest of the Stamping Sunday Blog Hop for more fun ideas!
(If you are viewing this via email, click on my header to go to my blog and see the blog roll.)
Stamping Sunday Blog Hop Designers:

Purchase products from my online store to qualify to receive free exclusive project tutorials. This month’s PDF includes 12 creative tutorials designed by my demonstrator friends and I to inspire your paper crafting! The projects feature products from the 2025 Annual Catalog, Online Exclusives, and January-April Mini Catalog. Enjoy!


Striking card … and great tips on watercolouring that gorgeous leaf Tami. xxx
Thanks so much sweet friend! xxx
The leaves are just so beautiful! I love this technique also a lot. Thank you for sharing your beautiful project. I love your card a lot!
Thank you so much Katja!!!