For this month’s Stampin’ Fancy Friday, our theme is super fancy Christmas! One of my favorite things is making super fancy gift boxes for family and friends, so they feel special and loved. To me, “super fancy” means a little more effort and lots of layers and dimension. I love not having to worry about fitting my project in an envelope, so the sky is the limit!
To see all the designers’ projects, keep an eye on the Stampin’ Fancy Friday Facebook and Instagram pages throughout the month. We’d also love to see any of your projects using our theme! Be sure to tag them with @stampinfancyfriday so we can find and admire them!
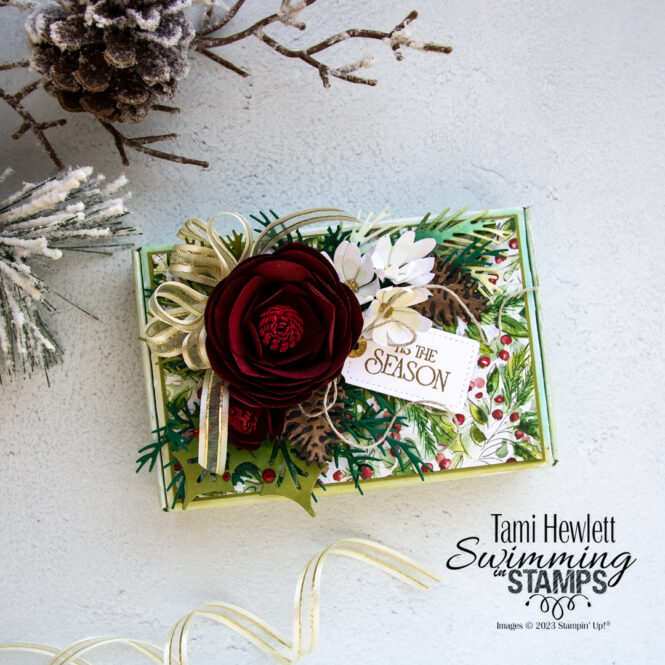
I needed a fairly big box as a base for what I had in mind, so I dug out a retired Mini Paper Pumpkin Box. I think they’re the perfect size for small gifts or even a stack of homemade cards! I’ll figure out what to put in my box later …
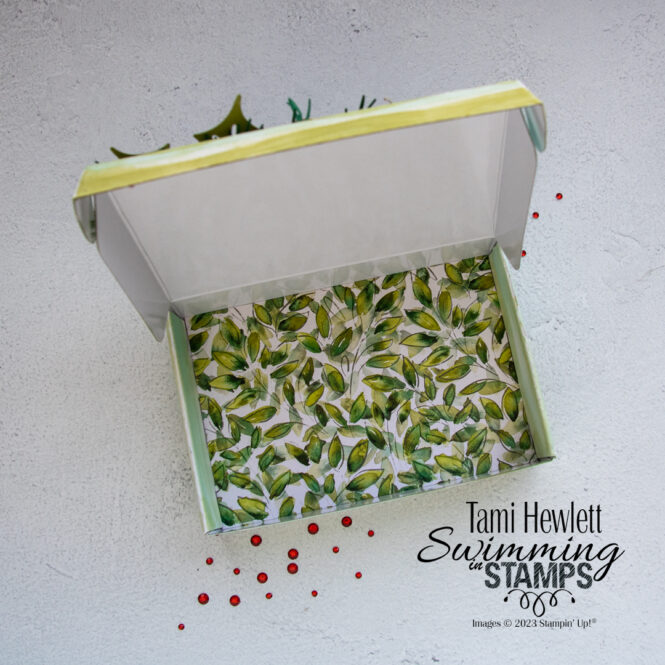
I’m obsessed with the Joy of Christmas Mega Suite. I particularly love the watercolored Joy of Christmas Designer Series Paper (DSP), so I chose one of my favorite prints for the top of the box and another for the inside. Since the DSP is so busy, I decided most my decorations would be solid colors. In particular, I wanted to try my hand at making paper roses. I had seen a gorgeous paper rose made by Mikaela Titheridge (2023 Artisan) and really wanted to try.
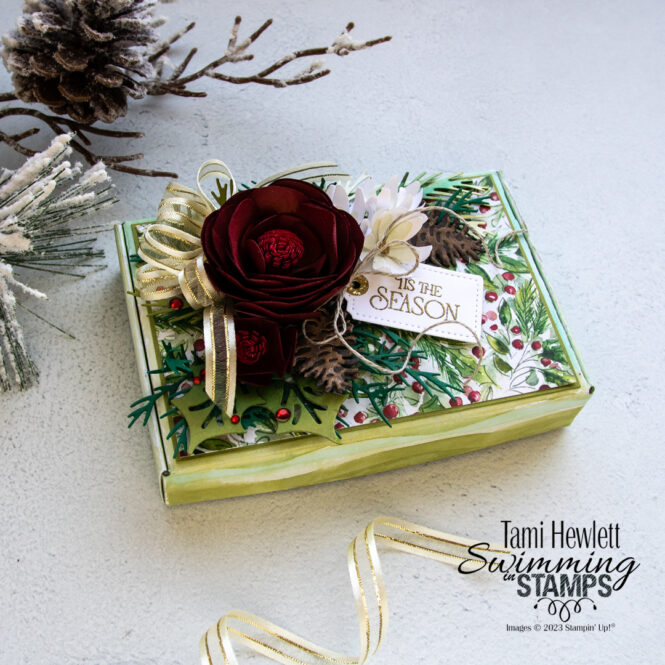
To create my large rose, I cut the centers out of Real Red and the petals out of Cherry Cobbler Cardstock. I cut lots of individual petals (so many, I didn’t count), two small four-petal flower die-cuts, and one large four-petal flower die-cut. Prior to constructing the flower, I used a Blending Brush and Cherry Cobbler ink to shade each petal and then I worked each die-cut with a Bone Folder to make them pliable. I also used liquid glue to overlap the bottom slit of the individual petals, making them curve quite a bit on the bottom.
To assemble the rose, I started with the middle. I rolled the center tightly, using three center die-cuts. I added the second and third when the previous ones ended. Then, I attached the two small four-petal flowers and one large four-petal flower to the center, folding the petals up and around the center. This formed a nice base to glue the individual petals. Lastly, I glued the individual petals, slightly overlapping then to form a rose. The smaller rose just uses the four-petal die-cuts and a single center.
I cut the white flowers from Basic White Cardstock and watercolored the centers with a very light mixture of Old Olive and water. I noticed that the DSP was slightly off-white because of the watercoloring, so I thought this would tie the flowers into the background a bit more. Then, I shaped them and layered two die-cuts for each flower and then added a center cut from Distressed Gold Specialty Paper.
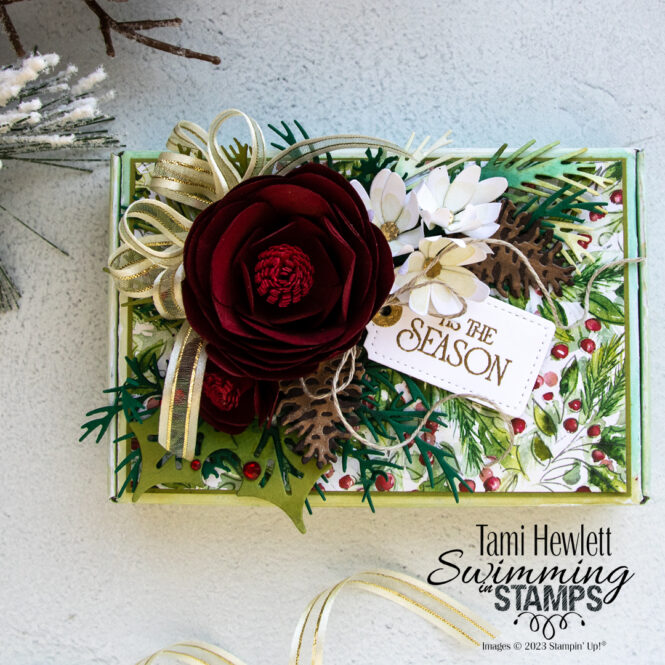
The greenery is from a combination of the Christmas Pinecone Dies (cut from Shaded Spruce Cardstock and shaded with Blending Brushes with the same color), Christmas Classics Dies (cut from Old Olive Cardstock and shaded with Blending Brushes and Shaded Spruce ink, and Joy of Noel Dies (cut from Thick Basic White Cardstock and watercolored with Old Olive and Shaded Spruce ink.)
I ended up cutting the Christmas Pinecone Dies (large background die-cut) into three pieces so it would lay where I wanted.
I cut the pinecones from Early Espresso Cardstock and a woodgrain print from the Joy of Christmas DSP. Then, I added a little Wink of Stella glitter.
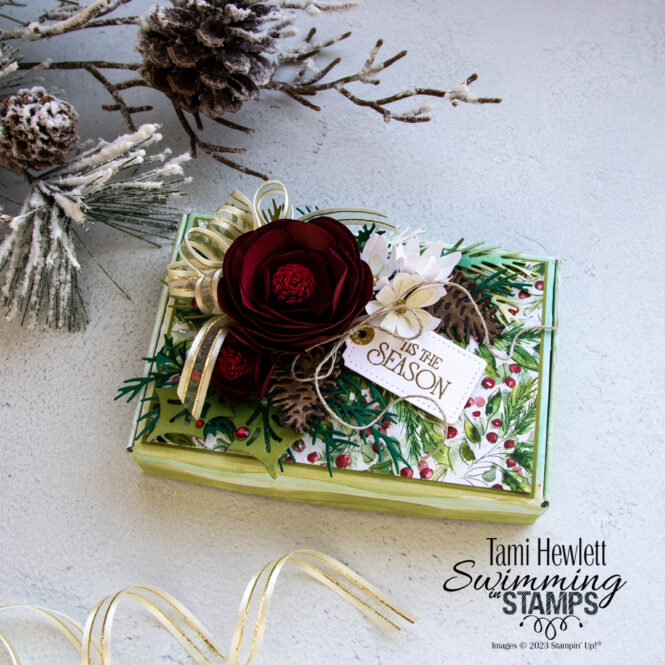
For the tag, I embossed the Brightest Glow sentiment in gold on Basic White and cut it out with a Tailor Made Tag. It also has a Distressed Gold reinforcer. Finally, I tied a triple bow with some Gold & Vanilla Satin-Edged Ribbon, gave it a little fold, and tucked it under the rose.
I lightly watercolored the box with both Old Olive and Shaded Spruce ink prior to assembling it.
I’m so excited to see the Fancy Friday Design Team’s super fancy Christmas projects this month. Get ready to be inspired!!!
Have a wonderful and creative day!

Purchase products from my online store to qualify to receive free exclusive project tutorials. This month’s PDF includes 12 creative tutorials designed by my demonstrator friends and I to inspire your paper crafting! The projects feature products from the 2025 Annual Catalog, Online Exclusives, and January-April Mini Catalog. Enjoy!
