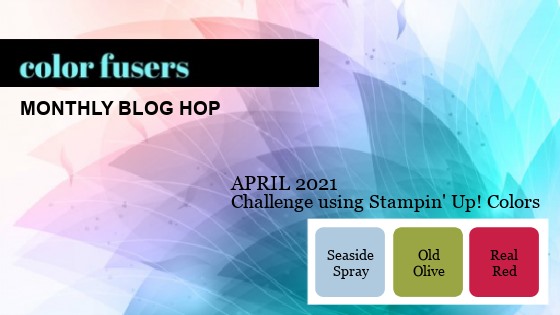
Welcome to the April Color Fusers Blog Hop! This month, we have a color combination of Seaside Spray, Old Olive, and Real Red. I absolutely ADORE Seaside Spray, but I have to admit that I usually only use Old Olive and Real Red together around Christmastime, so that threw me for a loop. Then, a lightbulb went on, and I thought STRAWBERRIES!!!
Weather you just started here or arrived from the talented Jo Anne Hewins’ blog, be sure to continue on through the rest of the blog hop by clicking the “Next” button below.
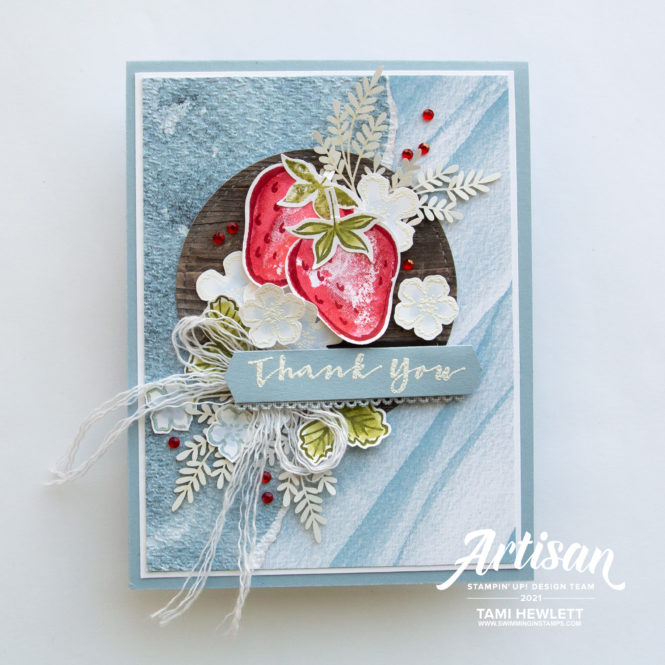
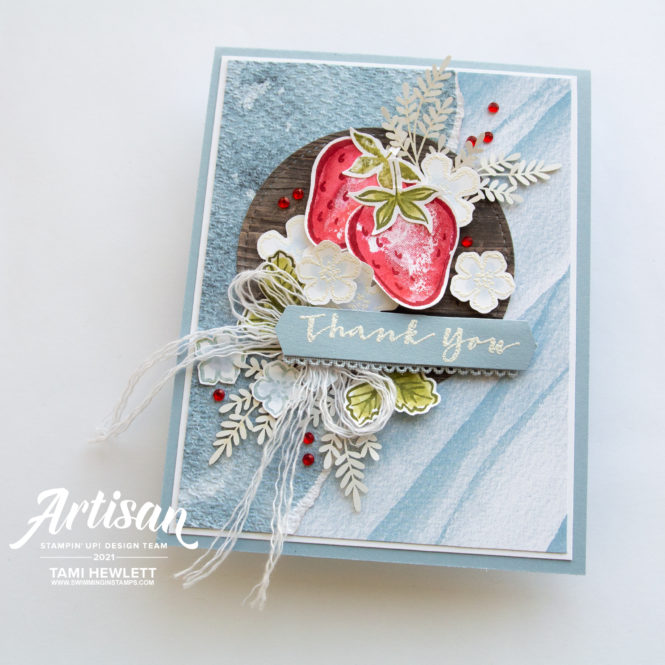
I used the Sweet Strawberry Photopolymer Stamp Set and coordinating Strawberry Builder Punch for my card. (Purchase in a bundle to save 10%.)
This stamp set involves two-step stamping, so I started by stamping the “fill” stamps for the strawberries and stems using a “watercolor stamping” technique. I inked up the stamp and then used a Water Painter to brush the stamp with clear water prior to stamping on Basic White Cardstock. I love this technique because it turns out different every time depending on how much water I add . After the paper dried, I stamped the coordinating detail stamp over the original image and then punched out the images with the Strawberry Builder Punch.
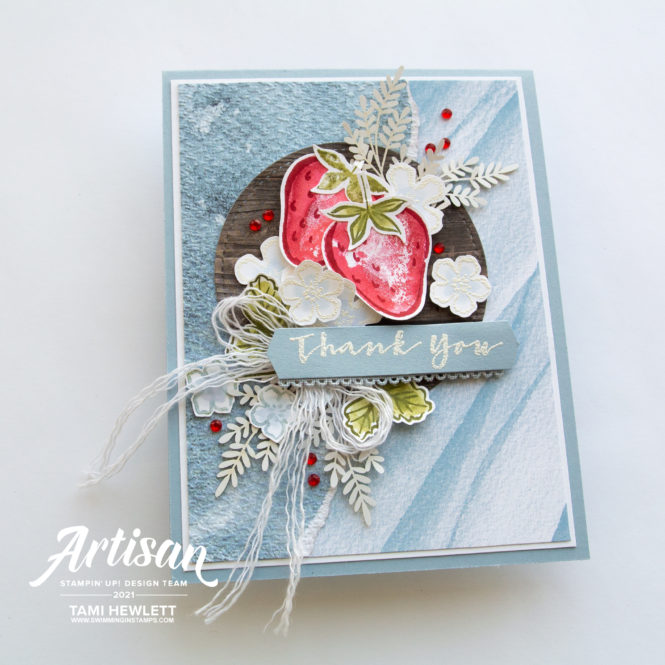
I used a few other punches on this card as well. The Small Bloom Punch coordinates with the large flowers in this stamp set (while the Strawberry Builder Punch coordinates with the small flowers) and then I used the Banners Pick A Punch to notch the ends of the sentiment strip.
For the background, I used some Sand & Sea Designer Series Paper that I ripped and dry embossed with the Tasteful Textile 3D Embossing Folder. I was inspired by my talented friend Tammy Wilson who created a very similar background (using pinks) on a recent card. It was so pretty, I couldn’t help CASEing it.
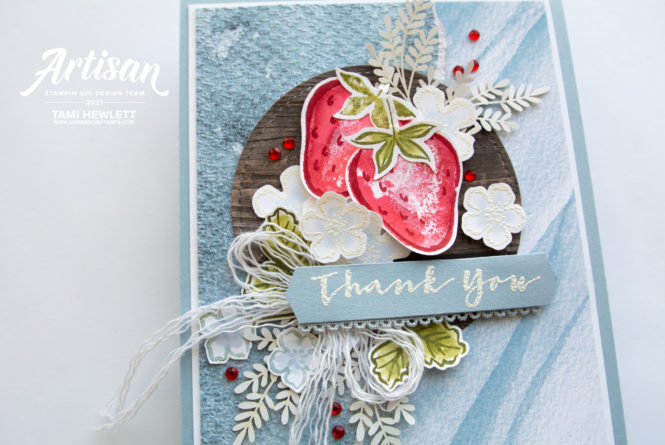
For the rest of the card, I either stamped or embossed the images on Basic White Cardstock and then watercolored with Water Painters. Watercoloring on Basic White is a little tricky. You need to do it very quickly with very little water, like one or two swipes of the brush max. Otherwise, the paper will pill.
To enhance my card further, I used some Forever Gold Laser Cut leaves (flipped to the white side), Snail Mail Twine (pulled apart into tiny strands), and Seaside Spray 1/2″ Scalloped Linen Ribbon (under the sentiment.) The final touch was some Red Rhinestone Basic Jewels to tie in those bright red strawberries.
Hope my project inspired you. Next up in the Color Fusers Blog Hop is my sweet and talented friend Brenda Nelson. I can’t wait to see where her creative mind took her with these colors!
Color Fusers Blog Hop Designers:
- Gail Ellis
- Nicolle Belesimo
- Jo Anne Hewins
- Tami Hewlett — You Are Here
- Brenda Nelson
- Melissa Kerman
- Bonnie O’Neill
- Melanie Hockin
Have a wonderful and creative day!

Use Host Code VPKBXPD7 for purchases at my online store to qualify to receive free exclusive project tutorials and a special thank you card from me. This month’s PDF features 13 AMAZING tutorials from a group of super talented demonstrators. You are going to love them!!! (Please note that Host Codes are only valid for 30 days. You can always find the current Host Code on the right side bar of my blog.)


Tami, This is so stunning! I love all of the little details you added with the trim and embellishments. It’s really beautiful!
Thanks so much Nicolle! That really means a lot. ❤❤❤
Wow!!! these layers are beyond amazing.. love it!
Thanks so much Patty! That means a lot.
Wow Tami. So many elements. I just can’t stop looking and discovering!
Thanks so much my talented friend!
Love this card and how you used so many elements from different sets.
Thanks so much Lynne!
Tami – this is just amazing! Gorgeous project!
Thanks so much Melanie! ❤❤❤