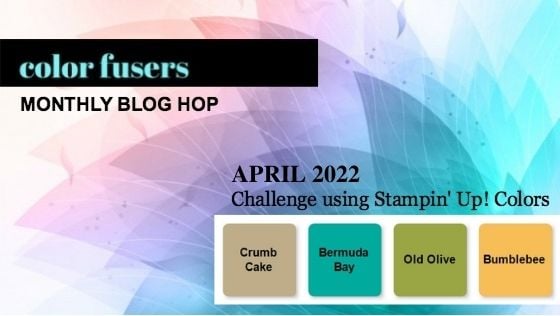
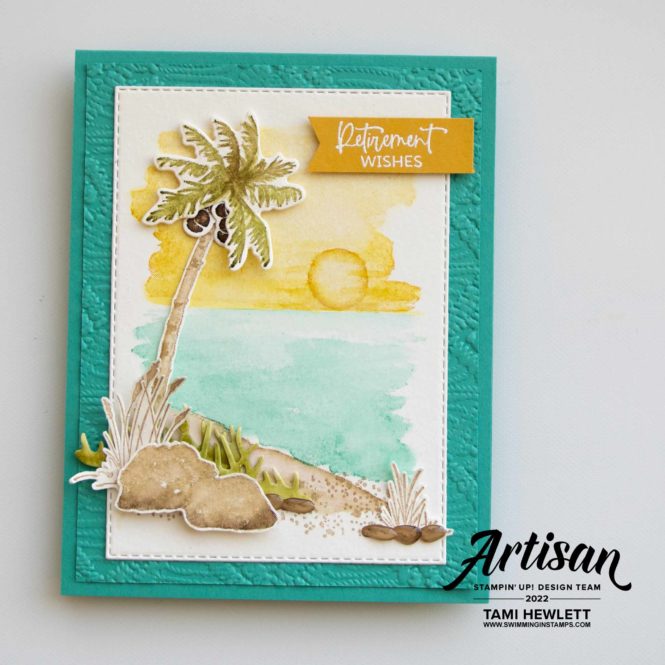
Welcome to the April Color Fusers Blog Hop! This month, we have a lovely color combination of Crumb Cake, Bermuda Bay, Old Olive, and Bumblebee. The first two colors immediately made me think of the ocean, so I decided to pull out a stamp set I’ve been wanting to use for a while called Oceanfront.
Whether you just started here or are already following the Color Fusers Blog Hop, be sure to continue on for lots of inspiration from our designers. See the navigation links at the bottom of this post.
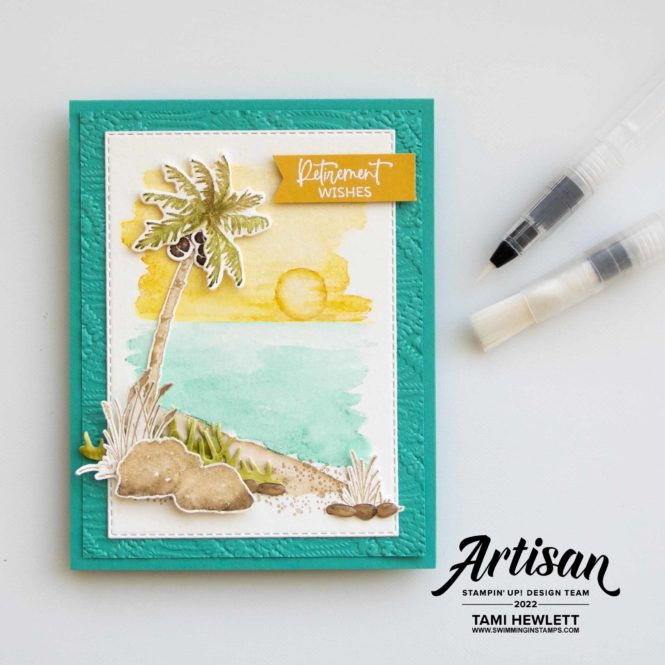
The Oceanfront stamp set includes several scene building stamps that are super fun and easy to use. I also bought it because it pairs well with both the Paradise Palms and New Horizons Bundles, two of my favorites!

I used Fluid 100 Watercolor Paper for all the “white” paper on this card, as well as a watercolor stamping technique. With this technique I used a Water Painter to lightly paint over the stamped image with clear water (using the design of the stamp as a guide for my brush.) The brush activates the ink and makes the resulting image look hand-painted!
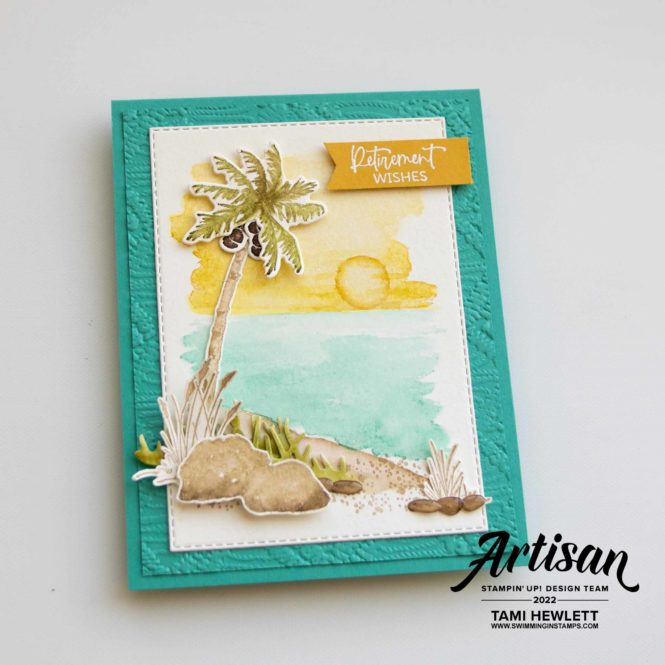
Tutorial:
- Cut a card base and top layer (4″ x 5-1/4″) from Bermuda Bay Cardstock. Dry emboss the layer with the Macramé 3D Embossing Folder and adhere with Seal.
- Use an oversized piece of Fluid 100 Watercolor Paper for the stamping, which will be cut down later. Stamp the water first by inking up the stamp with Bermuda Bay, stamp off on scratch paper, and then use a Blending Brush to add more ink to the bottom portion of the stamp. Huff and stamp. Use the large Water Painter to blend the ink.
- Ink up the “sky” with Bumblebee ink, stamp off on scratch paper, and then stamp above the water. Use the large Water Painter to blend the ink. Tip: To remove some of the color and lighten areas, paint with clear water and then press with a paper towel.
- For the “sun,” add clear water to the Paradise Palms sun stamp and stamp, wait 10 seconds and press with a paper towel. Repeat. Then to add the outline of the sun, use Blending Brushes to add Bumblebee ink to edges of the sun and stamp. Finally, use a Water Painter to paint horizontal lines across the sun to make heat lines.
- Stamp the sand in a similar fashion with Crumb Cake ink. When dry, use the splatter stamp to stamp detailed sand with Crumb Cake.
- Cut out the background with a Stitched Rectangle Die and adhere with Seal.
- On scratch waterpaper, ink up the rocks with Crumb Cake ink, add Early Espresso ink to the bottom edge with a Blending Brush, huff and stamp. Use the small Water Painter to brush over the image. Cut out with Paper Snips.
- Stamp sea grass with Crumb Cake ink on watercolor paper and cut out with Paper Snips.
- Use the Paradise Palms stamp set to stamp the tree trunk with Crumb Cake ink, the tree top with Old Olive ink, and the coconuts with Early Espresso ink on watercolor paper. Use the smallest Water Painter to paint over the images. For the tree trunk, add a little more Crumb Cake ink to shadows and lines. For the tree top, dip the Water Painter in Crumb Cake ink before going over the stamped image to add a color variation.
- Cut out the grass die from watercolor paper and then watercolor it with Old Olive ink. Trim it in half to overlap and shorten.
- Adhere everything in place with Seal, except add the tree top and rocks with Dimensionals.
- Stamp the sentiment with Versamark on Bumblebee Cardstock and trim close. Notch the end with a Banners Pick-A-Punch. Adhere with Dimensionals.
- Add some Pebble Enamel Shapes.
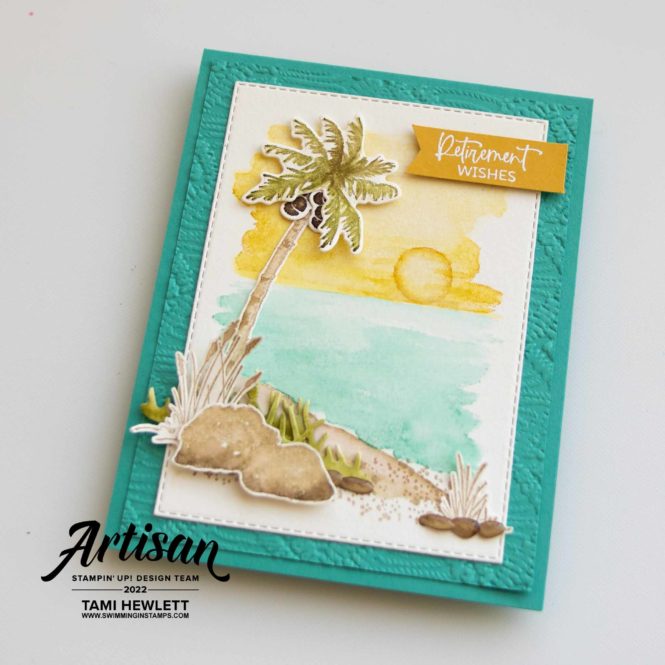
You’ve got to give this watercolor stamping technique a try. It’s so easy and looks fantastic. My only suggestion is to use it with watercolor paper, because it really makes a big difference.
Be sure to continue on through the rest of the Color Fusers Blog Hop for even more inspiration using this beautiful color combination. Next up is the super talented Brenda Nelson!

Click below to return to Melissa’s blog:

Color Fusers Blog Hop Designers:
- Melissa Kerman
- Tami Hewlett — You Are Here
- Brenda Nelson
- Janneke Dijkstra de Jong
- Melanie Hockin
- Sue Vine
- Julie Kettlewell
- Bonnie O’Neill
Have a wonderful and creative day!

Purchase products from my online store to qualify to receive free exclusive project tutorials. This month’s PDF includes 12 creative tutorials designed by my demonstrator friends and I to inspire your paper crafting! The projects feature products from the 2025 Annual Catalog, Online Exclusives, and January-April Mini Catalog. Enjoy!


This is beautiful Tami! That sun is so cool!
Thanks Melanie!
Oh boy, me too Brenda!!! Let’s go! 🤣🤣🤣 Thanks so much!
I love this card so much, I can picture myself under that palm tree!