


Hello! I’m Tami Hewlett from California, USA. Today, I’m sharing some holiday cards featuring the Leaves of Holly Bundle that I designed for the for the Stampin’ Up! Facebook and Instagram Pages. As a member of the Artisan Design Team, I occasionally get this wonderful opportunity to contribute to their corporate social media sites. This time, I decided to demonstrate some creative ways to use the Fabulous Frames Dies to add unique background designs.
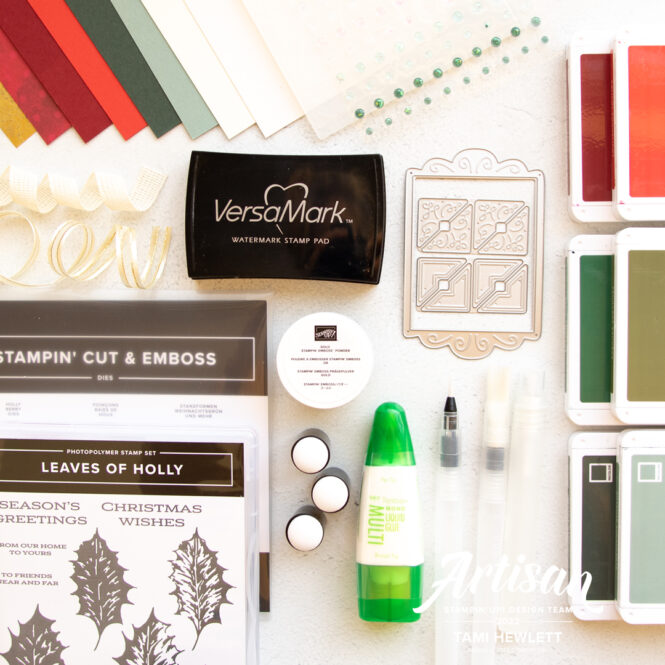
The photo below shows all the supplies I used to create my projects. I’ve also included them in the Product List below for easy access.
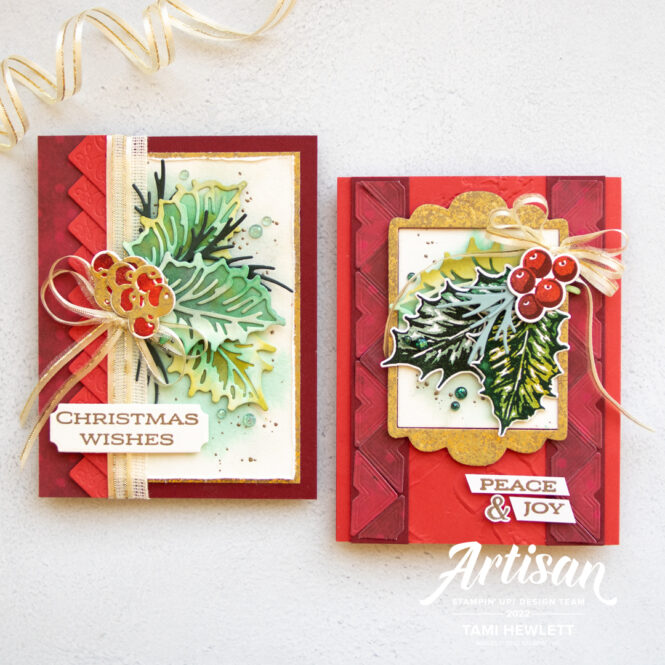
Christmas Wishes Watercolor:
On my first card, I created a border with the Fabulous Frames Dies. I cut multiple photo corner die-cuts from Poppy Parade Cardstock and adhered them to a narrow strip to form an overlapping pattern. That way, I could add the entire strip in one shot.
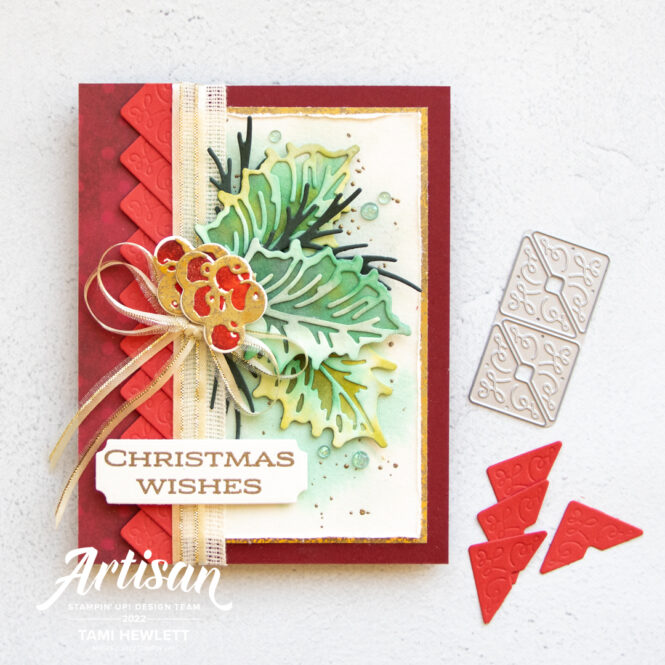
For the remainder of the card, I used the Holly Berry Dies to cut shapes from Fluid 100 Watercolor Paper, and then I watercolored them with Shaded Spruce, Mossy Meadow, Soft Succulent, and Evening Evergreen ink. I mixed up the color combinations for each pair, so they would stand apart visually.
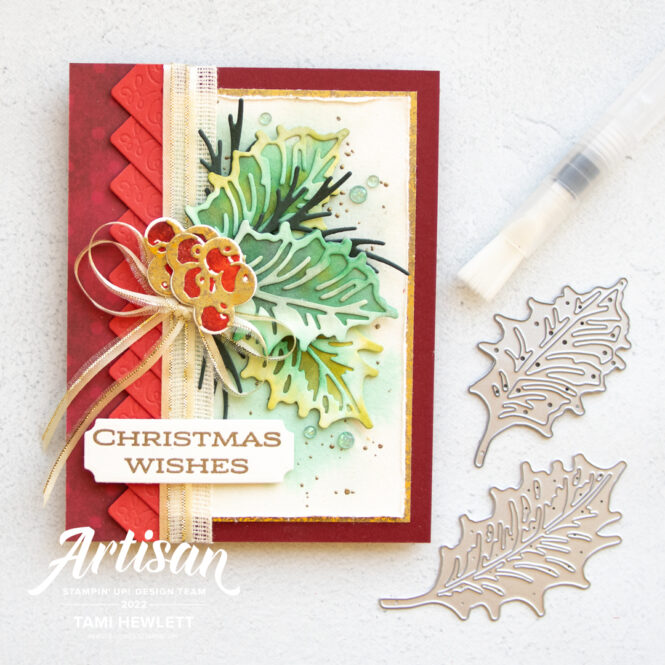
In the background, I created a watercolor wash with Shaded Spruce ink and then added gold splatter. To create the splatter, I mixed liquid glue with water and then used an old Water Painter to splatter it over the background layer. Next, I added gold embossing powder and heat set.
For the berries, I inked up the stamp with Poppy Parade ink and then added Cherry Cobbler ink with a Sponge Dauber, gave it a little spritz and stamped on Shimmery White Cardstock.
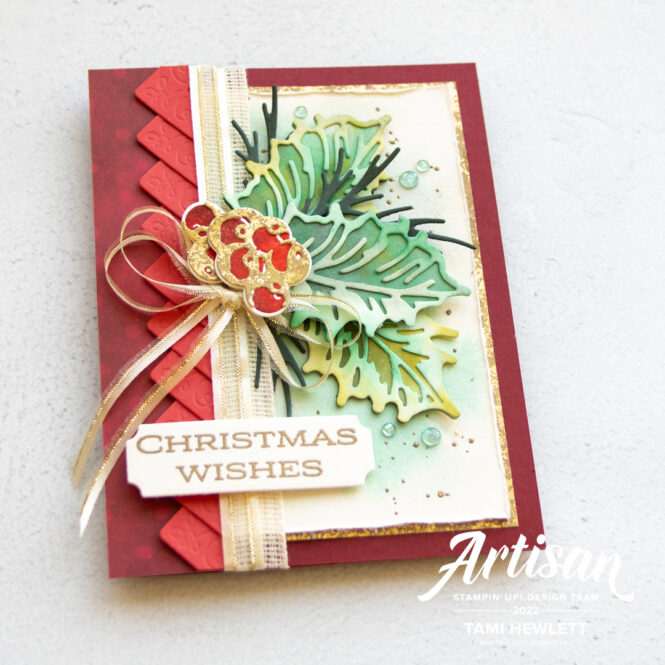
To complete the card, I wrapped it with two different types of ribbon including the Natural Woven 1/2″ Ribbon and Gold & Vanilla 3/8″ Satin Edged Ribbon. They layer together just beautifully and the gold brings out the Distressed Gold Specialty Paper that I used in the background.
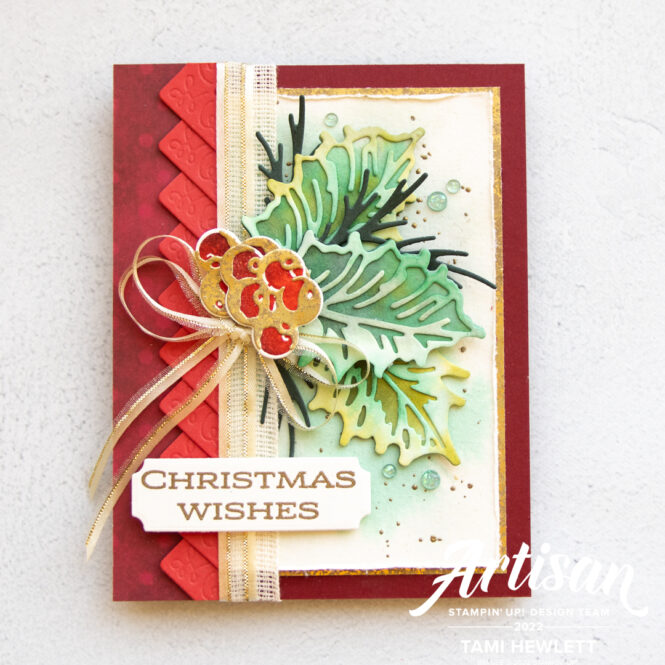
Finally, I added some 2021-2022 In Color Opal Rounds in Soft Succulent and a bow tied with that beautiful satin edged ribbon (cut in half lengthwise.)
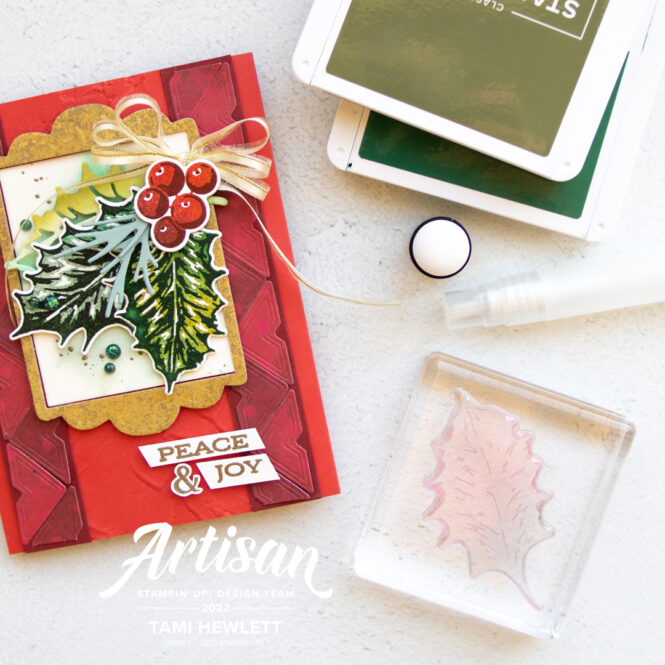
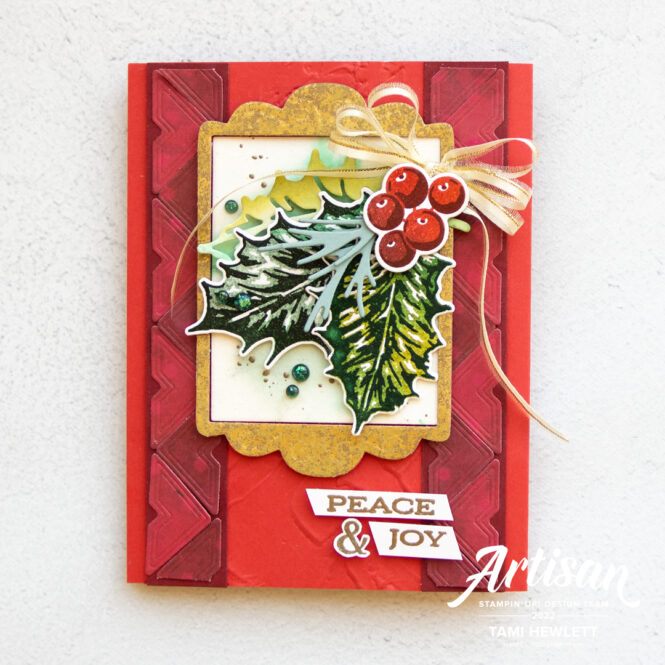
Peace & Joy Card:
For my next card, I cut multiple Fabulous Frames photo corners from Boughs of Holly Designer Series Paper and adhered them to a slightly wider strip of cardstock to create a border with a geometric pattern. The paper has distinct light and dark area, so I positioned the die-cuts accordingly to create the subtle pattern.
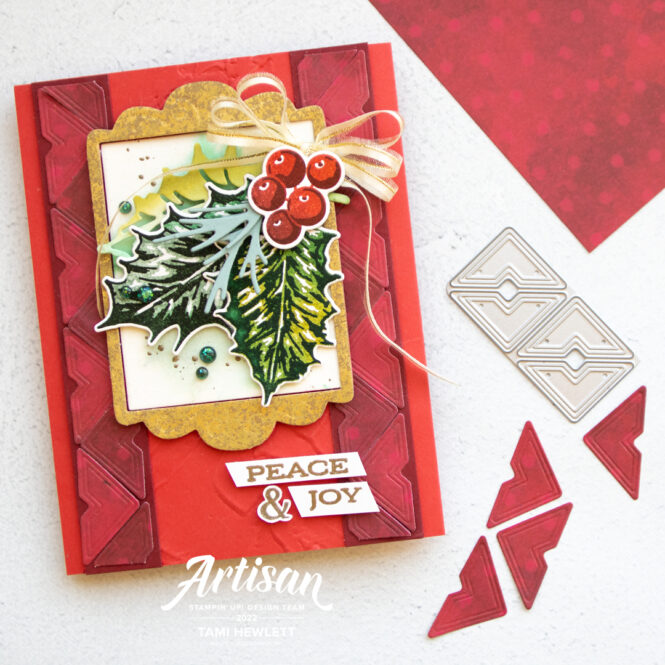
To complete the card, I stamped the Leaves of Holly “solid” leaf and berry images with multiple colors by inking up the stamp with a lighter color of ink and then using a Sponge Dauber to add a darker color to only a portion of the stamp. Next, I lightly spritz the stamp with water and stamped on Shimmery White Cardstock. Then, I used a Stamparatus to align and stamp the “detailed” stamps over the solid images and cut out the images with the coordinating dies. I don’t know about you, but I’m not very good at aligning two-step stamping images, so the Stamparatus is a game changer for me, because I can align the stamps perfectly every time.
I cut the center frame from Distressed Gold Specialty Paper. That paper is stunningly elegant; I just love it. Since it’s fairly thin, I mounted it over another frame cut from cardstock and then attached both with Dimensionals.
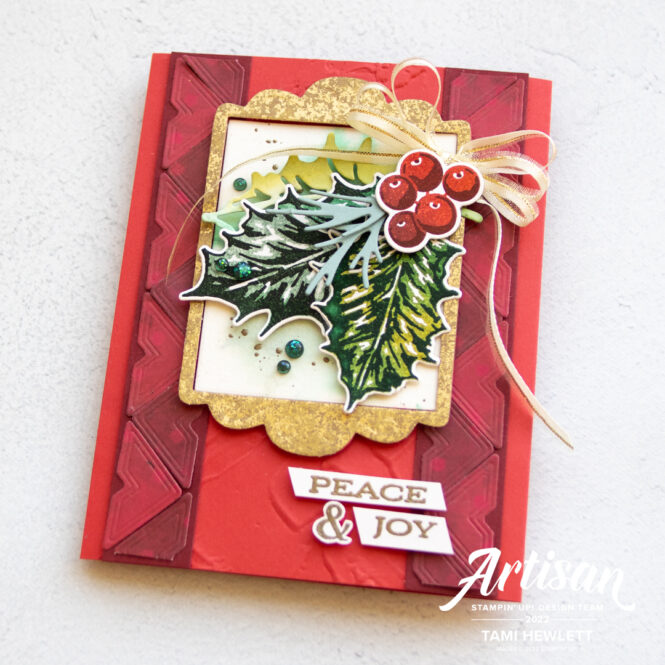
In the background of the frame, I used a layer of Shimmery White Cardstock which, similar to the first card, I watercolored with Shaded Spruce ink and splattered with gold flecks. Then, I added some 2021-2023 In Color Opal Rounds in Evening Evergreen.
I hope these cards have inspired you to use the Fabulous Frames Dies in some different ways.
Have a wonderful and creative day!

Purchase products from my online store to qualify to receive free exclusive project tutorials. This month’s PDF includes 12 tutorials designed by my demonstrator friends and I that are sure to inspire your paper crafting hobby! The projects feature products from the 2025 Annual Catalog, Online Exclusives, and January-April Mini Catalog. Enjoy!
")
")


 Designer Series Paper")
 Specialty Paper")


")


 Woven Ribbon")
 Satin Edged Ribbon")


