Hello and welcome to the February Control Freaks Blog Hop! This month, the theme is to let our imaginations go and create something “out of the box.” That happened to coincide with a very special wedding that’s coming up at the end of this month, so I decided to use my imagination to come up with a killer wedding card.
If you’re already following along the hop, then you’ve just come from the blog of the super creative Melissa Davies. Be sure to continue on by clicking the Next button at the bottom of this post.
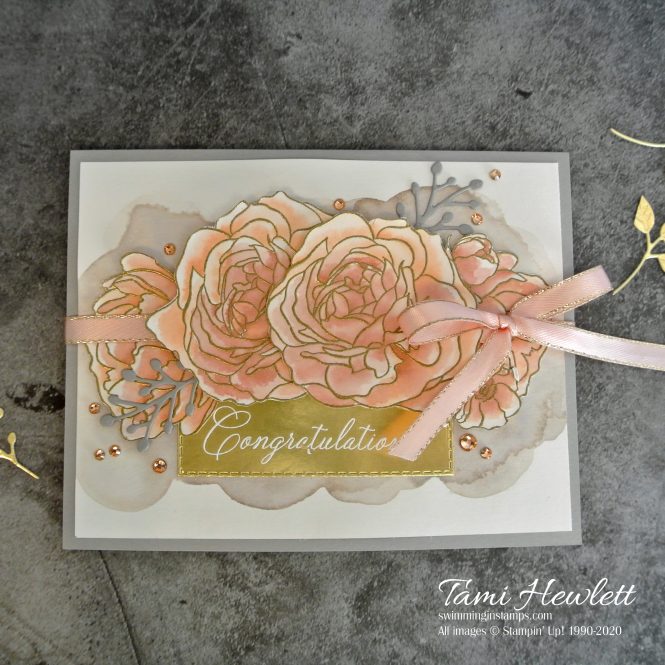
My nephew is getting married on February 28th!!! It’s so exciting! My daughter is one of the bridesmaids, and I found out that the bride’s colors include taupe, pink, and gold. Therefore, I selected a color palette of Gray Granite, Blushing Bride (so apropos!), Petal Pink, Gold, and Shimmer White.
While the outside of the card is not necessarily “out of the box,” the inside is, and I did put a lot of effort into designing a super pretty card. (I was inspired by a gorgeous card created by Stesha Bloodhart.) I created my card by stamping the Breathtaking Bouquet background stamp twice on Shimmery White Cardstock and embossed it in gold. Then, I cut out some of the flowers by hand and used an Aqua Painter to watercolor them with Blushing Bride and Petal Pink. For the background of my card, I created a watercolor wash with Gray Granite.
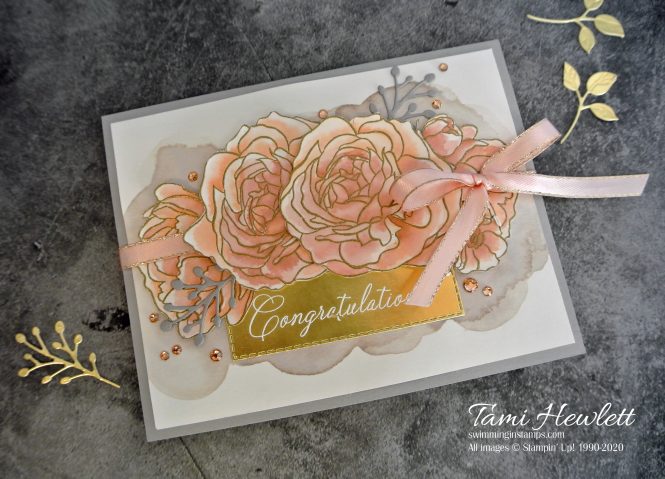
The greeting is from the Cheers To That stamp set from the Holiday Catalog. I had purchased it just for this purpose, and while there are other “Congratulations” stamps that are currently available, I really love the scripty font of this one. I embossed it in white on Gold Foil and cut it out with a Stitched Rectangle Die.
Because this card ended up being rather bulky inside, I added a strip of 1/4″ Petal Pink Metallic Edge Ribbon that ties around the entire card to keep it closed.
On the inside of the card, I created a fun pop-up wedding cake!
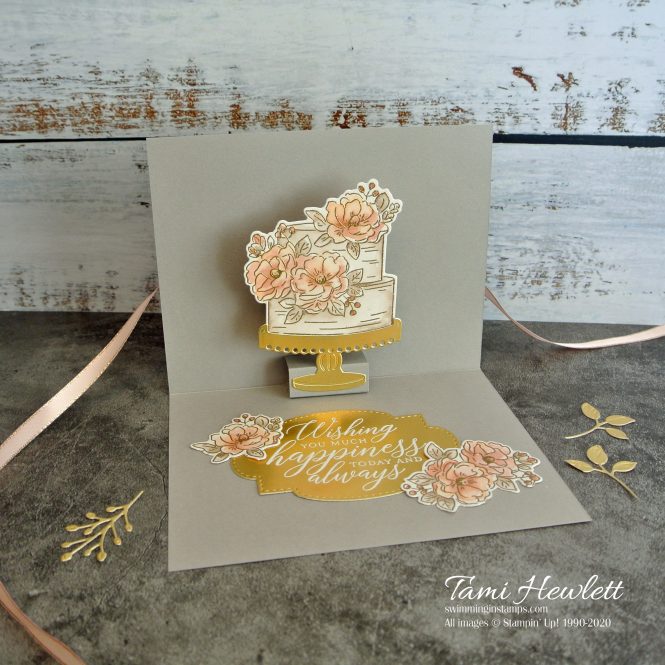
I used the Happy Birthday To You stamp set (free $50 Sale-A-Bration item) and Birthday Dies (Sale-A-Bration coordination product available while supplies last through 3/31/20) to create the wedding cake and flowers inside the card. I stamped and embossed in gold on Shimmery White Cardstock and then watercolored with Blushing Bride, Petal Pink, and Gray Granite. The Birthday Dies are great, because there’s one that cuts out just the flowers. That made it very easy to decorate the bottom portion of the card. (Those dies also include really pretty leaves that I used to decorate the front of the card.)
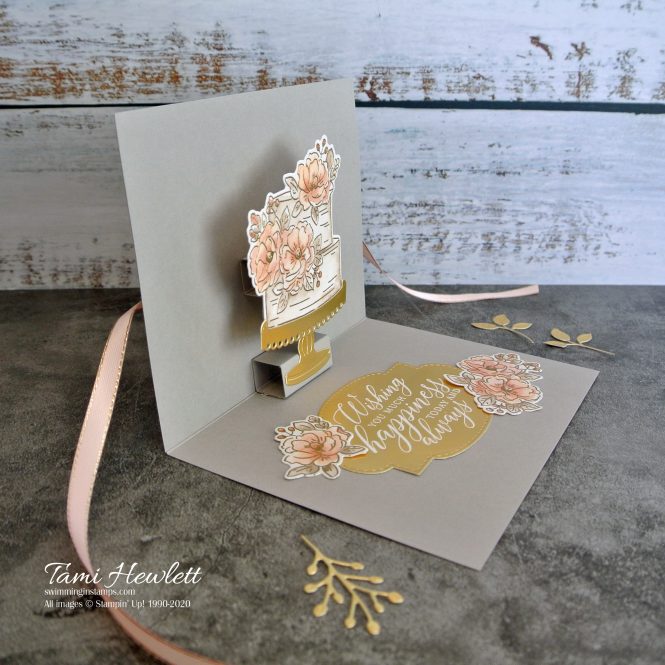
To create the pop-up, I cut two strips of matching cardstock measuring 1-3/4″ x 1-1/2″ and then scored the long side at 1/4″, 1/2″, 3/4″, and 1″. After adhering the ends together with Tear & Tape Adhesive to create a collapsible cube, I attached two sides to the card at the fold. Next, I attached the cake pedestal to the front of the cube. And then finally, I attached the second collapsible cube to the back of the cake, folded the card down flat and allowed the other side of the cube to adhere in the right place.
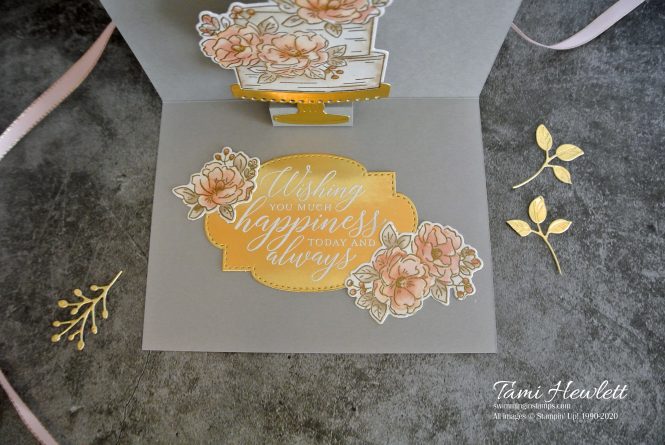
The inside sentiment is from the So Sentimental stamps, again I embossed it in white on Gold Foil. Then, I used the Stitched So Sweetly Dies to cut it out.
Be sure to click on the button below to continue on through the Control Freaks February Blog Hop and get more “out of the box” inspiration!!! Next up is the fantastic Bree Renwick! I can’t wait to see what she’s created!!!
Best wishes and happy crafting!


план перепланировки [url=https://www.proekt-pereplanirovki-kvartiry5.ru]https://www.proekt-pereplanirovki-kvartiry5.ru[/url] .
All I can say is wow! Love the card front and then you add in the center flip up, blown away!
Thanks so much!