
The September Paper Pumpkin kit is called Layered Leaves, and it includes loads of Fall-themed supplies (way more than you need) to make 8 pillow boxes and 8 note cards. It’s hard to see in the photo, but both the pillow boxes and card bases are embossed with beautiful, subtle swirls, and the envelopes and die-cut leaves are printed with gorgeous watercolor prints. This is by far one of my favorite Paper Pumpkin kits in a long time!
See below for a photo of all the contents of the kit. I got all this for the monthly subscription of $20. If you would like to learn more about Paper Pumpkin, click on the Paper Pumpkin tab on my blog. Sign up before October 10th to receive the next kit. I KNOW you’re going to love it.
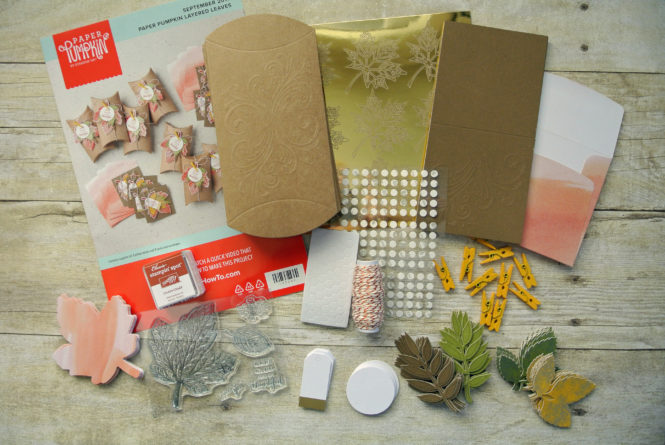
The small tags and leaf die cuts have gold foil on them and they are really pretty with the colors of the leaves (Cajun Craze, Soft Suede, Old Olive, Always Artichoke, Crushed Curry, and Sahara Sand.) I also really love the copper (or Cajun Craze?) baker’s twine that’s included in the kit! It’s so fun to get exclusive embellishments like this.
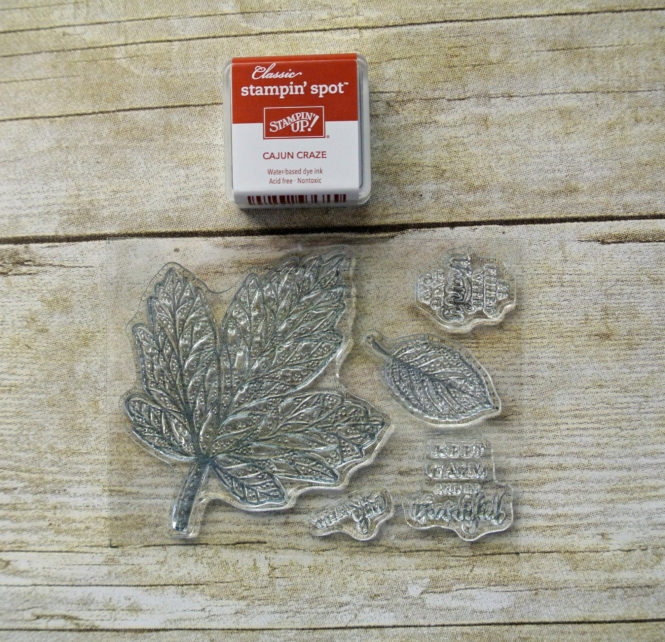
However, my favorite part of this kit is the photopolymer stamps!!! I adore the beautiful, delicate designs of the large and small leaves. The kit also included a Cajun Craze Classic Stampin’ Spot.
Paper Pumpkin is great for new crafters, as well as seasoned ones. Here’s Stampin’ Up!s YouTube video on how to put the kit together:
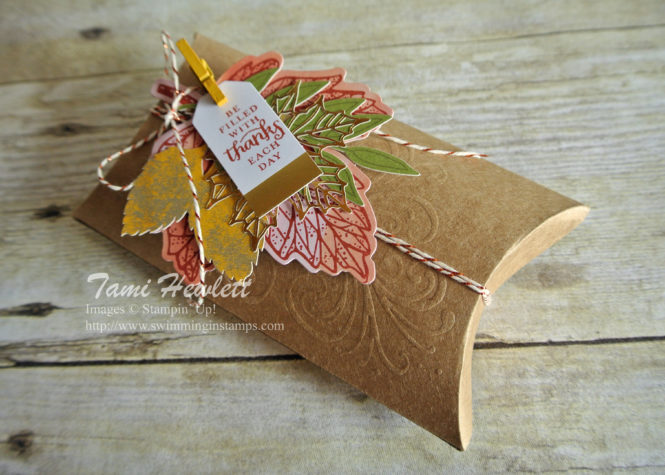
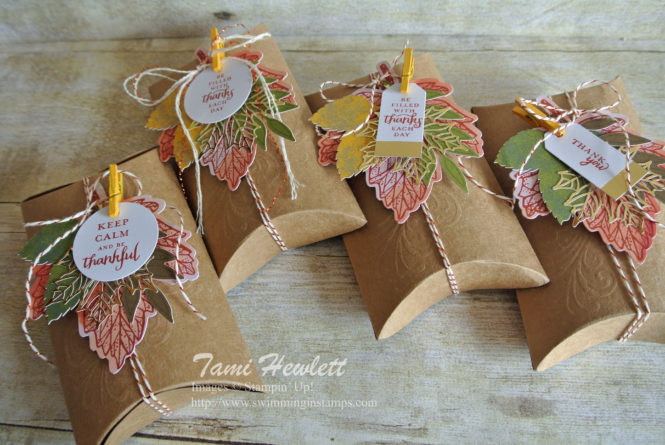
The designers at Stampin’ Up! are so great. This beautiful pillow box is perfect for Fall treats or small gifts. I didn’t enhance this project at all … it’s straight from the kit. Just beautiful!
There are all sorts of leaf die cuts in the kit to add a little variation.
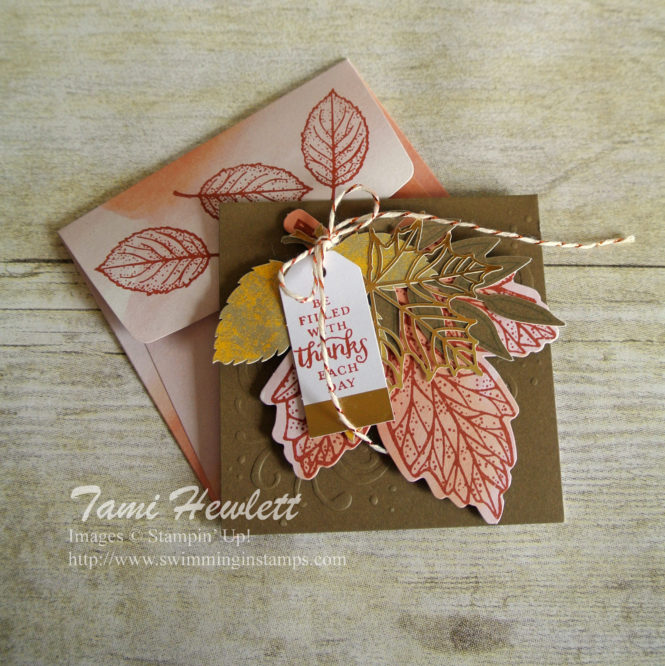
And, here’s the note card that’s straight out of the kit. Again, just beautiful. You could use this as a small thank you or even as a place card at Thanksgiving! I particularly love the matching watercolored envelopes.
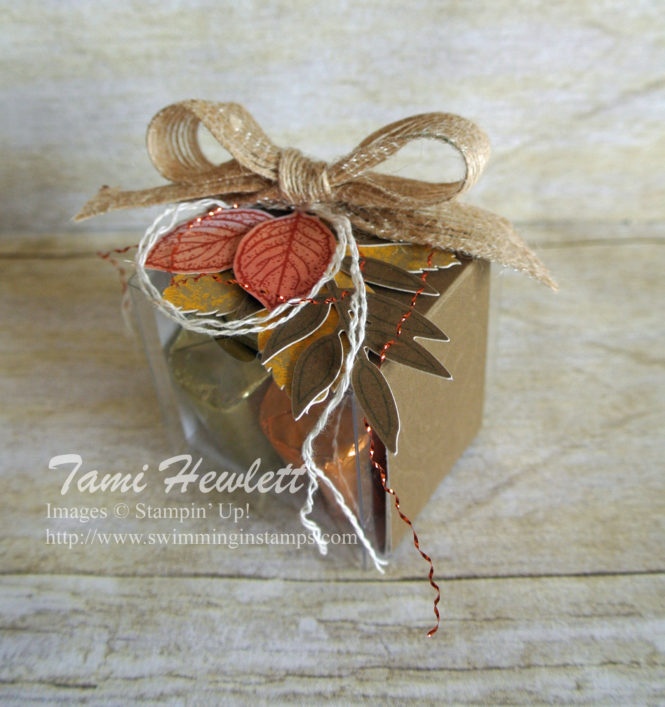
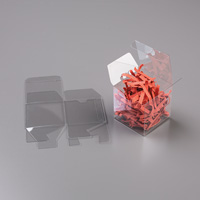
Each month, I try to come up with some ideas for alternative projects you can make with the Paper Pumpkin kit, using a few extra supplies. Last Sunday, I posted my alternative card. Today, I have a few more. The first is a Clear Tiny Treat Box. I cut up one of the note cards into 1-1/2″ strips and used that to build a belly band. (I suggest using Fast Fuse adhesive to adhere the belly band together, as it’s super strong.)
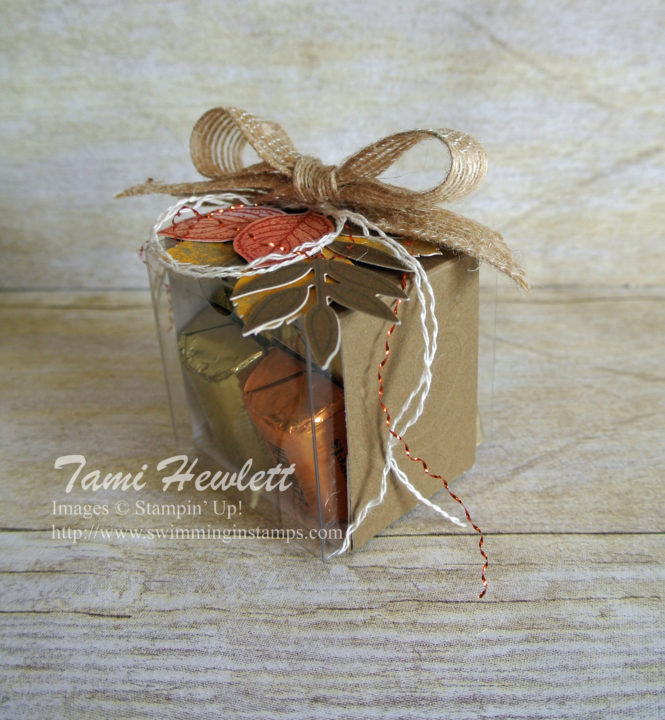
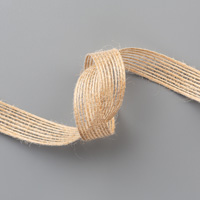
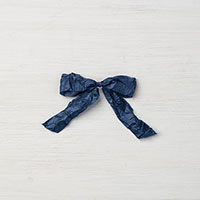
Then, I added a Burlap Ribbon bow and unraveled some of the copper baker’s twine so I could swirl it on top.
Next, I used a Stitched Shape Framelit Die to cut a circle out of one of the note cards from the kit. I love the pre-embossed design, and it seemed such a shame to cover it up with leaves. So, I decided to showcase it on this card. I also created my own designer paper on the lower half of the card by stamping the small leaf repeatedly with Whisper White Craft ink on Sahara Sand cardstock.
Tip: To force the unraveled baker’s twine to go where you want, add a few glue dots underneath!

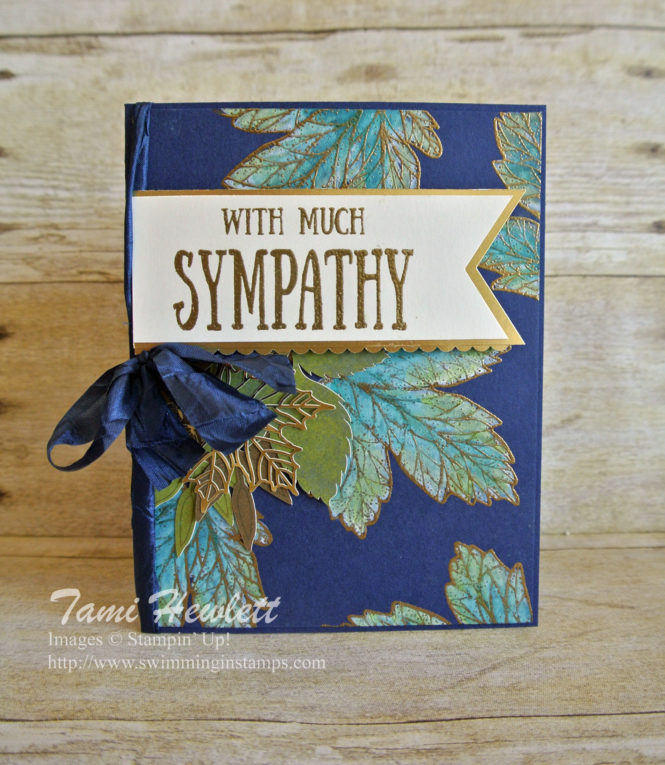
This last card is my favorite! I decided to change up the colors entirely and go with Night of Navy, Bermuda Bay, and Lemon Lime Twist. First, I cut a background layer from Night of Navy cardstock measuring 4-1/8″ x 5-3/8″. I randomly stamped and embossed the large leaf in gold. In order to watercolor the leaves a lighter color, I used an Aqua Painter and some white craft reinker to watercolor the leaves in white. After it dried, I watercolored the leaves with Bermuda Bay and Lemon Lime Twist ink. (Squeeze your ink pad to pool ink in the lid, then use an Aqua Painter to pick up the color and paint.)
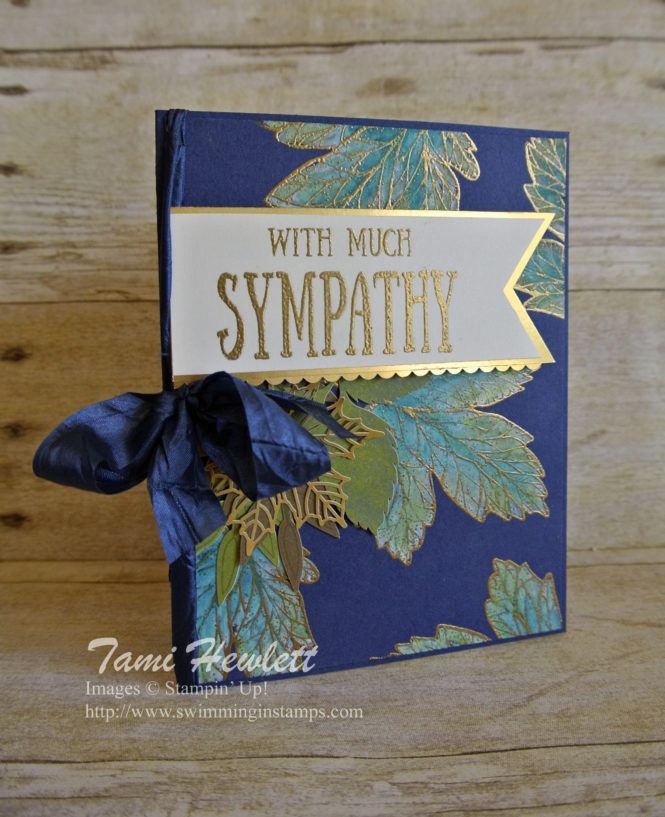
For the sentiment, I borrowed a stamp from the August Paper Pumpkin kit. I needed to make a sympathy card for a friend, so that stamp worked perfectly. I embossed the sentiment in gold on Shimmery White Paper, and then I cut the paper to form a strip and punched the end with the Banner Triple Punch. I added some Gold Foil underneath, including a strip I punched with the Decorative Ribbon Border Punch to form the small scallops.
In addition to the September Paper Pumpkin kit, and the stamps from the August Paper Pumpkin kit, I used the following supplies on my alternative cards:


Have a great weekend!!!


Your Sympathy card is absolutely gorgeous! I will be trying to make one just as pretty using all your instructions. Thanks for explaining it so clearly!
Thank you Donna! That means the world to me😀
Wow… That blue one… Swoon…Just lovely!! Thank you for explaining how you made it!!
Thank you Michelle!
Thank you Joan! I really appreciate your comment.
The blue card is for sure the best card alternative this month!!! Awesome job!!! Can’t wait to try this one!!! Thanks for sharing your talent!!!
Thank you so much Maggie! ❤❤❤
This sympathy card is stunning! I would like to case it for a wedding card for my granddaughter’s fall wedding! Thank you so much for sharing how you painted it.